
Homemade Instant Pot Greek Yogurt

Recipe of the Day
Discover a New Recipe Every Day. Give Back With Every Bite.
Every day, we feature a hand-picked recipe for you to discover, cook, and share. The best part?
Every recipe you read helps feed the hungry.


I’m all about practicality when it comes to the kitchen, and whenever I decide to make the homemade version of something, I ask myself: is this even worth it? Is it going to save me money, be better than store-bought, and be worth the time and effort? When it comes to homemade yogurt, I’ve decided the answer is a resounding yes!
While making yogurt at home isn’t a fast process, the majority of the time spent is inactive – you’re just waiting for the yogurt to come to a certain temperature or to incubate for many hours. In that sense, it’s the perfect side project while you’re doing other things in the kitchen. I often make yogurt while I cook other things or give the kitchen a nice deep clean.
And the best part about it is you can do it all in an Instant Pot! The process is so simple: heat the milk up, cool it down, let it sit (or incubate) at a certain temperature for 8 to 24 hours and you’re done. To make it Greek yogurt, simply strain the yogurt for a few hours after the incubation period. As for equipment, you’ll need an instant pot, a food thermometer, cheesecloth, and a strainer or a dedicated Greek yogurt strainer. Let’s delve deeper into each simple step.
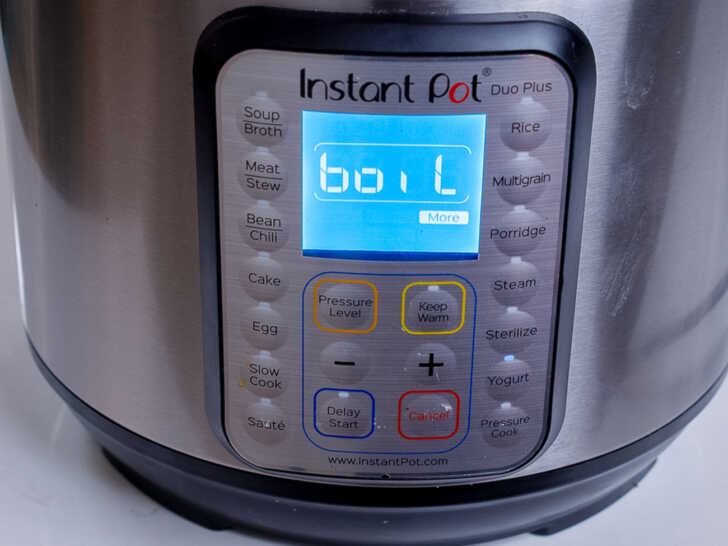
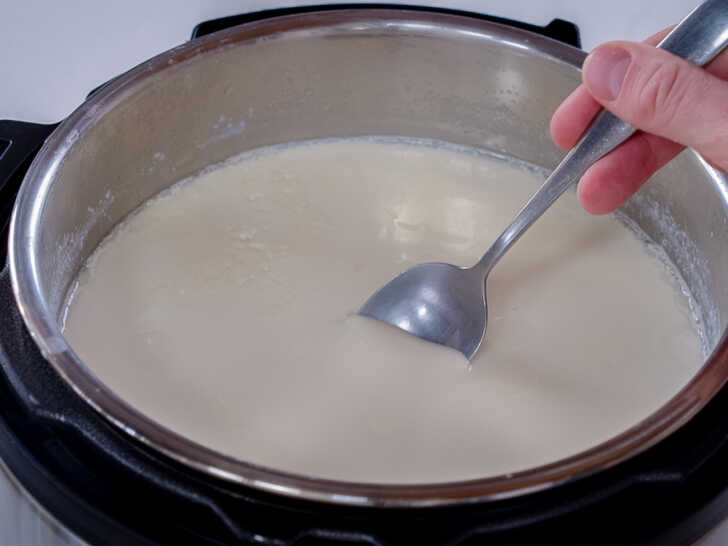
First, pour one gallon of milk into the Instant Pot. I always use a gallon of milk which ends up netting me 2.5 to 3 pints of Greek yogurt. If you’re just making normal yogurt, you’ll net much more overall yogurt, but it will be much thinner. Then, hit the “Yogurt” button on the instant pot a couple of times until it says “Boil.” It will take up to an hour, but the instant pot will heat the milk to temp. I suggest stirring the yogurt frequently and using a food thermometer.
(Note: avoid scraping the bottom of the instant pot when stirring the milk. This will scrape up bits of cooked milk solids that stick to the bottom of the pot and take away the smooth texture).
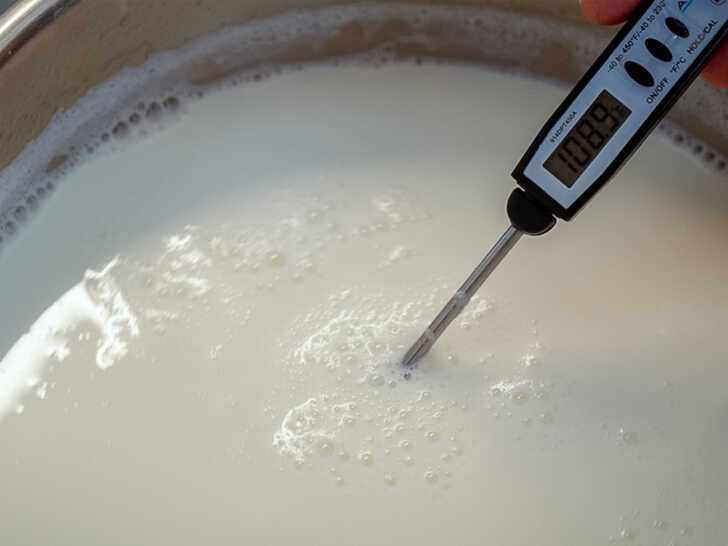
Heat the milk until the thermometer reads 180 to 185° consistently. This process of heating the milk kills competing bacteria as well as transforms the whey proteins so that the final product is a smoother, creamier yogurt.
After the milk reaches temperature, remove the lining from the instant pot and either set it on the counter or put it in a cold water or ice bath. What we’re doing here is bringing the milk back down to a temperature of 110° or less. If the Instant Pot sits on the counter, it may take up to an hour to cool to temperature, but if it is placed in the kitchen sink with cold water (be sure to stir), it will come down to temperature much faster, in just three to ten minutes depending on how cold the water is. The milk will come down in temp even faster if stirred frequently.
(Note: Just a reminder to avoid scraping the bottom of the instant pot to avoid getting bits of milk solids in the smooth yogurt). In the next step, we introduce the starter to the milk, so the temperature needs to be cool enough to not kill the cultures.

Once the milk is below 110°, introduce the starter. The easiest way to introduce a starter is to simply use a small store bought container of yogurt, and only a few tablespoons. Make sure the label lists live yogurt cultures in the ingredients. I’ve used Tillamook (a Pacific Northwest brand), Fage and Chobani, but there are many other options. Some say the more different live cultures listed on the packaging, the better! Once you’ve made your own yogurt, however, you can actually freeze a few tablespoons and use that as a yogurt starter for next time. Save the whey from the straining yogurt to make it Greek, but I’ll go over that later.
Add three to four tablespoons of the store bought yogurt into the semi-warm milk and stir. To make sure the yogurt spreads throughout the milk even better, mix it up in a small bowl with equal parts of the warm milk so that it becomes more liquid-like before introducing it to the instant pot.
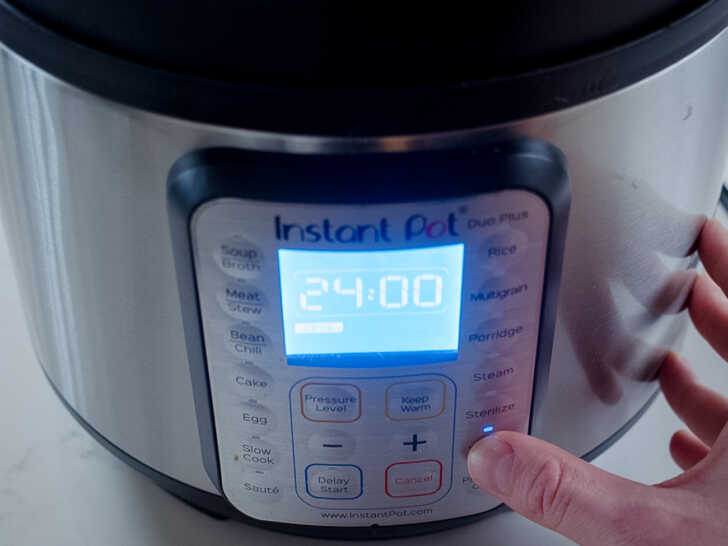
Once the starter is introduced to the milk, it’s time to incubate! Put the lid on the instant pot and press the yogurt button again. There are typically two options: 8 hours and 24 hours. I’ve done both and so far I don’t have a preference. Some say for a thicker, tangier yogurt, go for 24 hour incubation; for a less tangy and thick, 8 hours. I personally didn’t notice enough of a difference to warrant a 24 hour incubation, but try it yourself! During this time, make sure to let the yogurt set and not mix or move the instant pot.
After 8 (or 24) hours, take the lid off of the instant pot and check on the yogurt! At this point, if going for normal, plain yogurt, simply put it away in the awaiting containers of choice and refrigerate. If going for Greek yogurt, it’s time to strain.
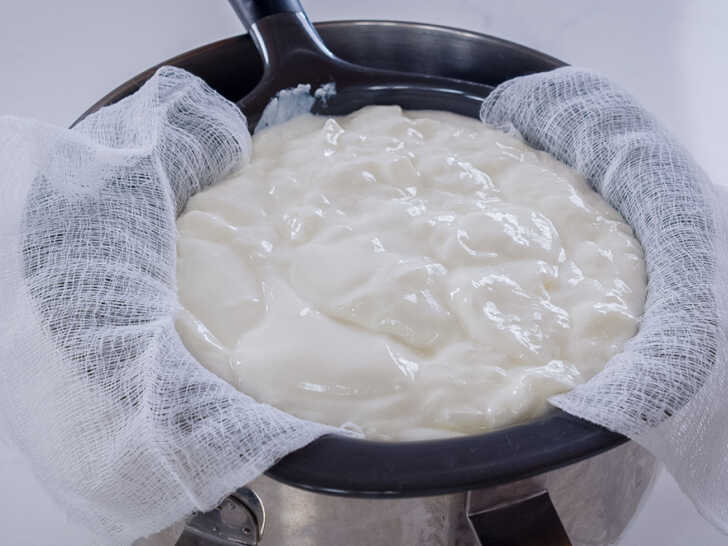
You can use a Greek yogurt-specific strainer, but it isn’t necessary; a normal strainer with a cheesecloth or a fine mesh strainer will suffice. I typically dump the yogurt onto cheesecloth that’s laid out over a fine mesh strainer, all of which is sitting on the top of a bowl. The bowl’s purpose is to collect all of the whey that drains from the yogurt. I keep the straining yogurt in the fridge during this time. Strain as much or as little as you like; the longer the strain, the thicker the Greek yogurt will be. Two hours is a good amount for a thinner Greek yogurt. The magic number to me is around eight hours. I’ve strained as long as 24 hours before and the Greek yogurt is deliciously thick as cream cheese! There’s no wrong answer here.
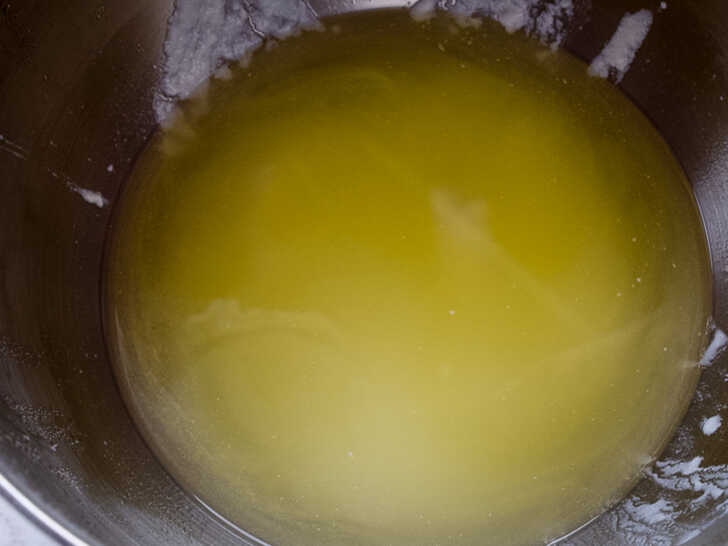
After straining, there will be a significant amount of yellowish liquid called whey. Don’t let that precious liquid go to whey-st! It can be repurposed in a variety of baking recipes but its best use is to be frozen and saved to use as a starter for a new batch of yogurt. The whey is also a protein-packed supplement to smoothies.

Homemade Greek yogurt is almost impossibly simple; so much inactive time that the process is easy and definitely worth the effort. One gallon of milk produces a generous amount of yogurt, making it a cost-effective project, too, especially if you frequently use yogurt in your daily life. I use this yogurt on my tacos, in middle-eastern dips, in smoothies, and for breakfast, topped with granola and a little bit of honey. Homemade yogurt is effortlessly good. I promise the results are delicious and worthy of little pat on the back.
Homemade Instant Pot Greek Yogurt
Ingredients
- 1 gallon milk
- 3 tablespoons yogurt (with live yogurt cultures)
Preparation
- Pour one gallon of milk into the Instant Pot.
- Press the “Yogurt” button on the Instant Pot until the screen reads “Boil.” Cook the milk for one hour, stirring often. Avoid scraping the bottom of the pot as you stir in order to maintain a smooth yogurt texture.
- Check the temperature of the milk often until the thermometer reads consistently between 180° and 185°F. Check the temperature at different spots in the pot to ensure a consistent reading.
- Remove the inner bowl from the Instant Pot and either set it on the counter or put it in cold water or an ice bath. Continue to stir frequently to accelerate the cool-down process. Avoid scraping the bottom of the pot.
- When the liquid has reached 110°F, mix 3 tablespoons of yogurt starter (yogurt with live cultures) with 1-2 tablespoons of the warm milk so the starter and add it to the pot. Add to the pot and stir gently to avoid disturbing any of the curds at the bottom of the pot.
- Place the basin back into the Instant Pot, put on the lid, and press the Yogurt button to select either 8 or 24 hours. For a thicker, tangier yogurt, select 24 hours. For less tangy and thick, 8 hours.
- After 8 or 24 hours, take the lid off of the Instant Pot to check the yogurt. At this point, if making normal, plain yogurt, transfer it into airtight containers of choice and refrigerate. If making Greek yogurt, strain using a Greek yogurt-specific strainer or a cheesecloth and a standard strainer. Be sure to place a bowl underneath the strainer to catch the liquid (whey) released by the yogurt.
- Refrigerate the yogurt while it strains. Strain for 2 hours for a runnier yogurt consistency; for up to 8 hours for a thicker consistency.