Roasted Spatchcock Turkey
Here's how to make the perfect Thanksgiving turkey.

Recipe of the Day
Discover a New Recipe Every Day. Give Back With Every Bite.
Every day, we feature a hand-picked recipe for you to discover, cook, and share. The best part?
Every recipe you read helps feed the hungry.

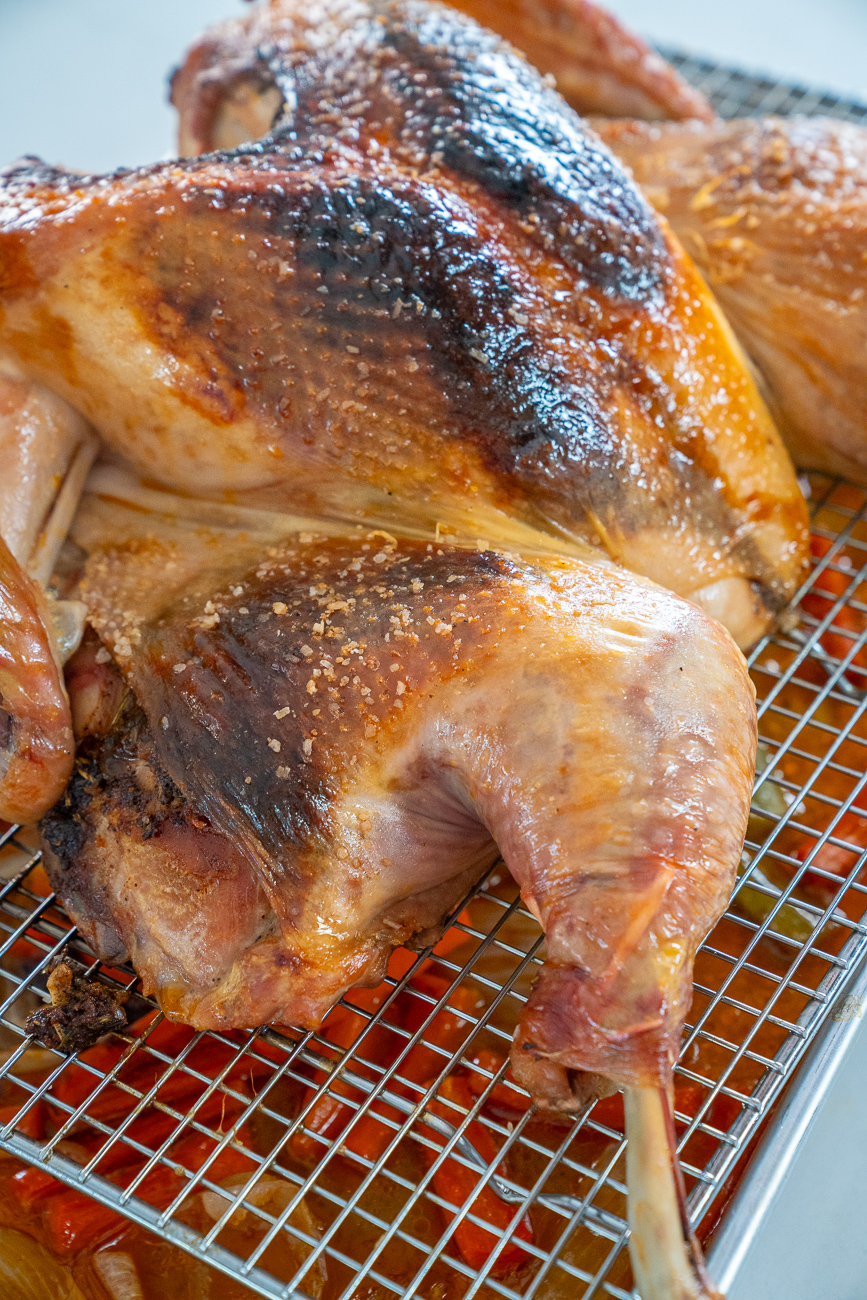
One thing we all have in common is that we all want to make the perfect Thanksgiving turkey. It unites us — like our love of freedom, baseball, and Toy Story 3. Of course, “perfect” means something different to everyone. Some people might picture that quintessential golden turkey as the centerpiece of the table while others picture slices of juicy, flavorful meat topped with beautifully crispy skin. If you’re looking for the latter — and you’re looking for it in hassle-free fashion in only about an hour and a half (yes, seriously), then spatchcocking a turkey is the method for you.
Here’s how you do it:
First things first, what is spatchcocking?
I’m glad you asked. Spatchcocking is, in essence, butterflying a bird. It’s the process of removing the backbone and then laying the bird out flat, breaking the breastbone in the process. You can do it yourself or ask the butcher to do it for you, but the video above demonstrates exactly how.
And why spatchcock?
There’s honestly a pretty hefty list of reasons and not a lot of cons.
Reason #1:
It cooks more evenly.
Because the bird is flat, the thighs and drumsticks are more exposed than they would be when the bird is in it’s, um, natural shape and this means that those parts end up cooking faster. And since you want those parts to get ten degrees higher than the breast meat, that’s very good news. Everything reaches perfect doneness at the same time, which is a hard thing to achieve with traditional turkey.
Reason #2:
It’s the fastest way to cook a turkey.
This is reason enough for me. It seems like we’re always waiting for the turkey to finally be done on Thanksgiving, but that’s not something you have to worry about with spatchcocking because it’s done cooking in an hour and a half, maybe less. It feels too good to be true, but it is true, my friends, and that also means that you have more free oven time for other things (like sweet potato casserole, and pumpkin pie, and grandma’s green beans).
(A note: the dry brine will add some hours to your preparation, but more to come on that.)
Reason #3:
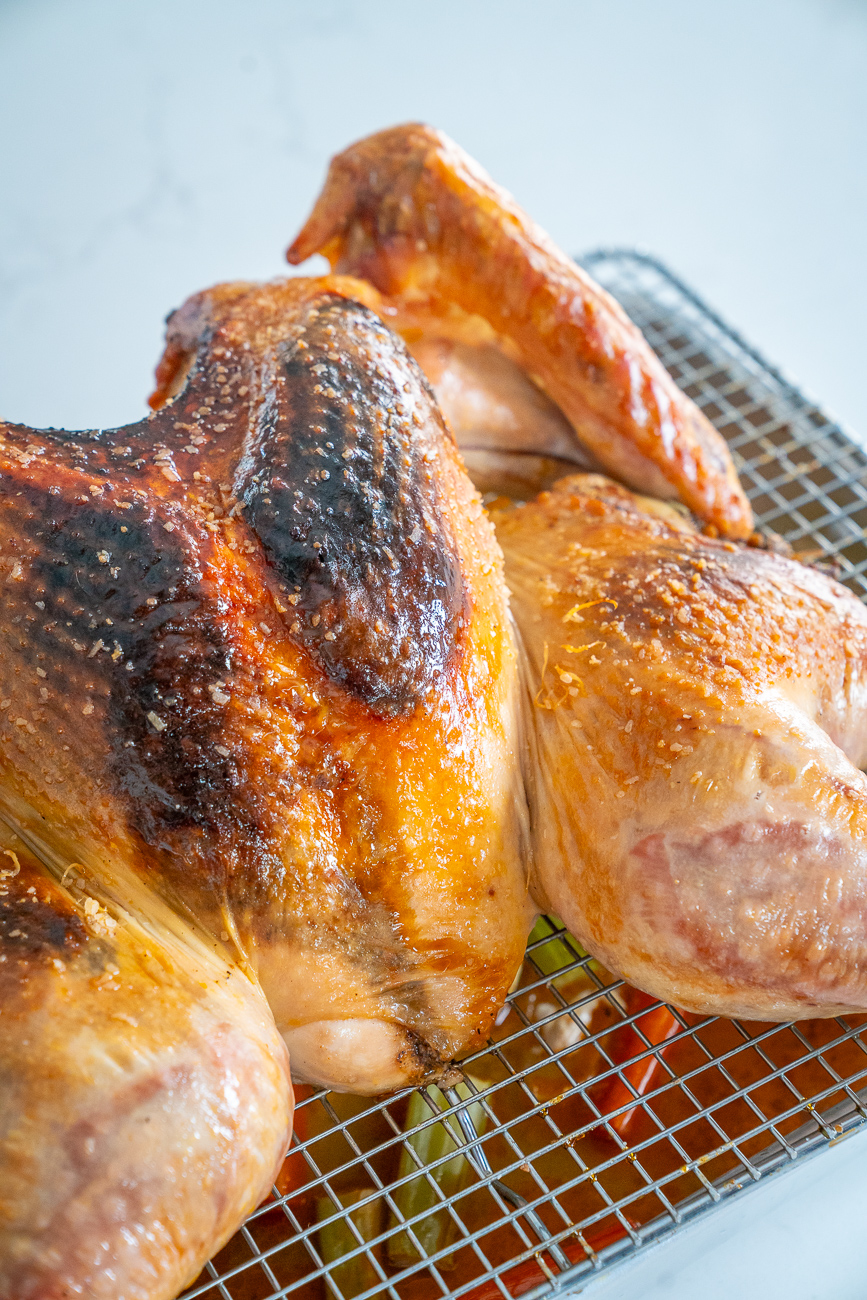
The skin gets crispier.
Because that turkey lays flat, there’s more surface area to get crispy. All of the skin is exposed to the oven heat and none of it is forgotten at the bottom of the pan where lack of airflow or collected drippings makes things soft, or worse, soggy.
Reason #4:
You get to season the whole bird.
With the inside of the turkey exposed, it’s easier to evenly season the inside as well rather than stuffing things in the carcass and calling it good. What does that mean? Better flavor.
Reason #5:
It takes up less space.
In the fridge, in the oven, even on the table. It might seem trivial, but it’s one less issue to juggle on a day full of juggling.
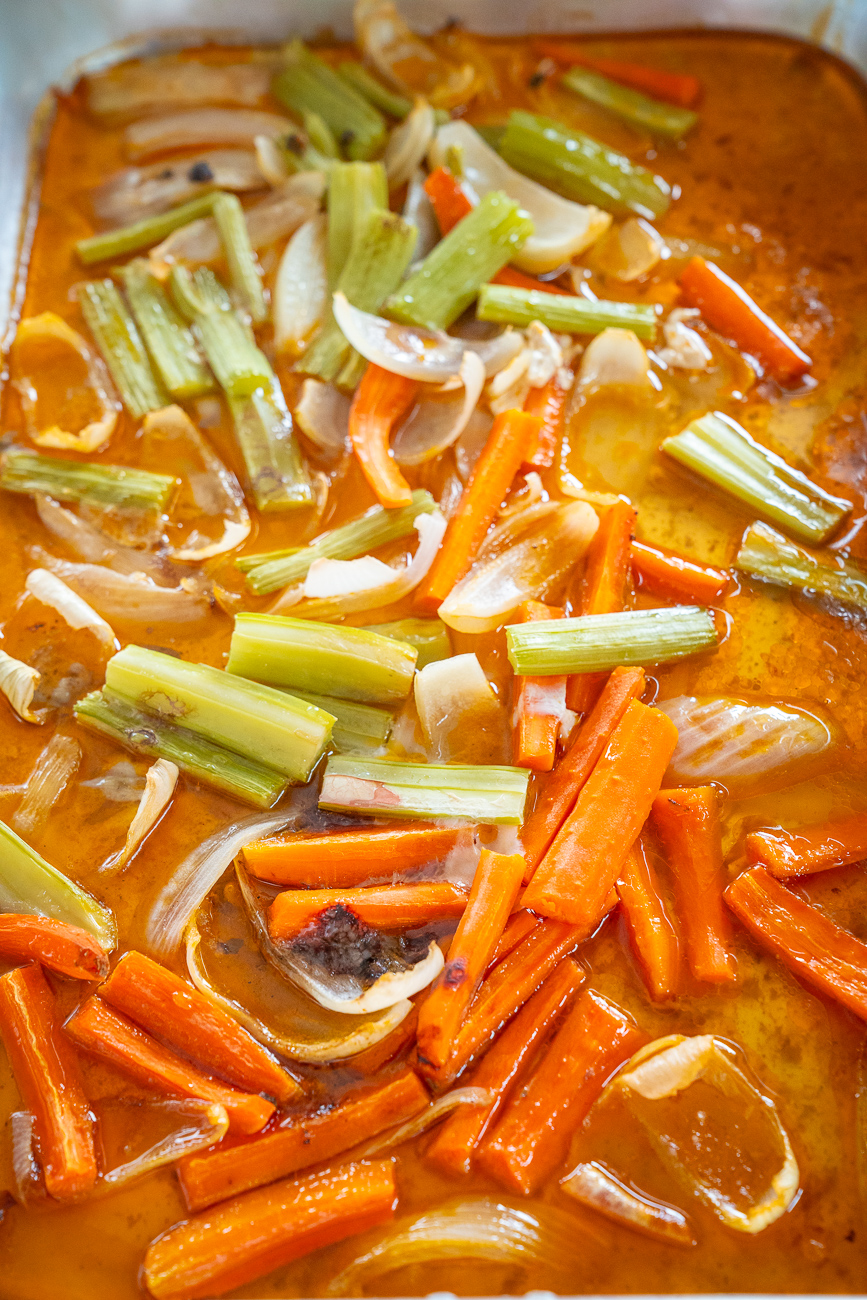
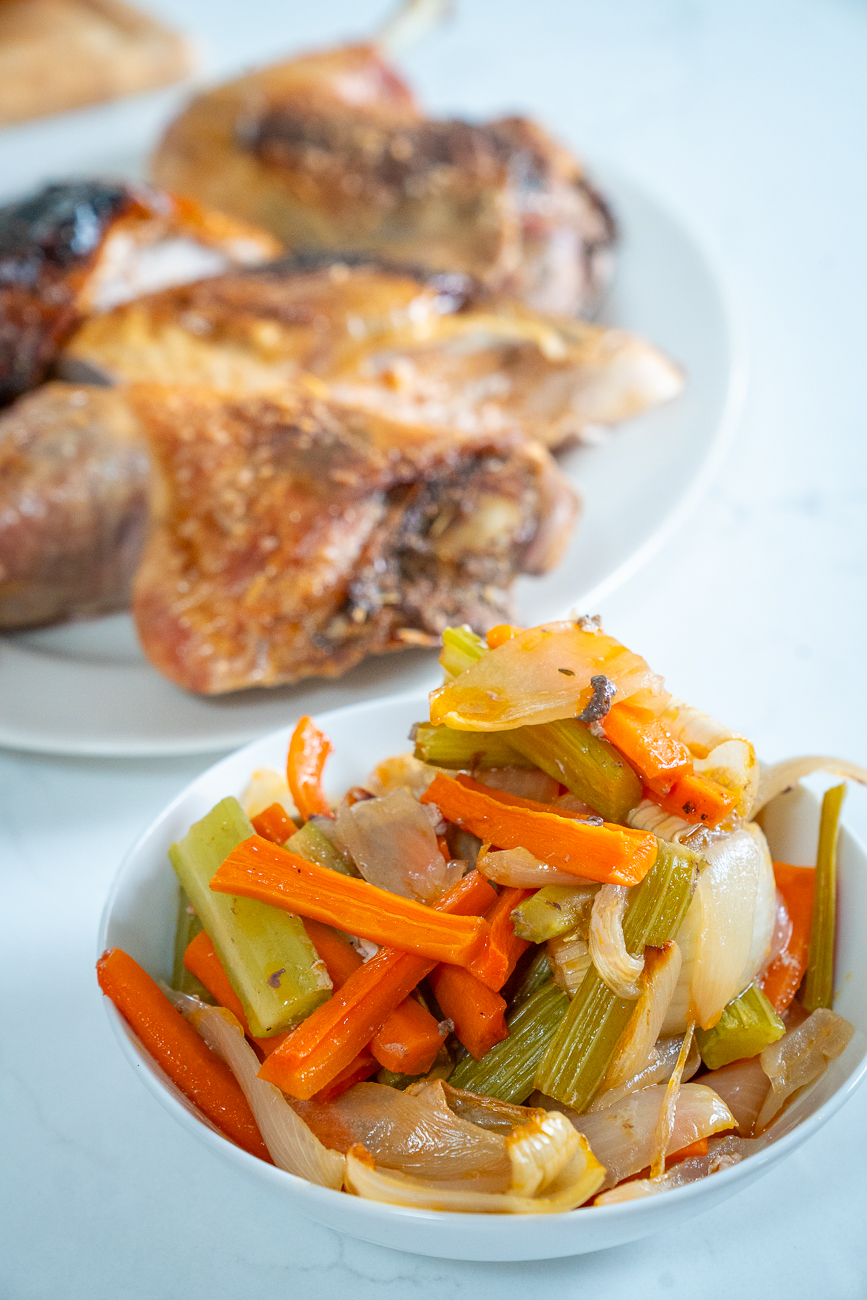
You also get a pan full of vegetables that are so delicious you can’t help but snack on them.
What about brining?
While the spatchcocked bird can be submerged in a wet brine, I’ve never been a fan of dealing with a huge tub of liquid. Dry brining is simple, affordable, and renders flavorful, juicy meat every time. That’s the method we use here, but you can still use the spatchcock method with any other brining or flavor method.
What is a dry brine?
A dry brine is essentially pre-salting poultry or meat and giving it enough time to rest so that the juices from the meat dissolve the salt and, in essence, create a wet brine. The salt is drawn into the meat and flavors it beautifully but doesn’t require a giant vessel to submerge the bird in. Win-win.
How long do I have to brine?
The turkey should sit (with it’s dry brine) uncovered in the refrigerator for at least four hours. It can sit up to 72 hours if you’re really working ahead, but the ideal length is about one hour per pound of turkey.
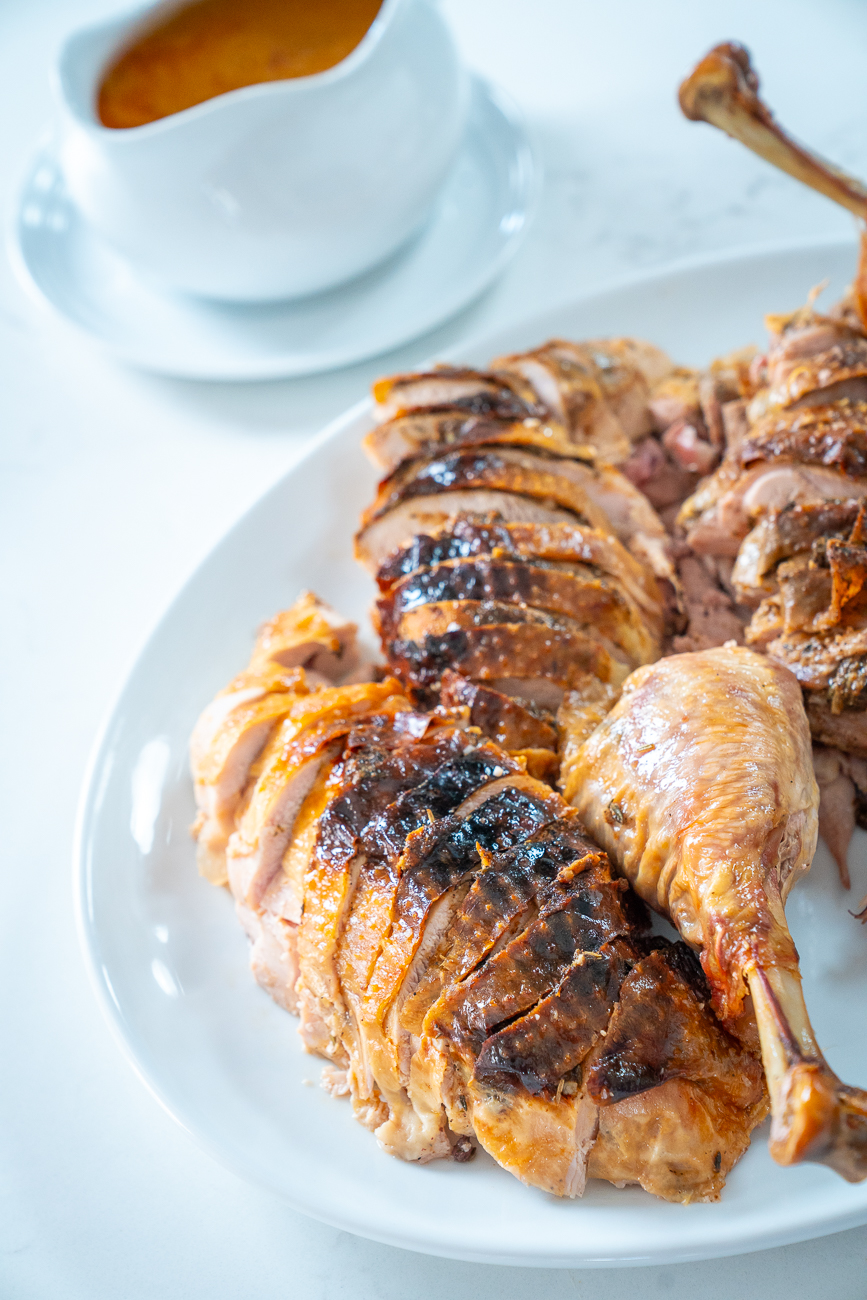
A dry brine and the spatchcocking method (and the delicious compound butter recipe below!) will result in a fool-proof delicious Thanksgiving turkey in almost no time at all. Crispy skin. Juicy meat. And plenty of time for other things — like those aforementioned sweet potatoes or green beans, or maybe just kicking back by the cheese board.
Recipe by Dom Ruane, copy by Kristy Norrell.
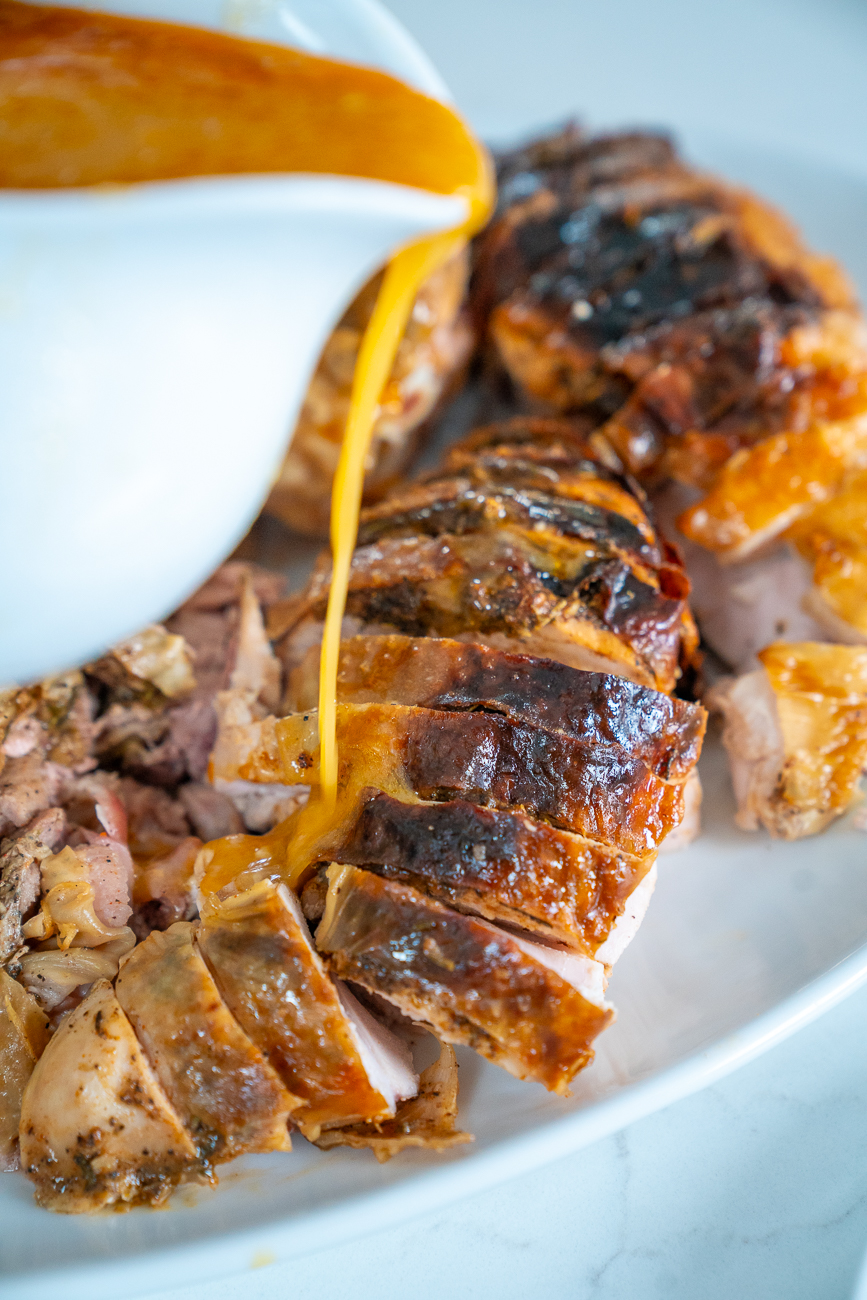
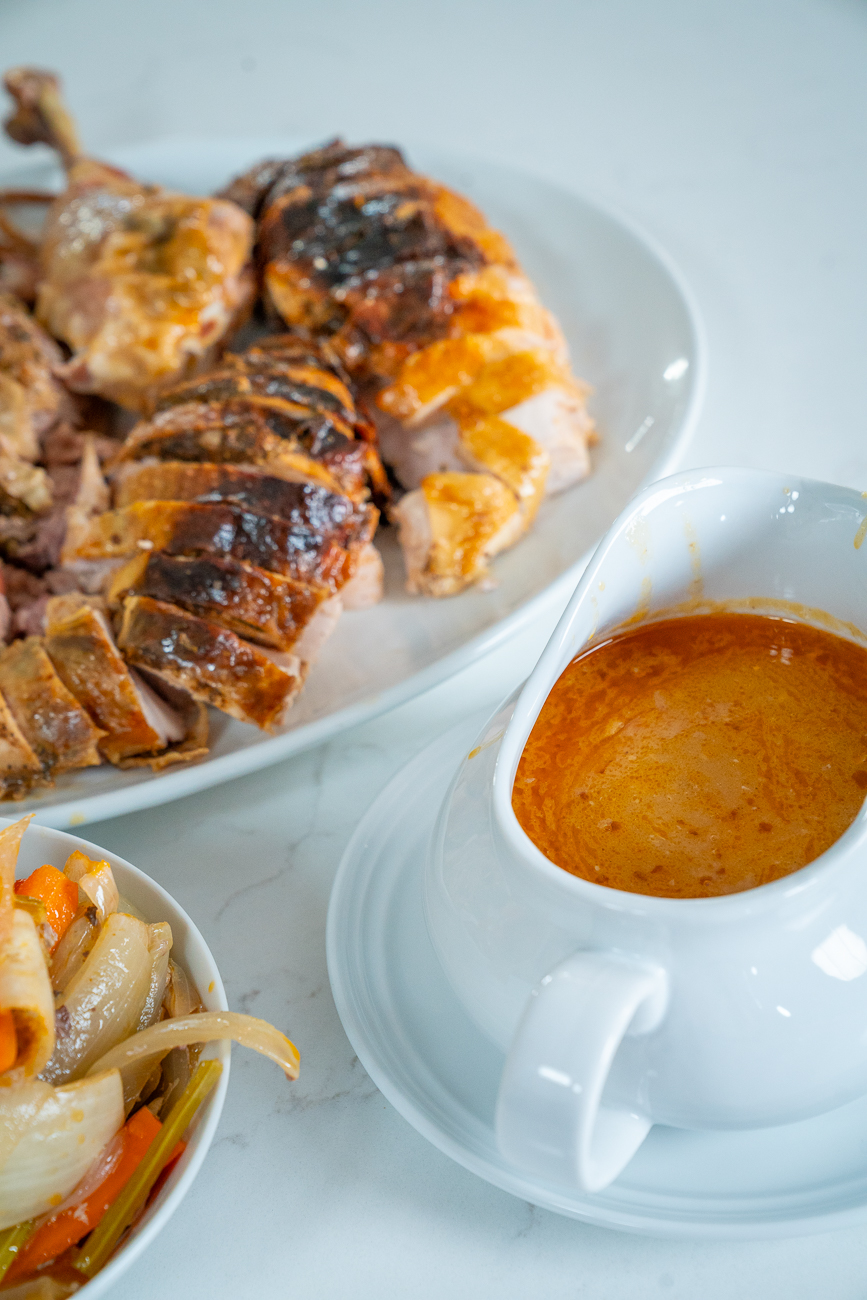
Wondering how to make the perfect gravy? See our Turkey Gravy 101.
Roasted Spatchcock Turkey
Watch How It's Made
Video unavailable — your ad blocker may be preventing it from loading.
Ingredients
- 12-14 lb whole turkey, fully thawed
- 1/3 cup kosher salt
- 1 stick butter, softened
- 4 garlic cloves, pasted
- 1 tablespoon black pepper
- 1 tablespoon brown sugar
- 1 tablespoon paprika
- 1 tablespoon thyme
- 1 tablespoon dried rosemary, chopped
- 2 teaspoons onion powder
- 2 carrots, peeled and chopped
- 2 celery stalks, chopped
- 1 onion, chopped
- Olive oil, for drizzling
Preparation
- Prepare your workspace with one large cutting board, strong kitchen shears, a wire rack lined sheet tray, and a roasting pan.
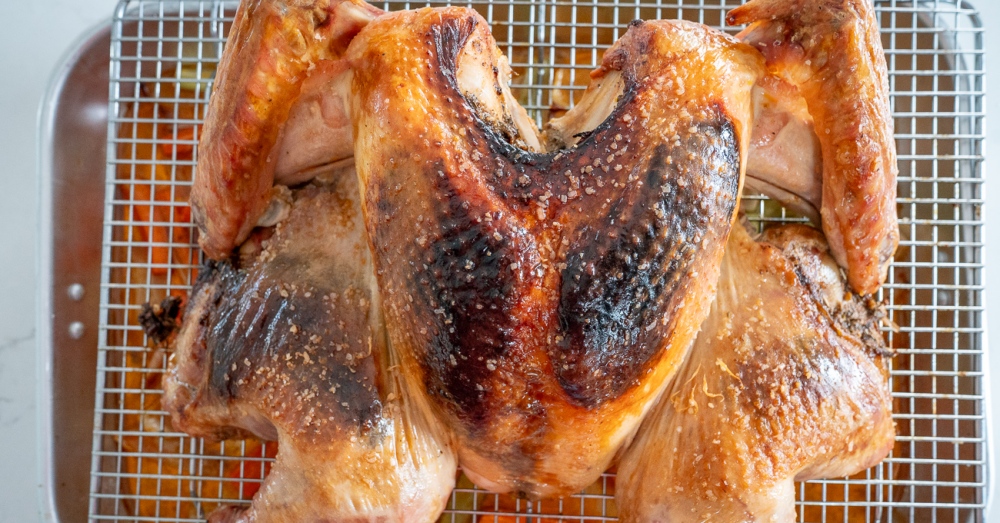
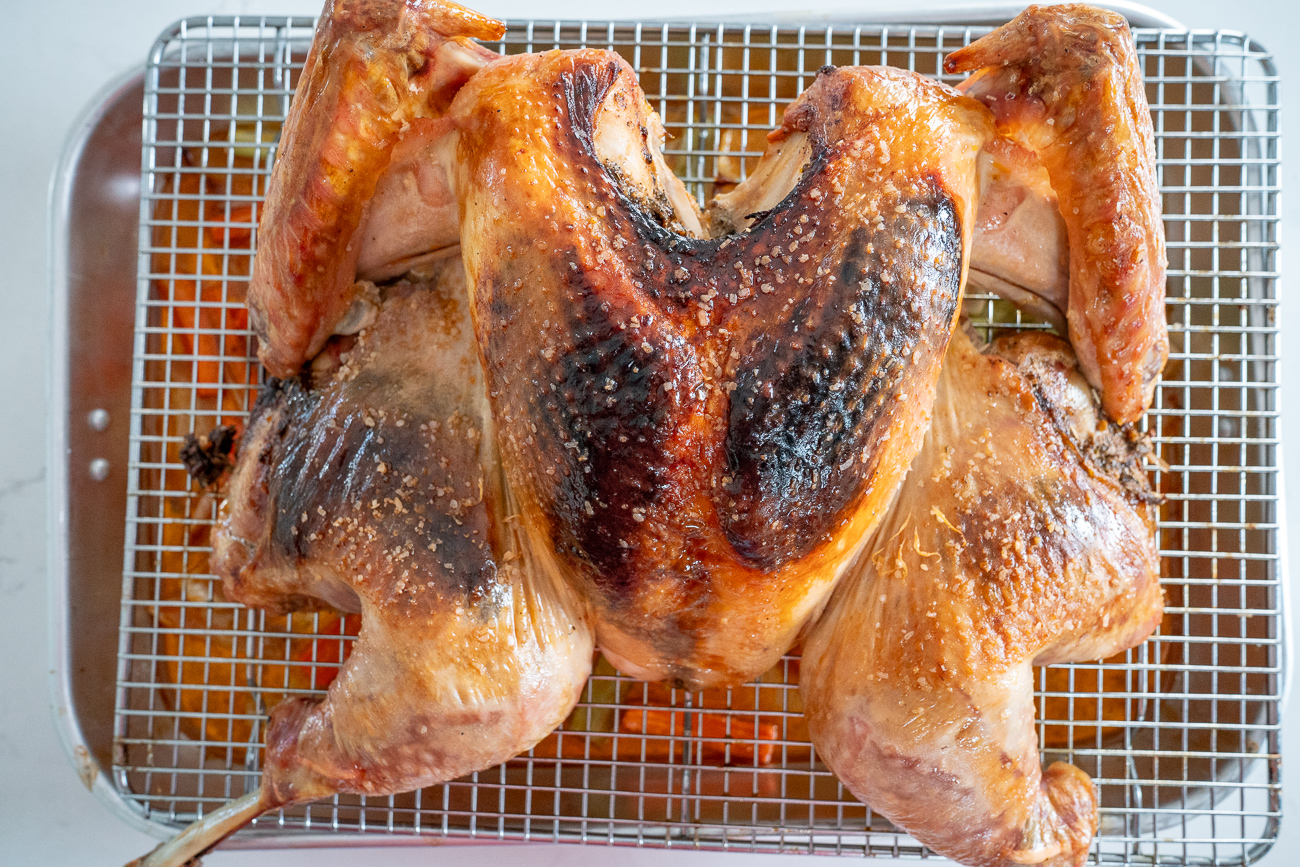
- To spatchcock the turkey, place the turkey breast-side down on the cutting board and cut along either side of the spine with kitchen shears.
- Flip the turkey over and press firmly between the chicken breasts until you hear it break. You will feel a definite crack.
- Next, dry brine the turkey by generously sprinkling 1/3 cup of salt all over both sides of the bird. Aim for an even coating.
- Place turkey over wire rack lined sheet tray and place in the refrigerator uncovered ideally overnight, but at least 4 hours and up to 72 hours.
- When turkey is ready to cook, preheat oven to 425° F. and place onion, celery, and carrots in the bottom of your roasting tray. Place turkey on wire rack on top of the roasting tray.
- In a mixing bowl, combine the butter, garlic, pepper, sugar, paprika, thyme, rosemary, and onion powder and stir until well combined.
- Spread the compound butter under each part of the turkey’s skin that you can access. Use your fingers to spread the butter between the skin and the meat and try to avoid getting it on top of the skin. Do as best as you can.
- Drizzle the whole turkey generously with olive oil and bake until turkey reaches 155°F in the breast and 165°F in the thigh, about 1 hour 30 minutes. All ovens are different and heat differently throughout the process, so go by temperature. At one hour, check the skin for brownness, and tent in foil if needed for remaining cooking time. Rest turkey for 15 minutes before slicing; temperature will rise to 165°F in the breast and 175°F in the thigh during this time.
- Save the vegetables to eat and the turkey cooking liquid for gravy. Enjoy!