
Recipe of the Day
Discover a New Recipe Every Day. Give Back With Every Bite.
Every day, we feature a hand-picked recipe for you to discover, cook, and share. The best part?
Every recipe you read helps feed the hungry.

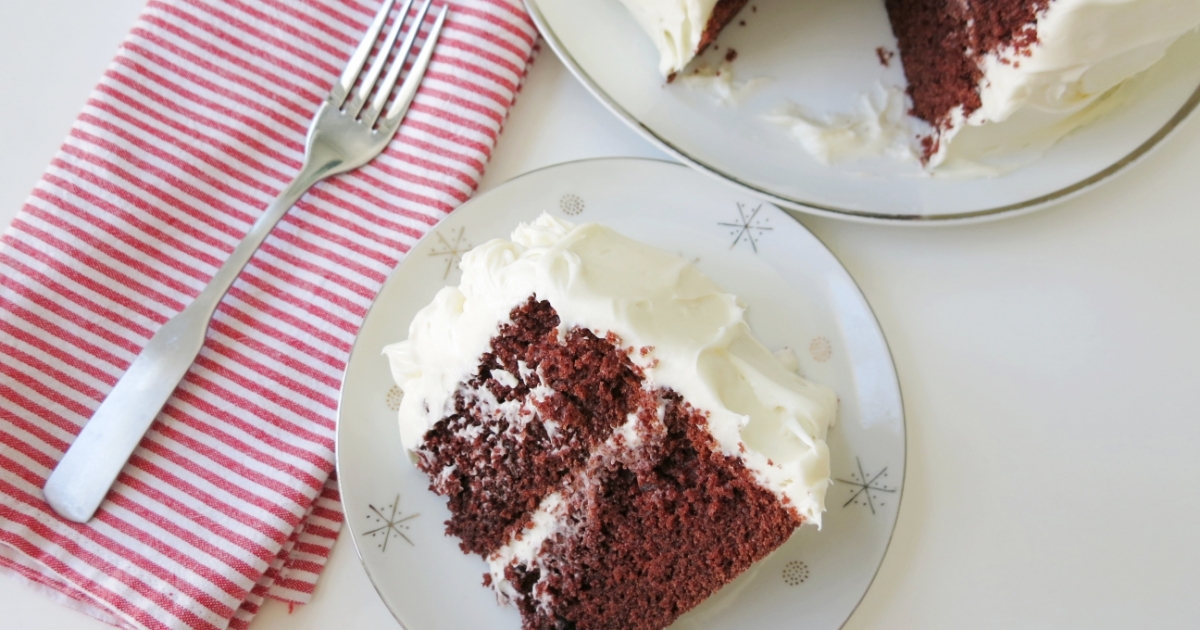
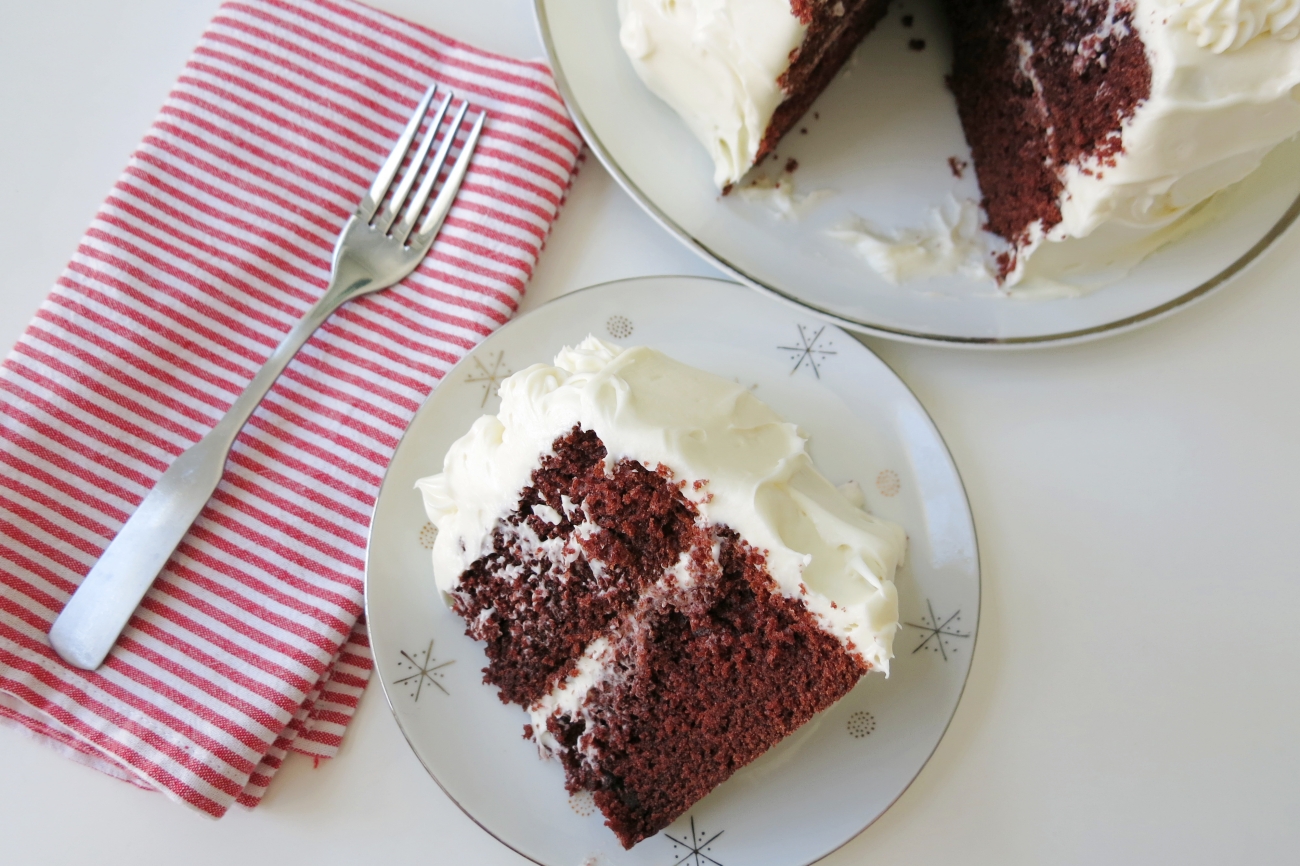
I’ve never been the biggest chocolate cake fan, but give me a slice of red velvet cake any day of the week. There’s something about this flavor that’s so enticing and the decadent cream cheese frosting is a major pull, too. Basically, this is my perfect cake. If you want to learn how to make a classic red velvet cake from scratch then read on!
While this isn’t a chocolate cake per se, there are a few spoonfuls of cocoa in the batter. This not only deepens the flavor, but it also gives a darker color to the cake. This is important because without this crucial ingredient you’re going to have to add a lot more food coloring to the batter.
Like a lot of cakes you mix the dry ingredients separately from the wet. In this case you need to reserve a cup of buttermilk and the whites of your eggs for later additions. Importantly, you will also need to add the food coloring to the wet batter before mixing it with the dry ingredients or the egg whites.
The reason is that the egg whites are beaten to add height to the cakes. If you were to mix the color with the egg whites it would let out all the air you incorporated beforehand.
You want the red-tinged wet ingredients to be a dark pink shade. Check the color again once you’ve mixed it with the cocoa and flour and add a bit more food coloring if needed. Just make sure you’ve got all the color you need before adding the beaten egg whites and you’ll be good to go.

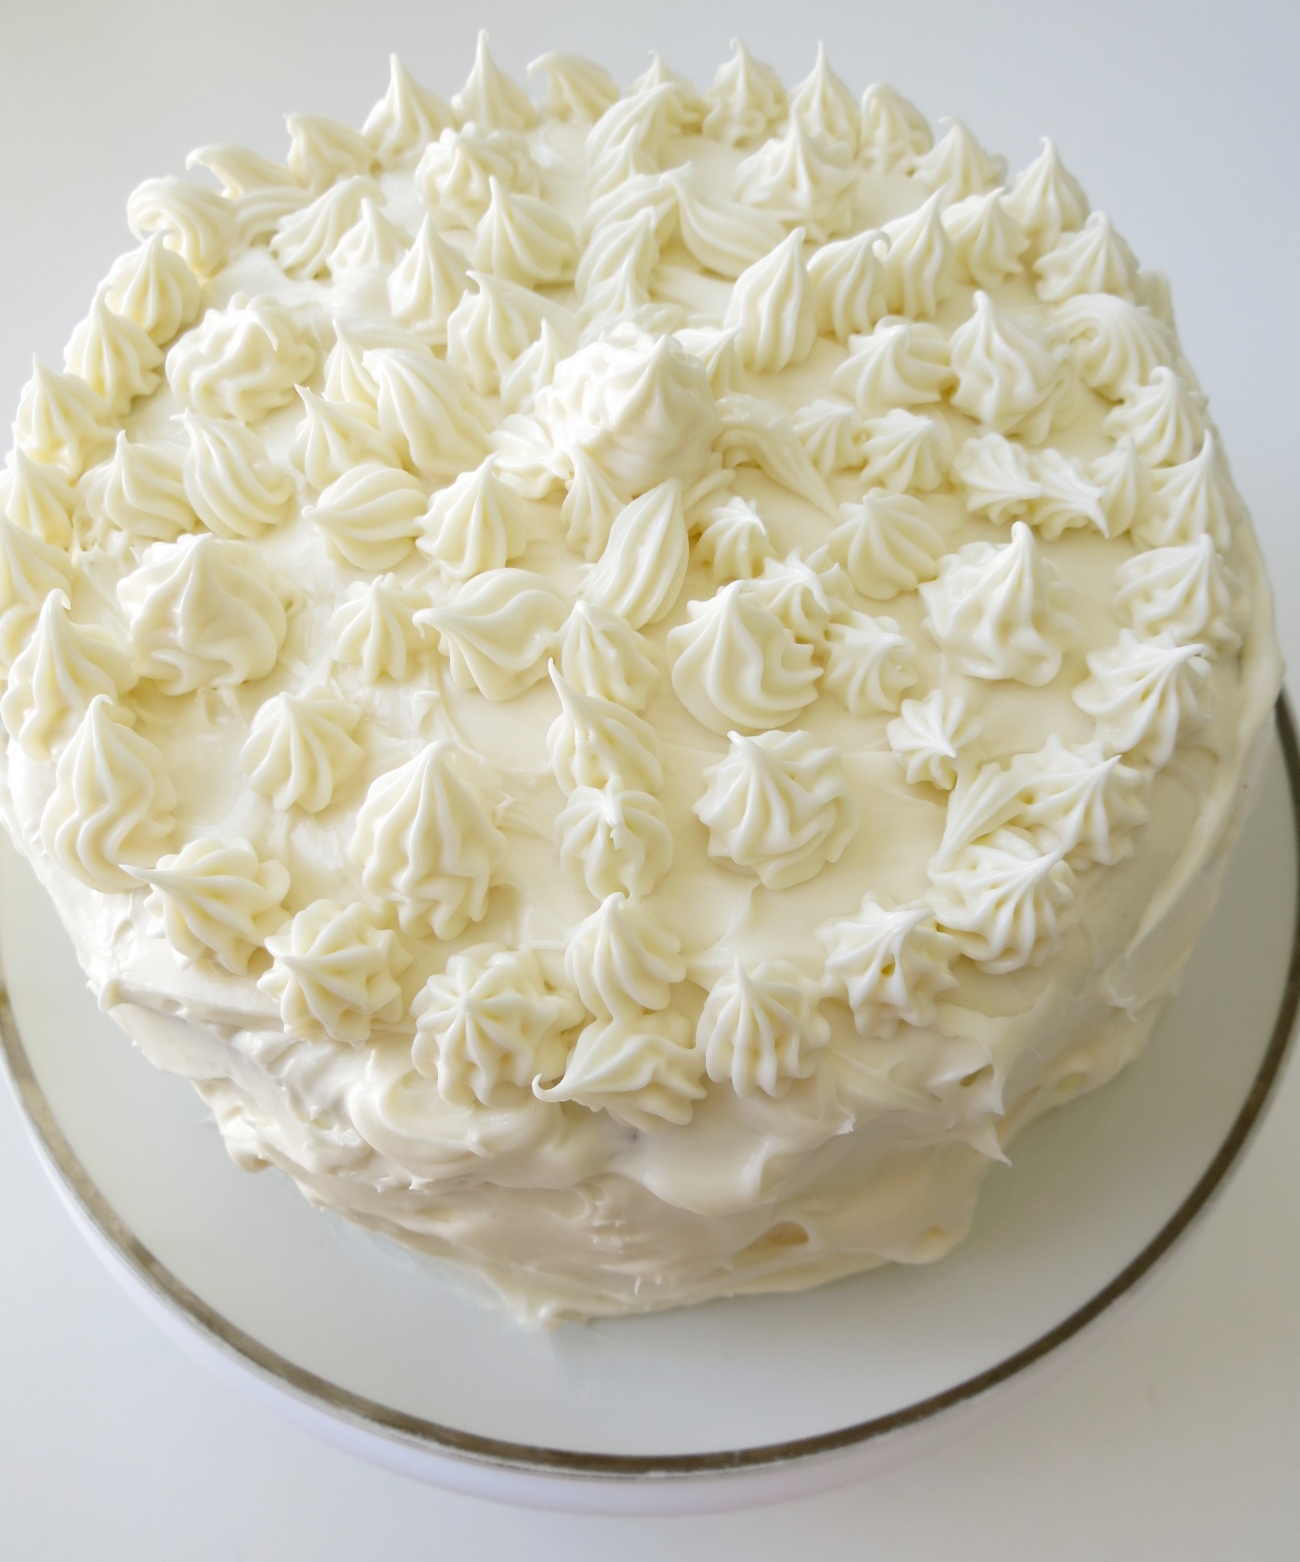
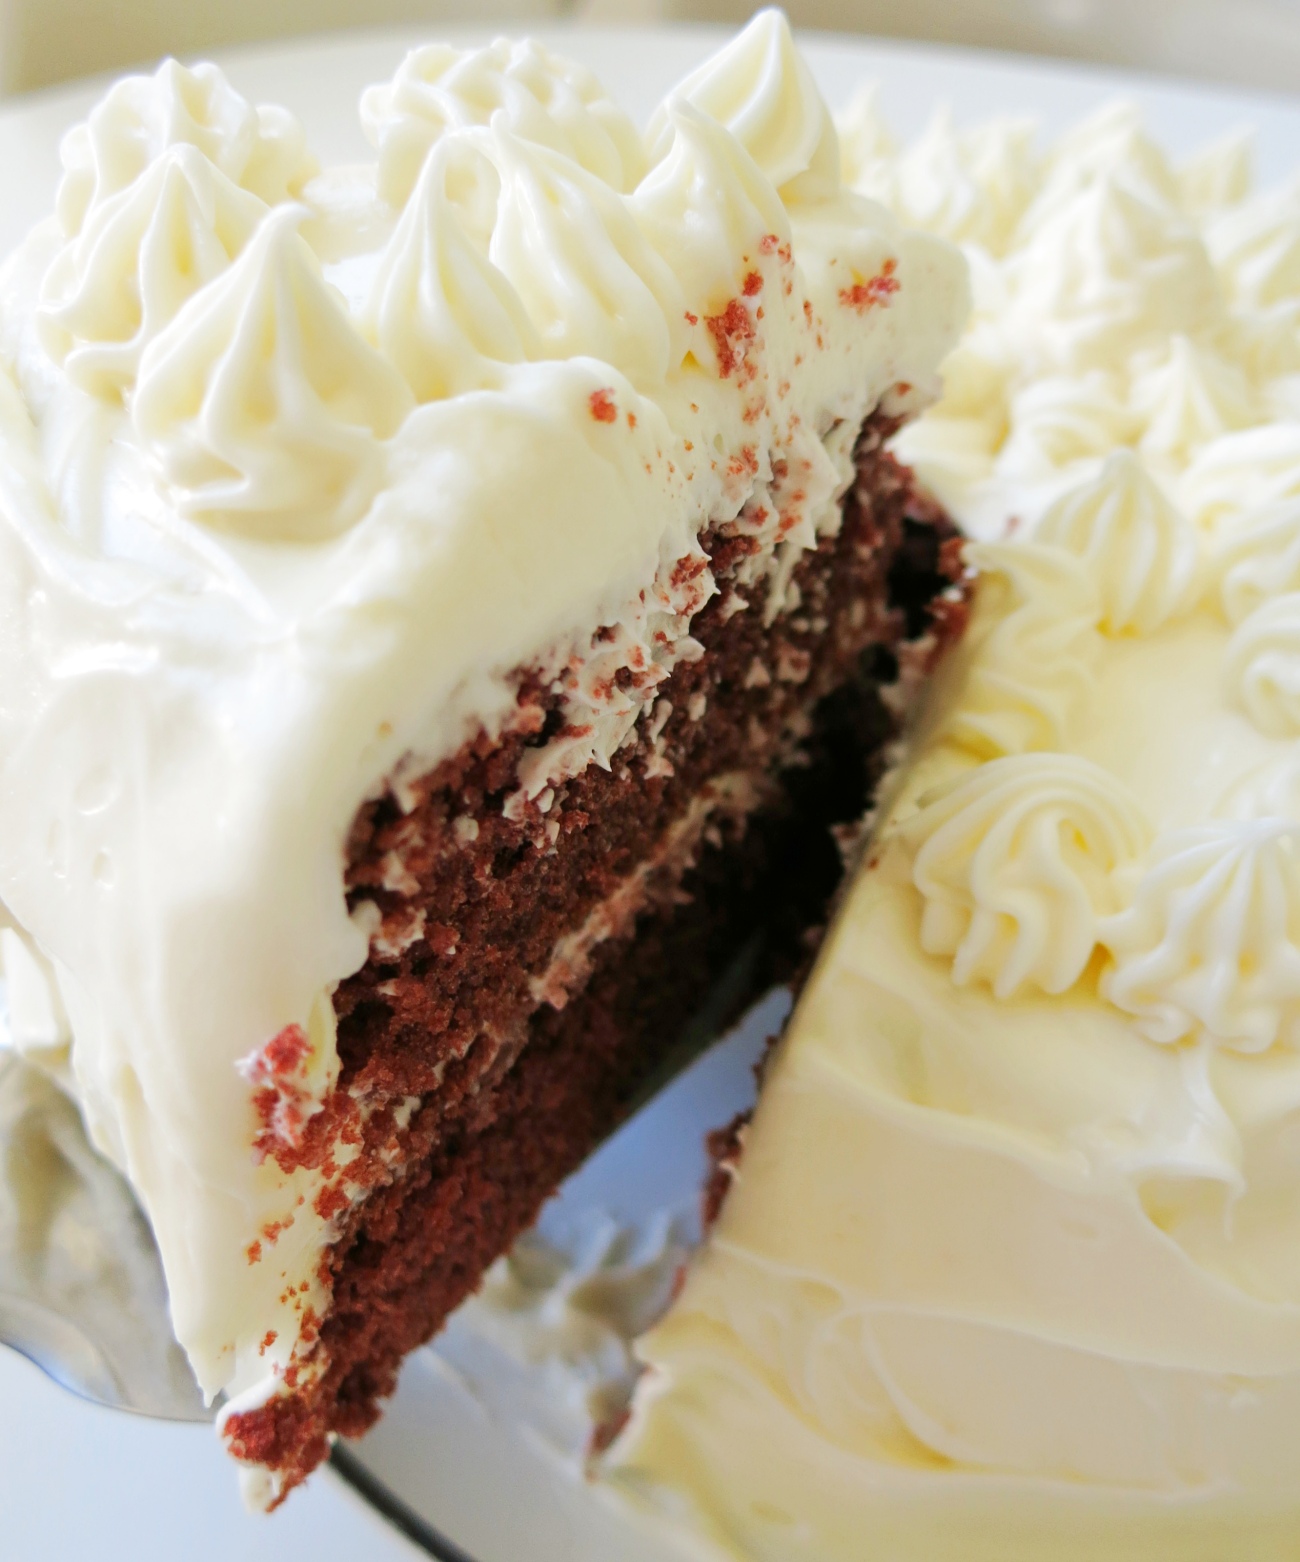
Once your cakes are baked and cooled make sure to level them off using a bread knife. Then it’s frosting time! Now this recipe makes a very generous amount of frosting. And, if you happen to have some leftover you can very easily make some red velvet cake pops by mixing the crumbled tops you removed with the frosting. Roll them into balls and chill in the fridge. Then dip into melted white chocolate and you’ve got a very tasty snack to pop in the freezer for later.
Back to the frosting! You want to coat your cakes with a thin layer before adding the final layers of frosting. This is called the crumb coat and it seals in most of the crumbs. Frosting chilled cakes also helps to make the frosting go on easier.
For the base I used a frosting knife to make little peaks and swirls. Then I took about a cup of frosting and loaded it into a piping bag with a star tip to make the design on top. You can go over the top or basic with your frosting and it will still be amazing, so don’t sweat the small stuff I say.
It’s best to let the frosted cake cool again before slicing and serving for the cleanest cuts.
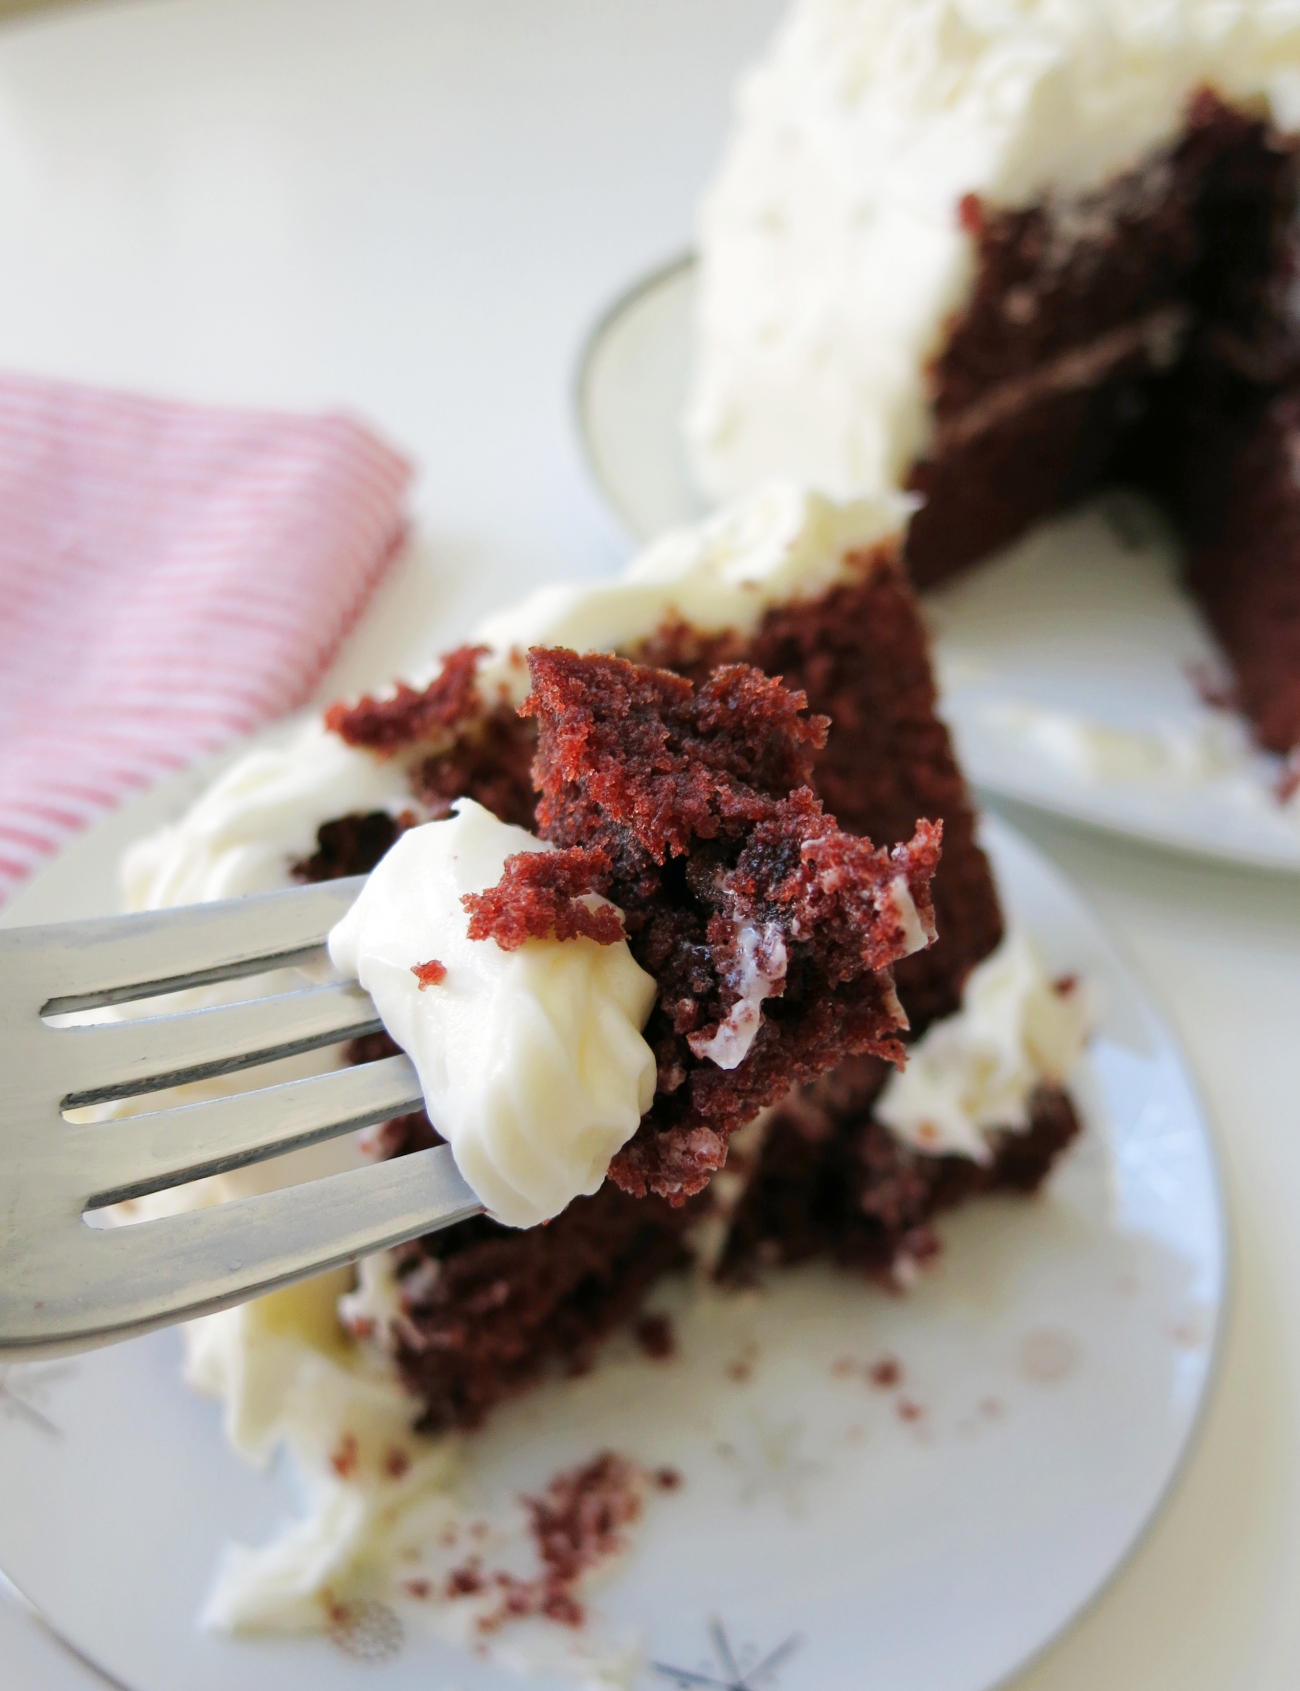
If you’re a fan of red velvet cake then now’s the time to learn how to make this luscious dessert at home. The slight tang of buttermilk and cream cheese offset the sweeter elements so well- it’s a winning recipe for sure!
Classic Red Velvet Cake
Diet: Vegetarian
Ingredients
- 3 cups cake flour
- 1 teaspoon baking soda
- 1/2 teaspoon salt
- 3 tablespoons Dutch cocoa powder
- 1/2 cup unsalted butter, softened
- 2 cups granulated sugar
- 1 cup canola or vegetable oil
- 3 eggs, room temperature and separated
- 2 tablespoons pure vanilla extract
- 1 teaspoon white vinegar
- liquid or gel red food coloring
- 1 cup buttermilk, at room temperature
For the frosting:
- 2 (8 oz packages) regular cream cheese, softened
- 3/4 cup (12 tablespoons) unsalted butter, softened
- 5 cups powdered sugar
- 2 teaspoons pure vanilla extract
- pinch of salt
For the cake:
- Preheat oven to 350˚F. In large bowl combine flour, baking, and salt. Sift in cocoa powder. In another bowl cream together butter and sugar. Mix in oil then add egg yolks, vanilla, and vinegar. Beat for 2 minutes. Mix in food coloring to wet ingredient until uniform in color, about 1 1/2 teaspoons gel or 60-70 drops liquid.
- Add wet mixture to dry little by little, alternating with buttermilk. Whip egg whites in separate bowl until white and fluffy, about 3-4 minutes. Gently fold egg whites into cake batter until uniform in color.
- Divide batter into 2 lined and greased 8” cake tins. Bake for 35 minutes or until toothpick inserted in centers comes out clean. Allow to cool for 1 hour before removing from pans to wire rack. Allow to cool for another 30 minutes before chilling in refrigerator for another hour.
For the frosting and decoration:
- While cakes chill combine all frosting ingredients in clean bowl using electric mixer. If too runny add a bit more powdered sugar. If too sweet add a small pinch more salt.
- Refrigerate frosting for 15 minutes before decorating cake. Cut cakes to be level if they’ve risen in the middle. Place one on plate or cake stand. Add frosting to first cake.
- Then top with second cake. Frost all over top and sides in thin layer to seal the crumbs in, the crumb coat.
- Use remaining frosting to ice cake in thicker layers. If desired reserve some frosting to load a piping bag and decorate with designs. Otherwise simply use a cake comb or a bench scraper to direct the icing to be flat, wavy, ect. Allow to cool in fridge again for 30-60 minutes before slicing.
Recipe adapted from Sally’s Baking Recipes.