Chic. Sophisticated. Elegant. Modern. All words used to describe the gorgeous decor, furniture, and knickknacks found at Pottery Barn and similar stores. While I love this look, I don’t love the price tag. Sixty dollars for a vase? I’d be broke by the time I get my living room decorated! Good thing a lot of these looks are easy to recreate if you have some basic supplies and some free time. See some of my favorite Pottery Barn DIYs in the list below!
Vase
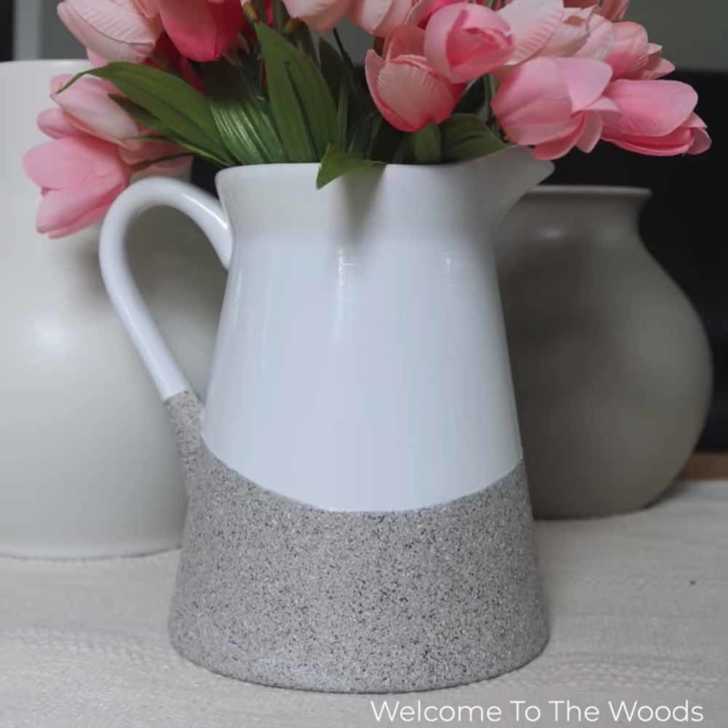
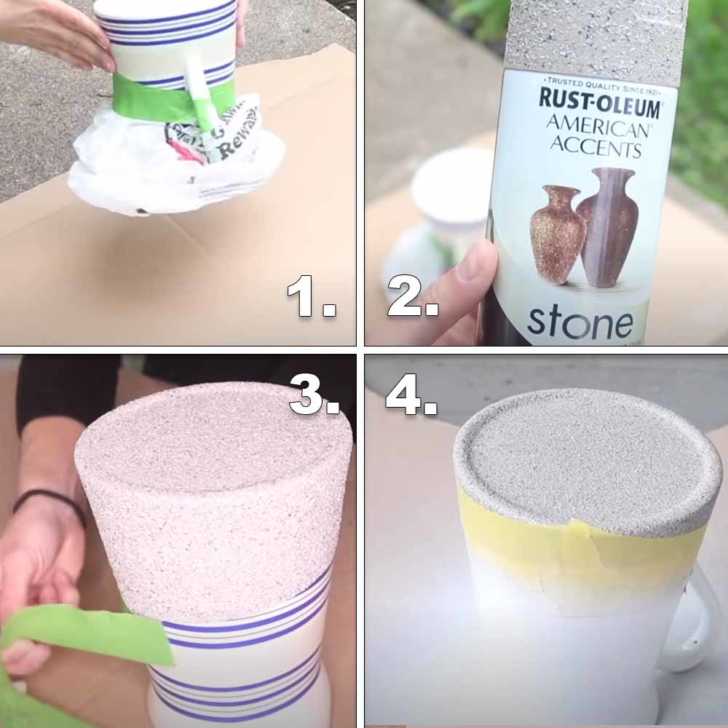
This is such a cute and classy vase to add to the collection! I love that it’s neutral enough to go with any decor, yet unique enough to catch the eye. I’ve seen similar items go for $40-$60 at retailers like Pottery Barn. Let’s take a look at how easy and cheap this vase can be.
For this project, all you need is two kinds of spray paint, an old vase, some painter’s tape, and a plastic bag. Start by covering the top half of the vase with painter’s tape and a plastic bag. Then, spray paint a layer of stone texture spray paint, or similar textured spray paint of your choosing. Once dry, cover the bottom with tape and then spray paint a layer of white, or another color of your choice. Finally, apply a clear, protective coat of spray paint and use around the house!
Rustic Sign
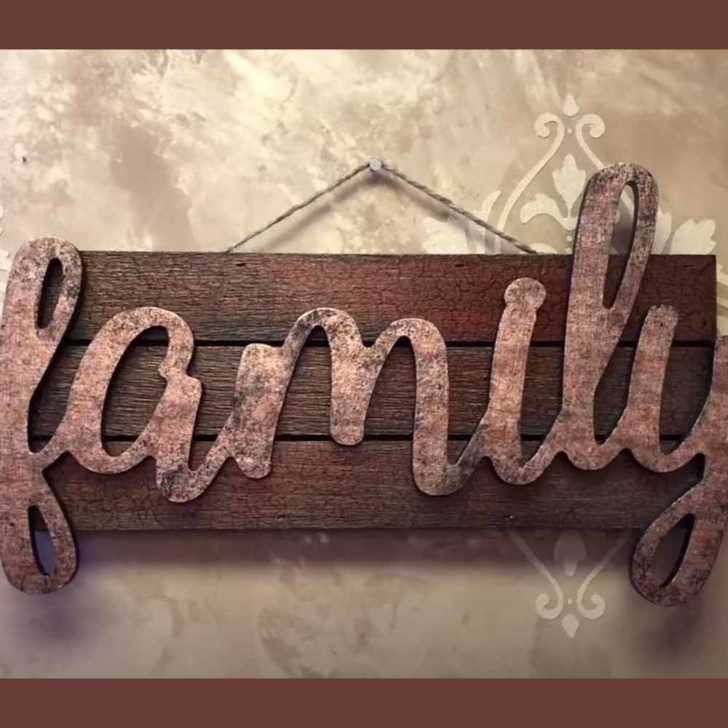
How fun is this sign? For this DIY, you’ll need black paint, Mod Podge, and metallic tissue paper. Start by painting the wooden base and the word you picked out. After the paint is dry, cover the front-facing surface with Mod Podge and then crinkle the tissue paper to make a distressed texture.
Finally, wipe the tissue paper with a rag, then use a bristled brush to create more distress lines and aging. Once you peel the tissue paper off, let the paint dry, then spray paint a clear, protective coat over the whole thing before hanging it up!

Light Fixtures
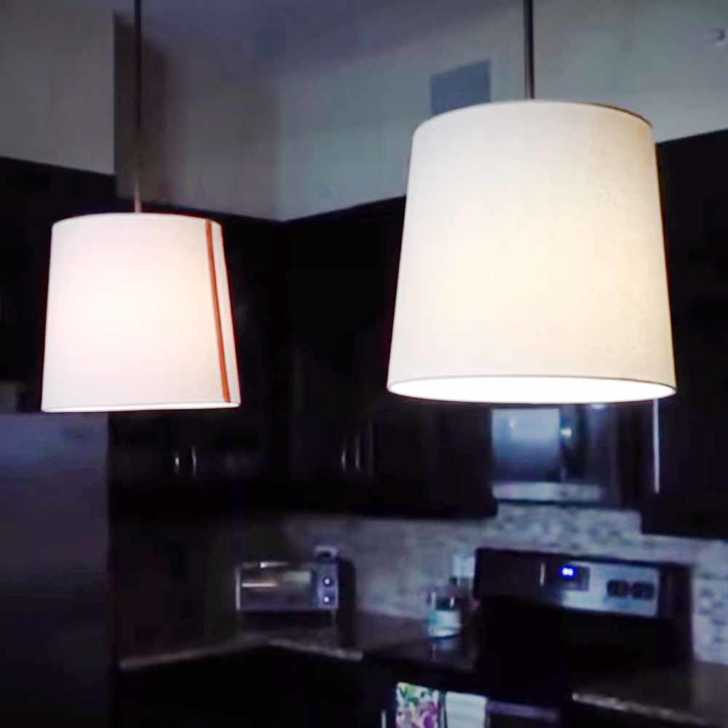
I don’t know about you, but light fixtures like these ones scream “Pottery Barn” to me. Instead of spending a fortune, simply modify regular lamp shades to fit over lights you already have in place. If you don’t already have this kind of set up in your dining room, you can easily pick up a kit at your local hardware store for much cheaper than you’ll find at Pottery Barn.
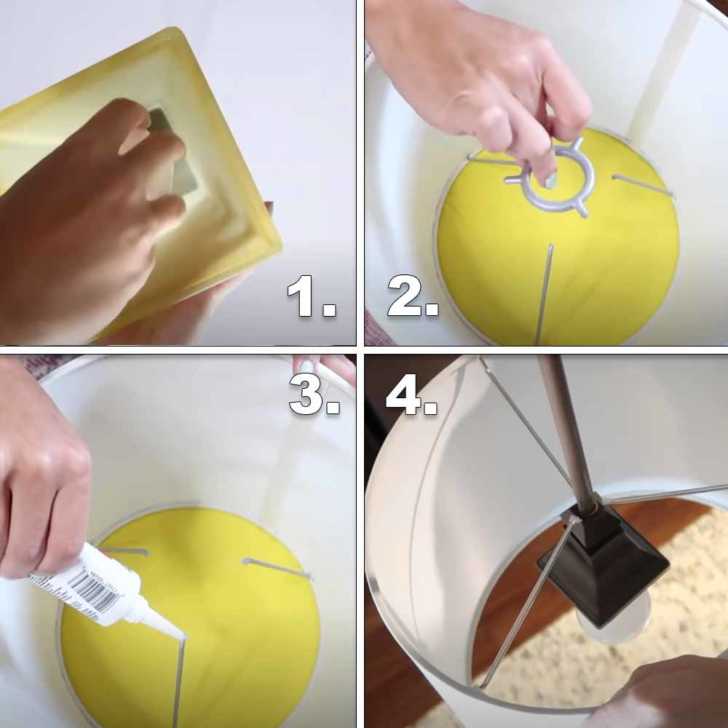
Once you have the fixtures installed (or you’ve stripped your current fixtures of their light covers), grab a couple of matching lampshades. Using wire cutters, remove the center circle of the shade, then add a dot of industrial-strength glue to each of the ends. Simply place the new lampshade over the fixture and hold for a few moments while the glue dries. If you’re using E6000 glue, it should be dry within a minute.
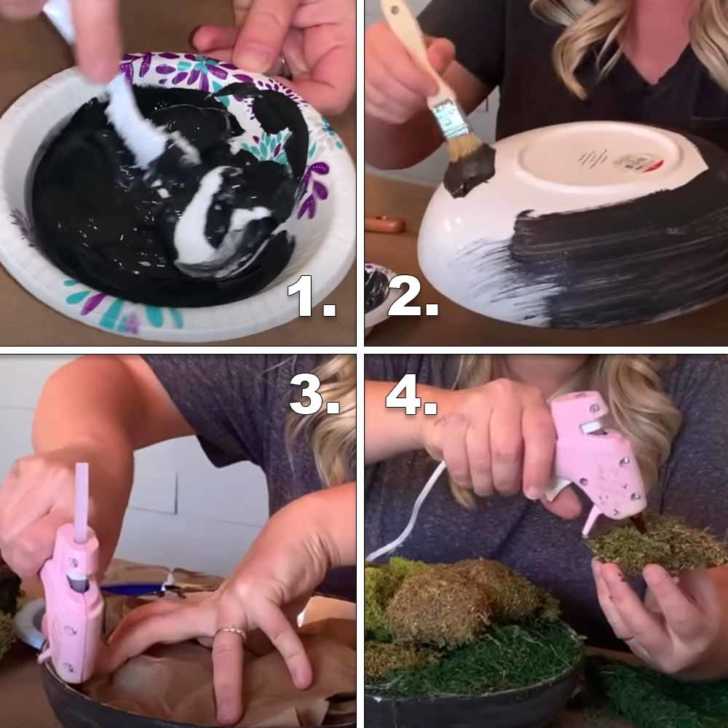
Decorative Bowl
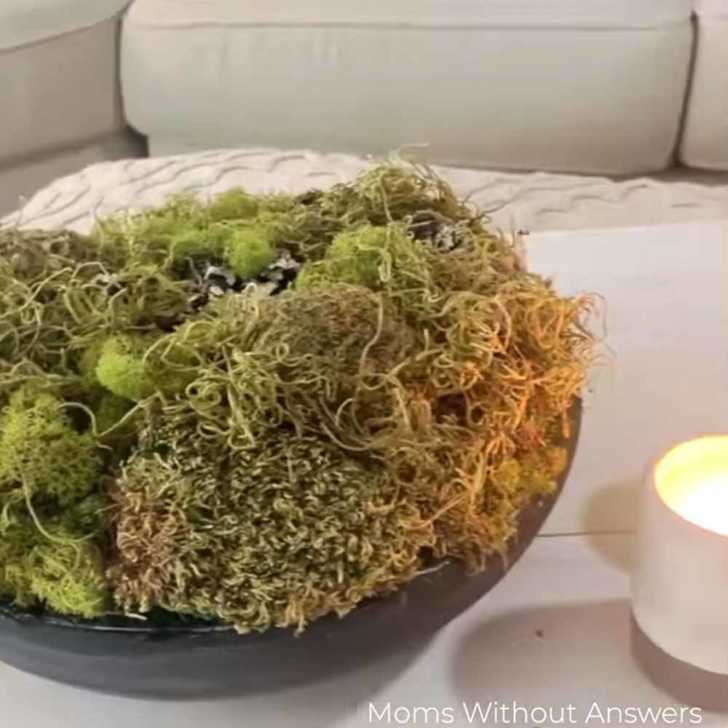
I don’t know about you, but I’m always on the lookout for cute centerpieces or side table fillers. This decorative bowl filled with dry moss is perfect for the coffee table in my living room!
You’ll need a bowl in the shape you want, some paint, and a few sheets of different colored dry moss for this project. To get the matte look, mix black acrylic paint with spackling paint. The spackling paint will not only give the flat, matte look, but also help the paint stick to the bowl, even if it has a glossy finish. Next, grab some filler, like an old paper bag or some newspaper, and cover the bottom of the bowl before cutting a large piece of dry moss and hot gluing it around the edges to cover up the filler.
Finally, cut pieces of different colored moss and glue on in layers. You can add other little fillers, sticks, fake succulents, etc., to make this project your own!