Summer is in full swing, and while a lot of us are spending more time at home this year rather than traveling and hanging out at pools and parks, it’s the perfect time to give your outdoor space a little TLC! These awesome DIYs are all very cost-effective, not to mention cute and chic. It’s amazing what a couple of coats of paint or some new decor can do for your space!
If you’re tired of looking at your eyesore of a cement patio, or if your deck needs an upgrade, check out these makeover ideas before spending the big bucks. Which one is your favorite?
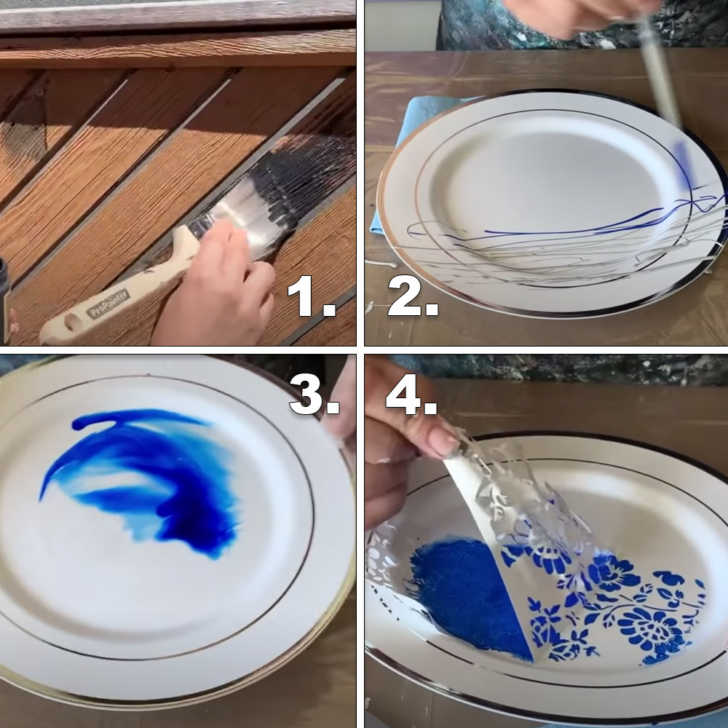
Painted Plate Wall

How awesome is this idea? I don’t normally think of plates as outdoor decor, but I sure do now! I’m not usually a fan of darker colors when painting and decorating a space, but this DIY is breaking down all of my preconceived notions, apparently! I absolutely love the bright royal blue & white plates on the black fence background.
My favorite part about this DIY is how cost-effective and easy it is. You really just need paint, plates, rubbing alcohol, and alcohol ink (available at all craft stores). First, paint the fence whatever color you want. Then, get to work on your custom plates!
For the first style, simply load up a brush with blue and white paints and drizzle back and forth to create those lines. The second style uses alcohol ink, which you can find for pretty cheap at any craft store. Wipe down the plate with rubbing alcohol and then add a few drops of ink and tip the plate to create any fun swirl pattern you like! The final one is pretty self-explanatory – use a stencil and your chosen color of paint. Finish everything off with a coat of sealant, and then hang your plates!
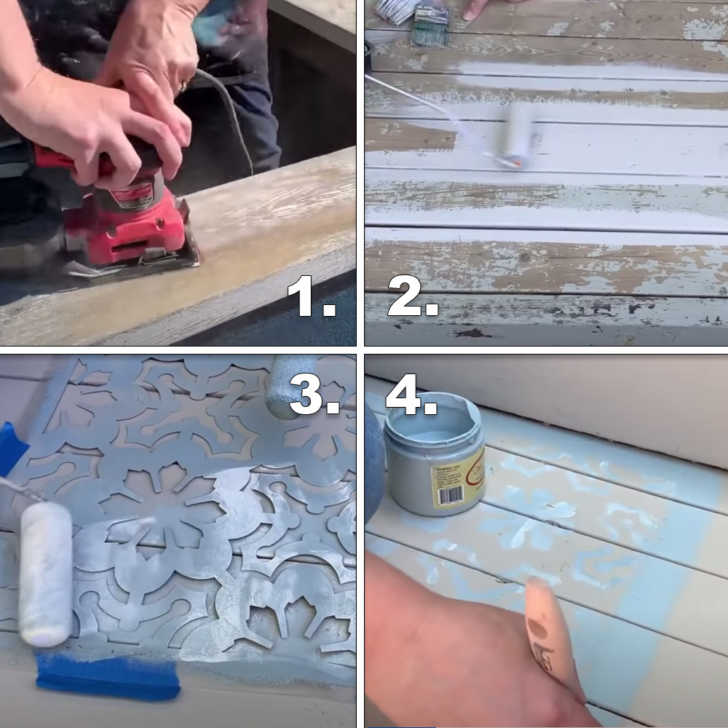
Porch “Carpet”
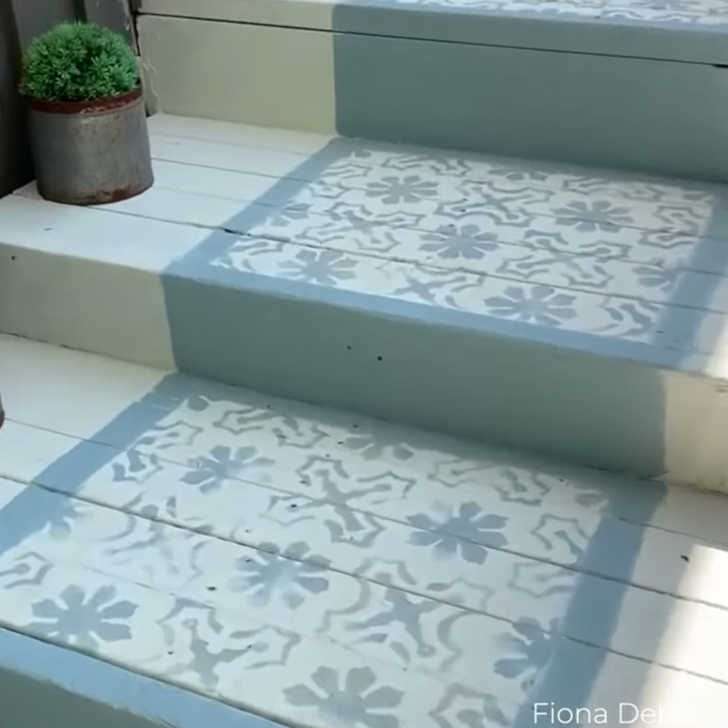
I’m not sure if this can be considered a true “carpet.” Maybe a path? A walkway? Whatever it is, I love it. If your deck is looking a little worse for wear, breathe some new life into it with a few coats of paint and stencils.
Start by sanding off your porch to ensure a nice even coat of paint. Then, do a solid coat or two of the color of your choice. Once dry, mark out where you want your “carpet” to go, and stencil it in! To get the cool faded effect, only lightly load your rollers so you don’t get full coverage. Work the stencil with two colors to complete the look. Finally, outline the edges of your path and then spray everything down with a wood sealant!
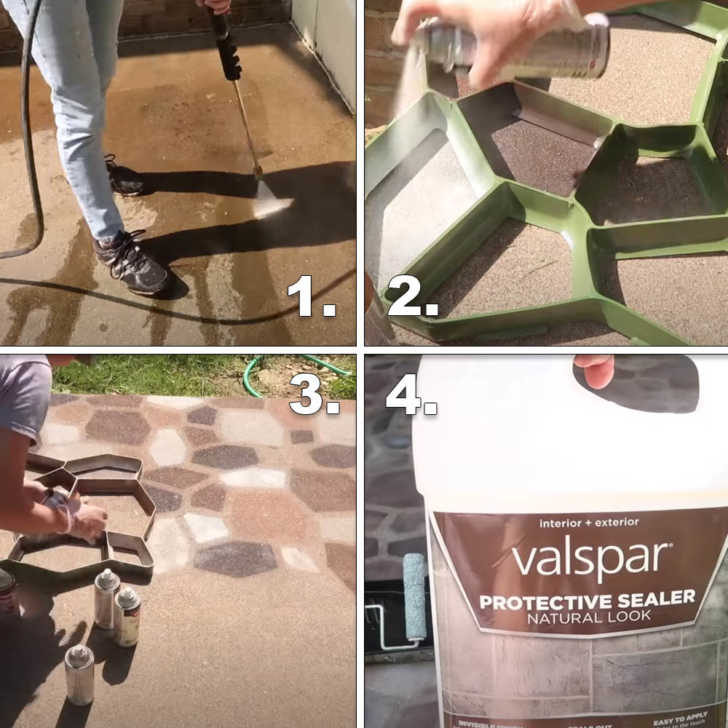
Faux Stone Porch
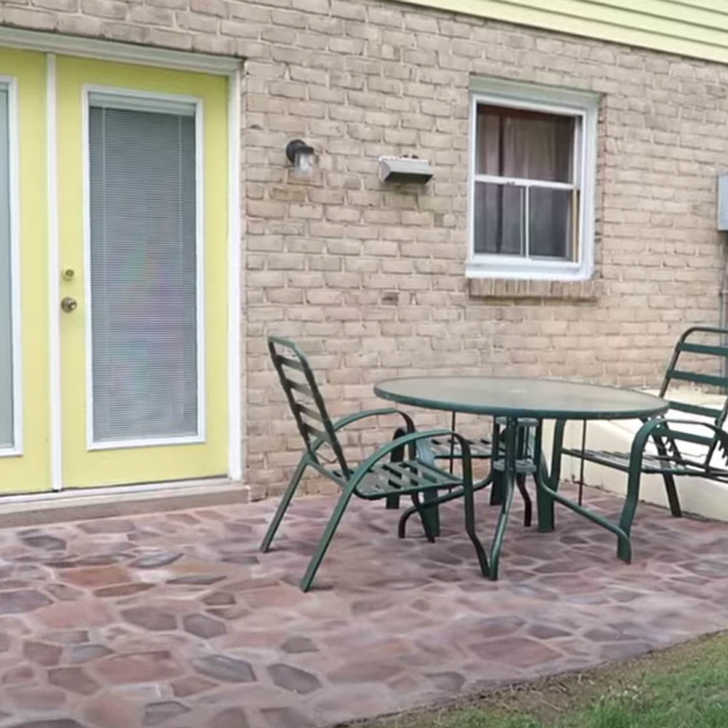
Want to upgrade the old cement patio, but don’t quite have it in the budget this year? Here’s a creative solution! You can grab one of these stencils or a similar one at any home improvement store. Then gather the colors of spray paint you want – probably some variation of cream, tan, and dark brown.
Once you have your supplies, start by washing off the cement patio. Once dry, place your stencil down and fill in the separate sections with different colors. Add a few layers of different colors to get more of a realistic effect. Repeat this process until the area is covered. Then, spray on a protective coat, and enjoy your “new” patio!
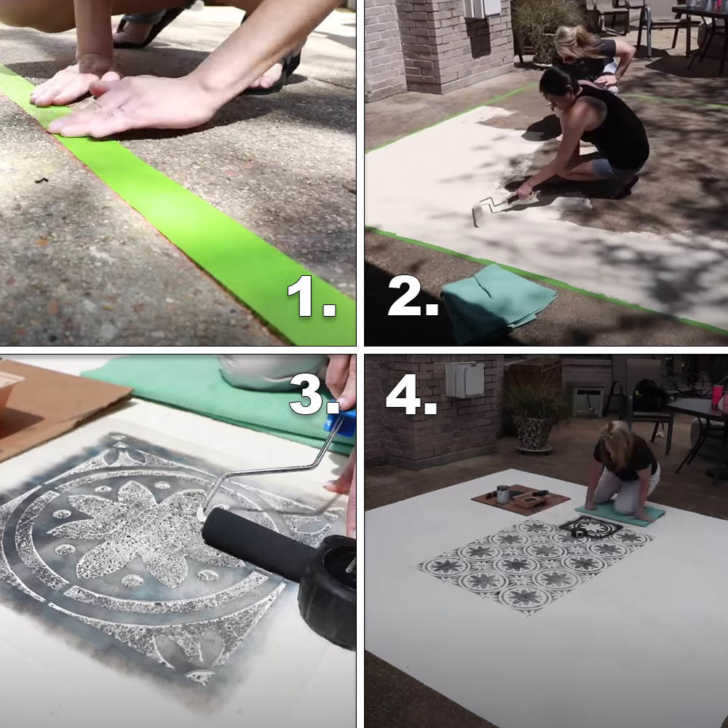
Stencil Patio Makeover
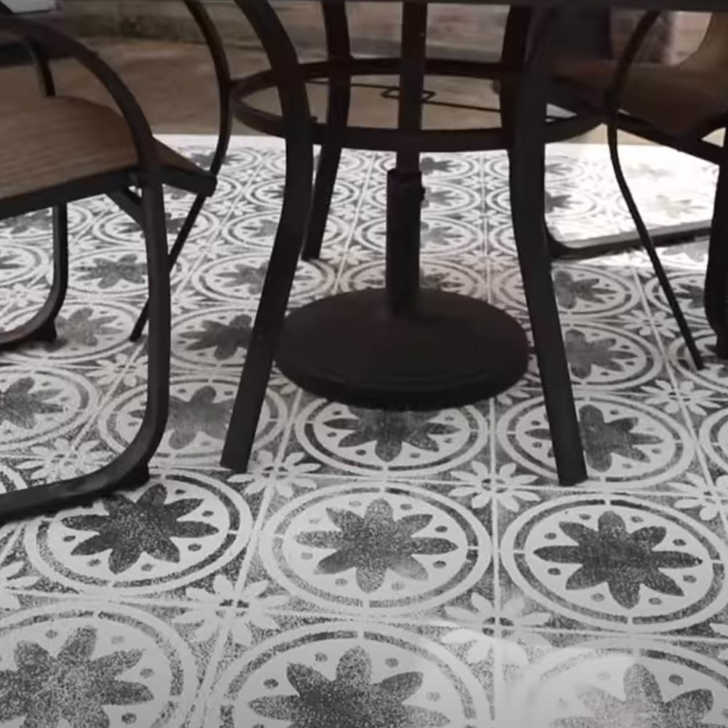
I love this idea! If you have a cement patio that is drab and boring, what better way to add some color and texture than to paint it! Start by marking off the edges of where you want your stenciled area. Then, paint a few coats of white (or your preferred color) onto the cement.
Once dry, use a stencil and a textured roller to fill up the marked off area. That’s it! Just a few coats of paint and a stencil will give your space a whole new look and feel.