
We’ve been stuck at home with all non-essential businesses closed down for a few weeks now. Or months? Years? What even is time right now? But, I digress. One of the businesses that have closed in most states is hair salons. While I don’t suggest doing anything extreme if you’re not a professional, most people can handle a little trim on their own, as long as they have the right tools and do their research. I’ve found several tutorials on how to give everyone in the family a little trim. Make sure to save this article for the next time your family needs a trim and you can’t make it to the hair salon!
Tools
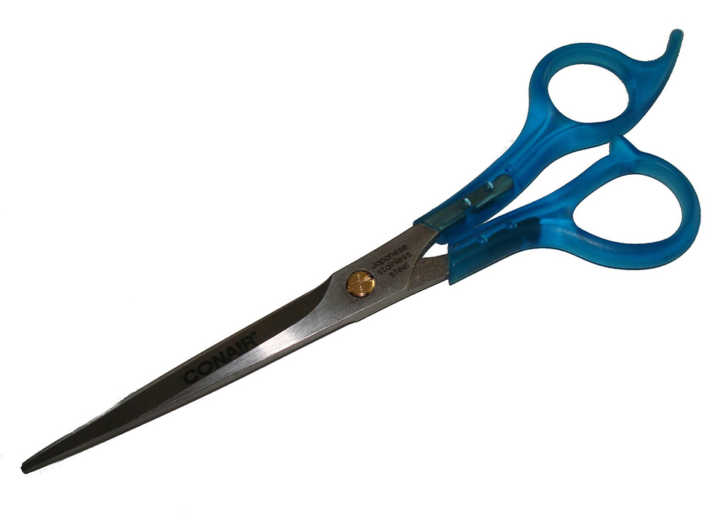
Let’s start with the basics. The most important tool to have is haircutting scissors. You can find these on Amazon, at Walmart, Target, and pretty much any big box store. Why are haircutting scissors important? Normal scissors are made to cut things like paper, which means the blades are bigger and more blunt and dull. Haircutting scissors have a sharper, finer edge, and they are lighter than regular scissors, thus making them easier to handle. Normal scissors will likely give you split-ends, and no one wants to deal with that!
You’ll also want a towel to drape around the person’s neck and shoulders to catch the falling hair, as well as either another towel or some newspaper on the floor to eliminate a mess. Do your haircuts in front of a mirror, like at the salon, and also keep a hand-held mirror to make sure you get everything nice and even. If you are trimming your child’s hair, consider giving them something to watch or a game to play on your phone to keep them from fidgeting.
Baby/Toddler Haircut
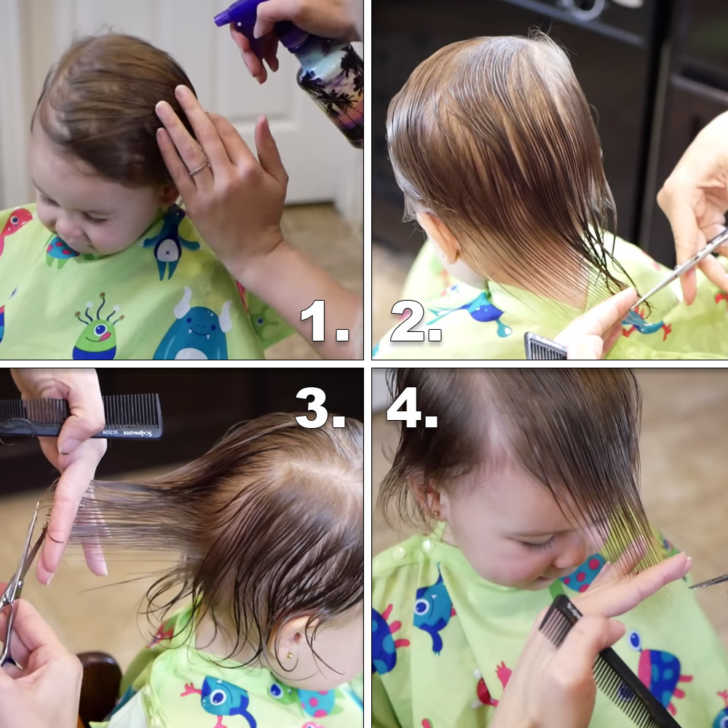
Start out by spritzing the hair and combing through it to make sure everything is evenly saturated with water. Then begin at the back of the head, tugging the strands lightly between your fingers until you get the desired amount you want cut off below your fingers. Cut a straight line that will be used as your reference point for the whole haircut.
From there, work in small sections around the back, always keeping a bit of the previous section in your hand to use as the guide. Then move onto the sides, blending the hair in and cutting according to the guide.
Once the ends are trimmed, it’s time to comb out verticle sections of the hair. You’ll notice that the guide you first cut at the bottom of the hair is still there. Use that as your guide to make verticle cuts. Finally, trim up the front of the hair in the same way, being mindful of where the part in the hair usually is. Get more details in the video below!
Boy’s Clipper Cut
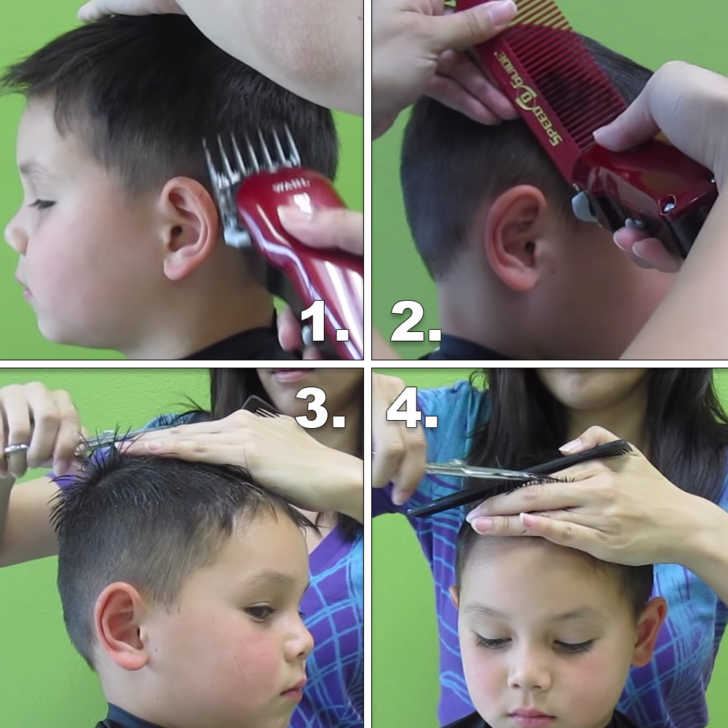
Start with a #2 clipper guard all the way around the back and sides – make sure the hair is dry. Then, take a flat top comb and hold it straight, not at an angle, and run the clippers across the comb. This will help the longer top to fade into the shorter sides and back.
For the top of the head, go ahead and wet the hair down. Make your base guide by combing hair up in the middle like a mohawk. Trim this to the desired length. Finally, starting at the front, grab small, horizontal sections and trim, using the part you already cut down the middle as a guide. Clean up any rough cuts by using the same fade technique as earlier. Get more info in the video below!
Girl’s Haircut
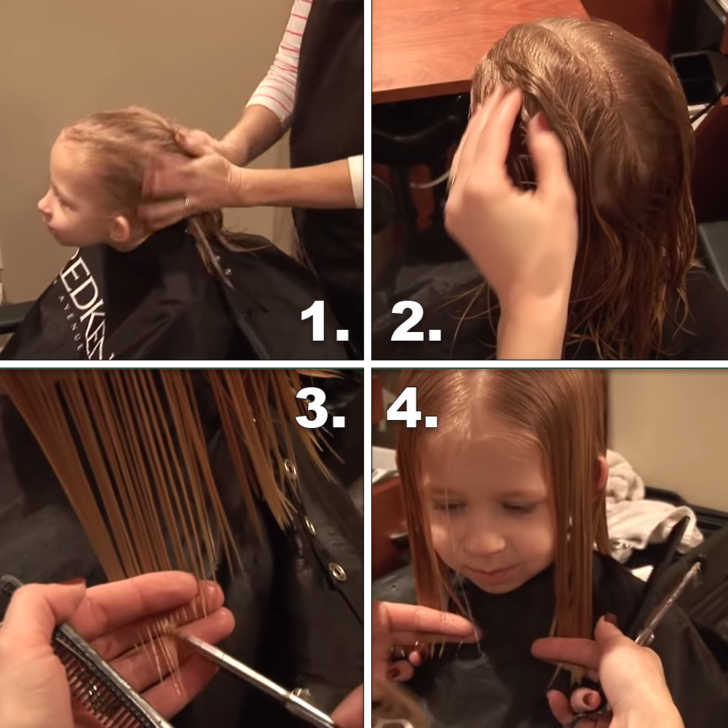
This is a super basic trim for girls (or boys with longer hair). With longer hair, it’s important to not only wet the hair down, but put some detangler or leave-in conditioner in the hair. Comb out the hair with a paddle brush and then a fine-tooth comb. It’s important to get all of the tangles out, otherwise you’ll have uneven hair later on.
Next, make a part in the middle. The easiest way to do this is to comb the hair straight back and then push it up slightly on the back of the head. This will cause the hair to part naturally. Then, starting in the middle back, take a small section of hair and trim it to the length you want. As with the other haircuts, you’ll use this as the guide as you continue to work your way to the sides of the head. Continue trimming until you’re all done! The final step is to check and make sure the sides are even. If you see any long strands, trim those down to the guide. See how it’s done in the video below!
Men’s Haircut
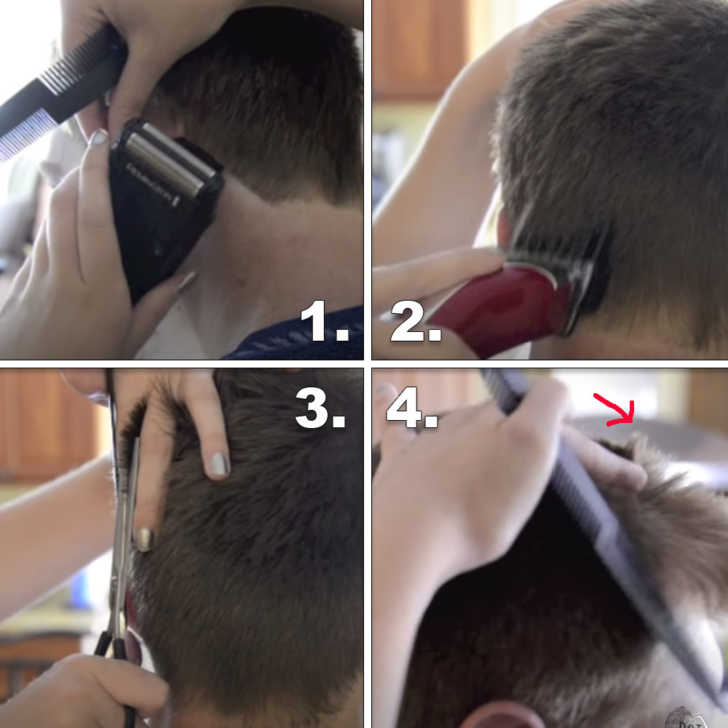
Start off trimming the edges with a razor. Be careful not to cut too far into the hairline. A good rule of thumb is to look at where the hair starts to thin, and then cut up to the line. Be sure to get behind the ears. Next, switch to clippers. In the video below, they used #5 clipper guard, but you can make it shorter or longer depending on your preferences. Use the clippers on the bottom of the head, lifting them up and away once you feel where the head curves in.
Next, switch to scissors. Like in the previous tutorials, start by creating a guide vertically. Use this to trim the top and sides. Finally, cross-check the hair by grabbing sections horizontally and trimming off any longer pieces. Get the full tutorial in the video below!