How to Reverse Sear Steak

If you love a great-tasting and juicy steak cooked with precision at home, then the reverse sear method is a must because the steak satisfaction is almost unparalleled. Using the reverse sear method is arguably the best way to cook a quality cut of steak and get the same result every time. The process has been a juggernaut for everyone who loves to eat beef: chefs, grill-masters, home cooks, and the beef industry at large have been praising the virtues of reverse sear at an ever-increasing rate.
Slow-cooking large pieces of steak, then achieving a crunchy, tasty crust from a final searing makes for an epic eating experience that’s right up there with what you can pay for at the best fine dining steakhouses. The goal is to achieve a perfect edge-to-edge medium rare without any gray or overcooked gradient through the cut you use, whether it’s sirloin, filet, NY strip, rib eye, or wagyu. Reverse searing changes the traditional method of cooking restaurant-style steaks.
Why Reverse Sear?
Cooking the perfect steak can be a round-the-clock pursuit for meat-loving foodies and home cooks, especially with the internet and social media chasing the ideal of perfection. The reason for the heightened popularity of reverse searing is simple. You can get perfect doneness and a delicious, brown crust every time when you cook thick steaks – from 1.5″ – 2″ thickness – or quality cuts with a high fat content such as wagyu and ribeye.
By using the reverse sear method you need not rely on quirky kitchen techniques, knowledge of specialized equipment and gadgetry, or superstition and guesswork to get the job done. You can cook your steaks perfectly with a straightforward, transferable, and reliable process that rivals the best cuts at steakhouses money can buy.
What Happens During Reverse Sear?
Instead of searing at high heat, and then cooking at a low temperature to finish the steak to the ideal doneness, the order is switched. The steak gets cooked low and slow to bring it up to the desired temperature, then is finished off at a high temperature to create a decidedly crispy outer layer of your steak. This browning, crisping effect comes from the Maillard Reaction. Merriam Webster defines the Maillard Reaction as “a nonenzymatic reaction between sugars and proteins that occurs upon heating and that produces browning of some foods (such as meat and bread).”
Reverse sear is a cooking technique you can do indoors using the oven, or you can use the barbecue for a smoked and barbecued finished steak. Either way works brilliantly, with only slight differences between both techniques.
The Reverse Sear Process

In a few simple steps, you can cook a delicious steak – for me, medium rare from crisp edge to crisp edge – using the reverse sear method.
1. Thaw the meat completely, or you’ll strike trouble quickly. It may take a lot of time for those big cuts, so be prepared and plan ahead.
2. Seasoning. Make sure moisture has been removed from your steak by drying with a paper towel, then season according to your taste. If you’re seasoning over time (12-24 hours), ensure that you bring the steaks back to room temperature before you begin cooking them.
3a. In the Oven (low and slow).
This clip from leading meat purveyors Omaha Steaks shows you the way to go:
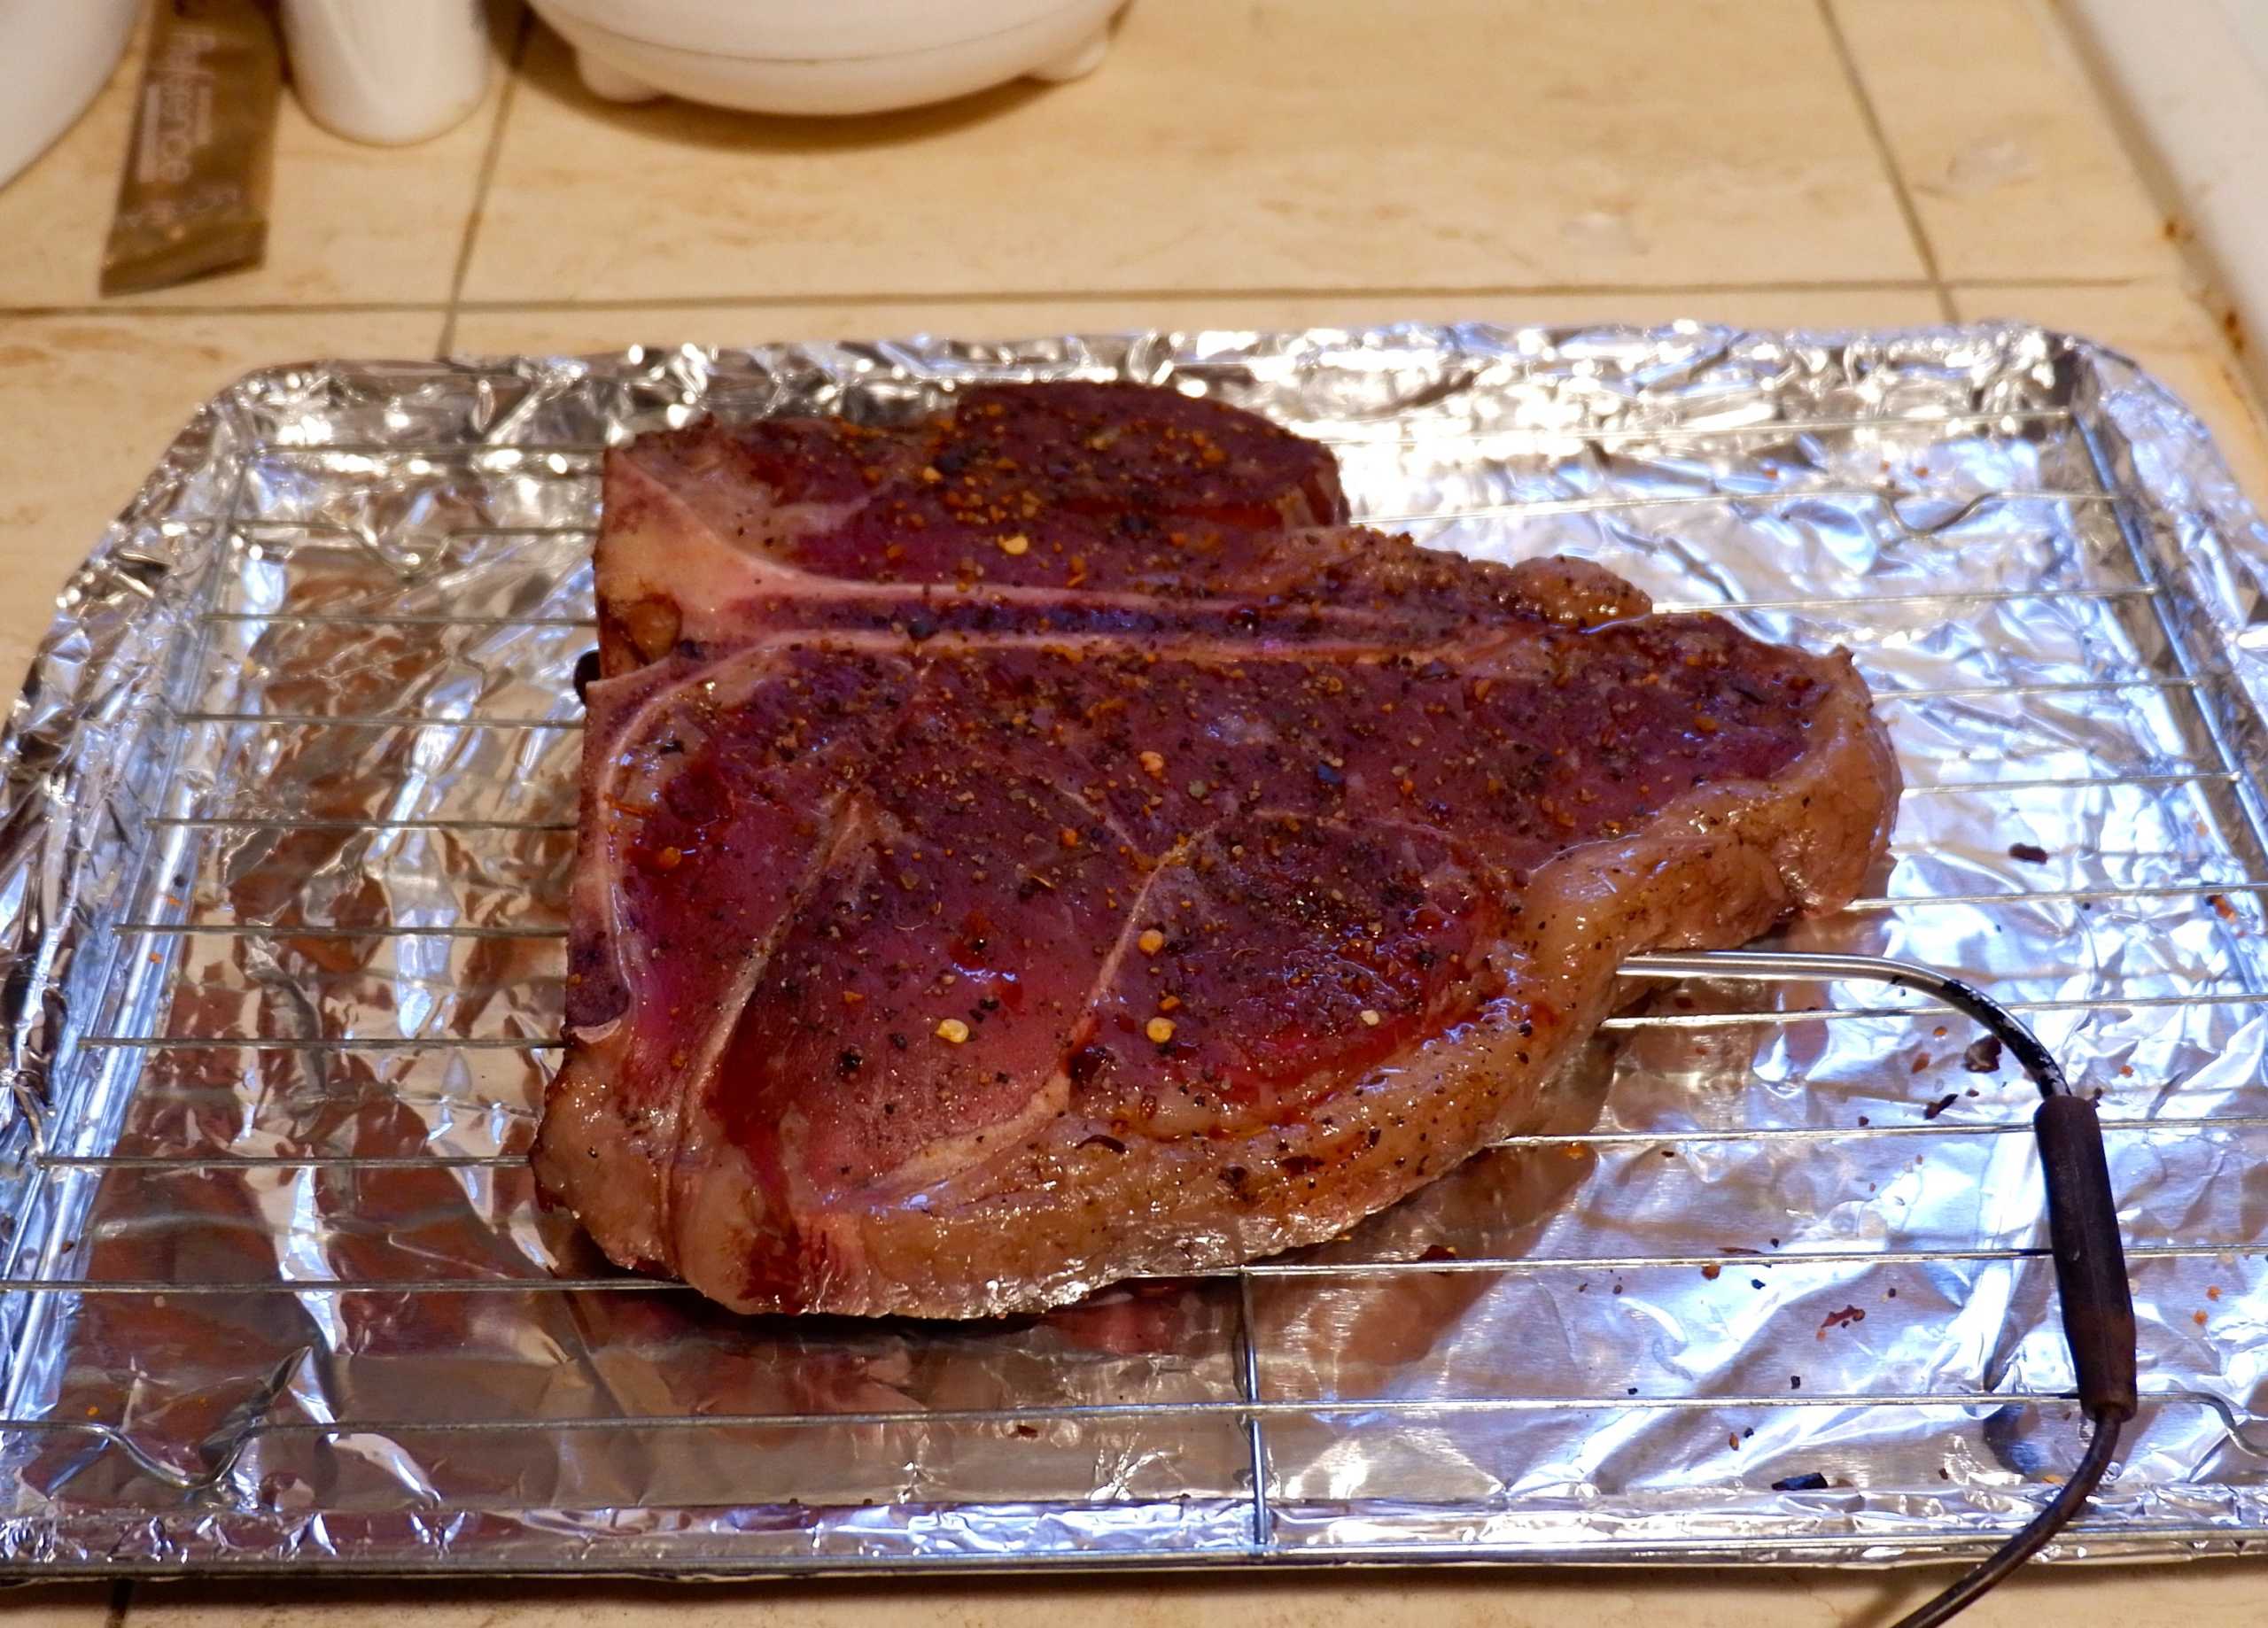
- Preheat your oven to 250F
- Place the steaks on a baking rack for better airflow around the beef
- Cook until the internal temperature is 10 degrees below your desired doneness (the searing will get the extra degrees)
- Use a quality meat thermometer and after 20 minutes, then every 5-7 minutes after
3b. On the Grill (low and slow)
Check out this clip from All Things BBQ for a great visual guide:
- Set up two cooking zones.
- If using a gas grill, turn on half your burners so that one side of the grill has fire and the other does not.
- On a charcoal grill, move all your coals to one side of the grill and leave the other side empty.
- Let the temperature reach approximately 225F-250F, then place as far from the lit side of the grill as possible and close the lid. Make sure to check frequently, and flip your steaks!
4a. Sear on the stove.
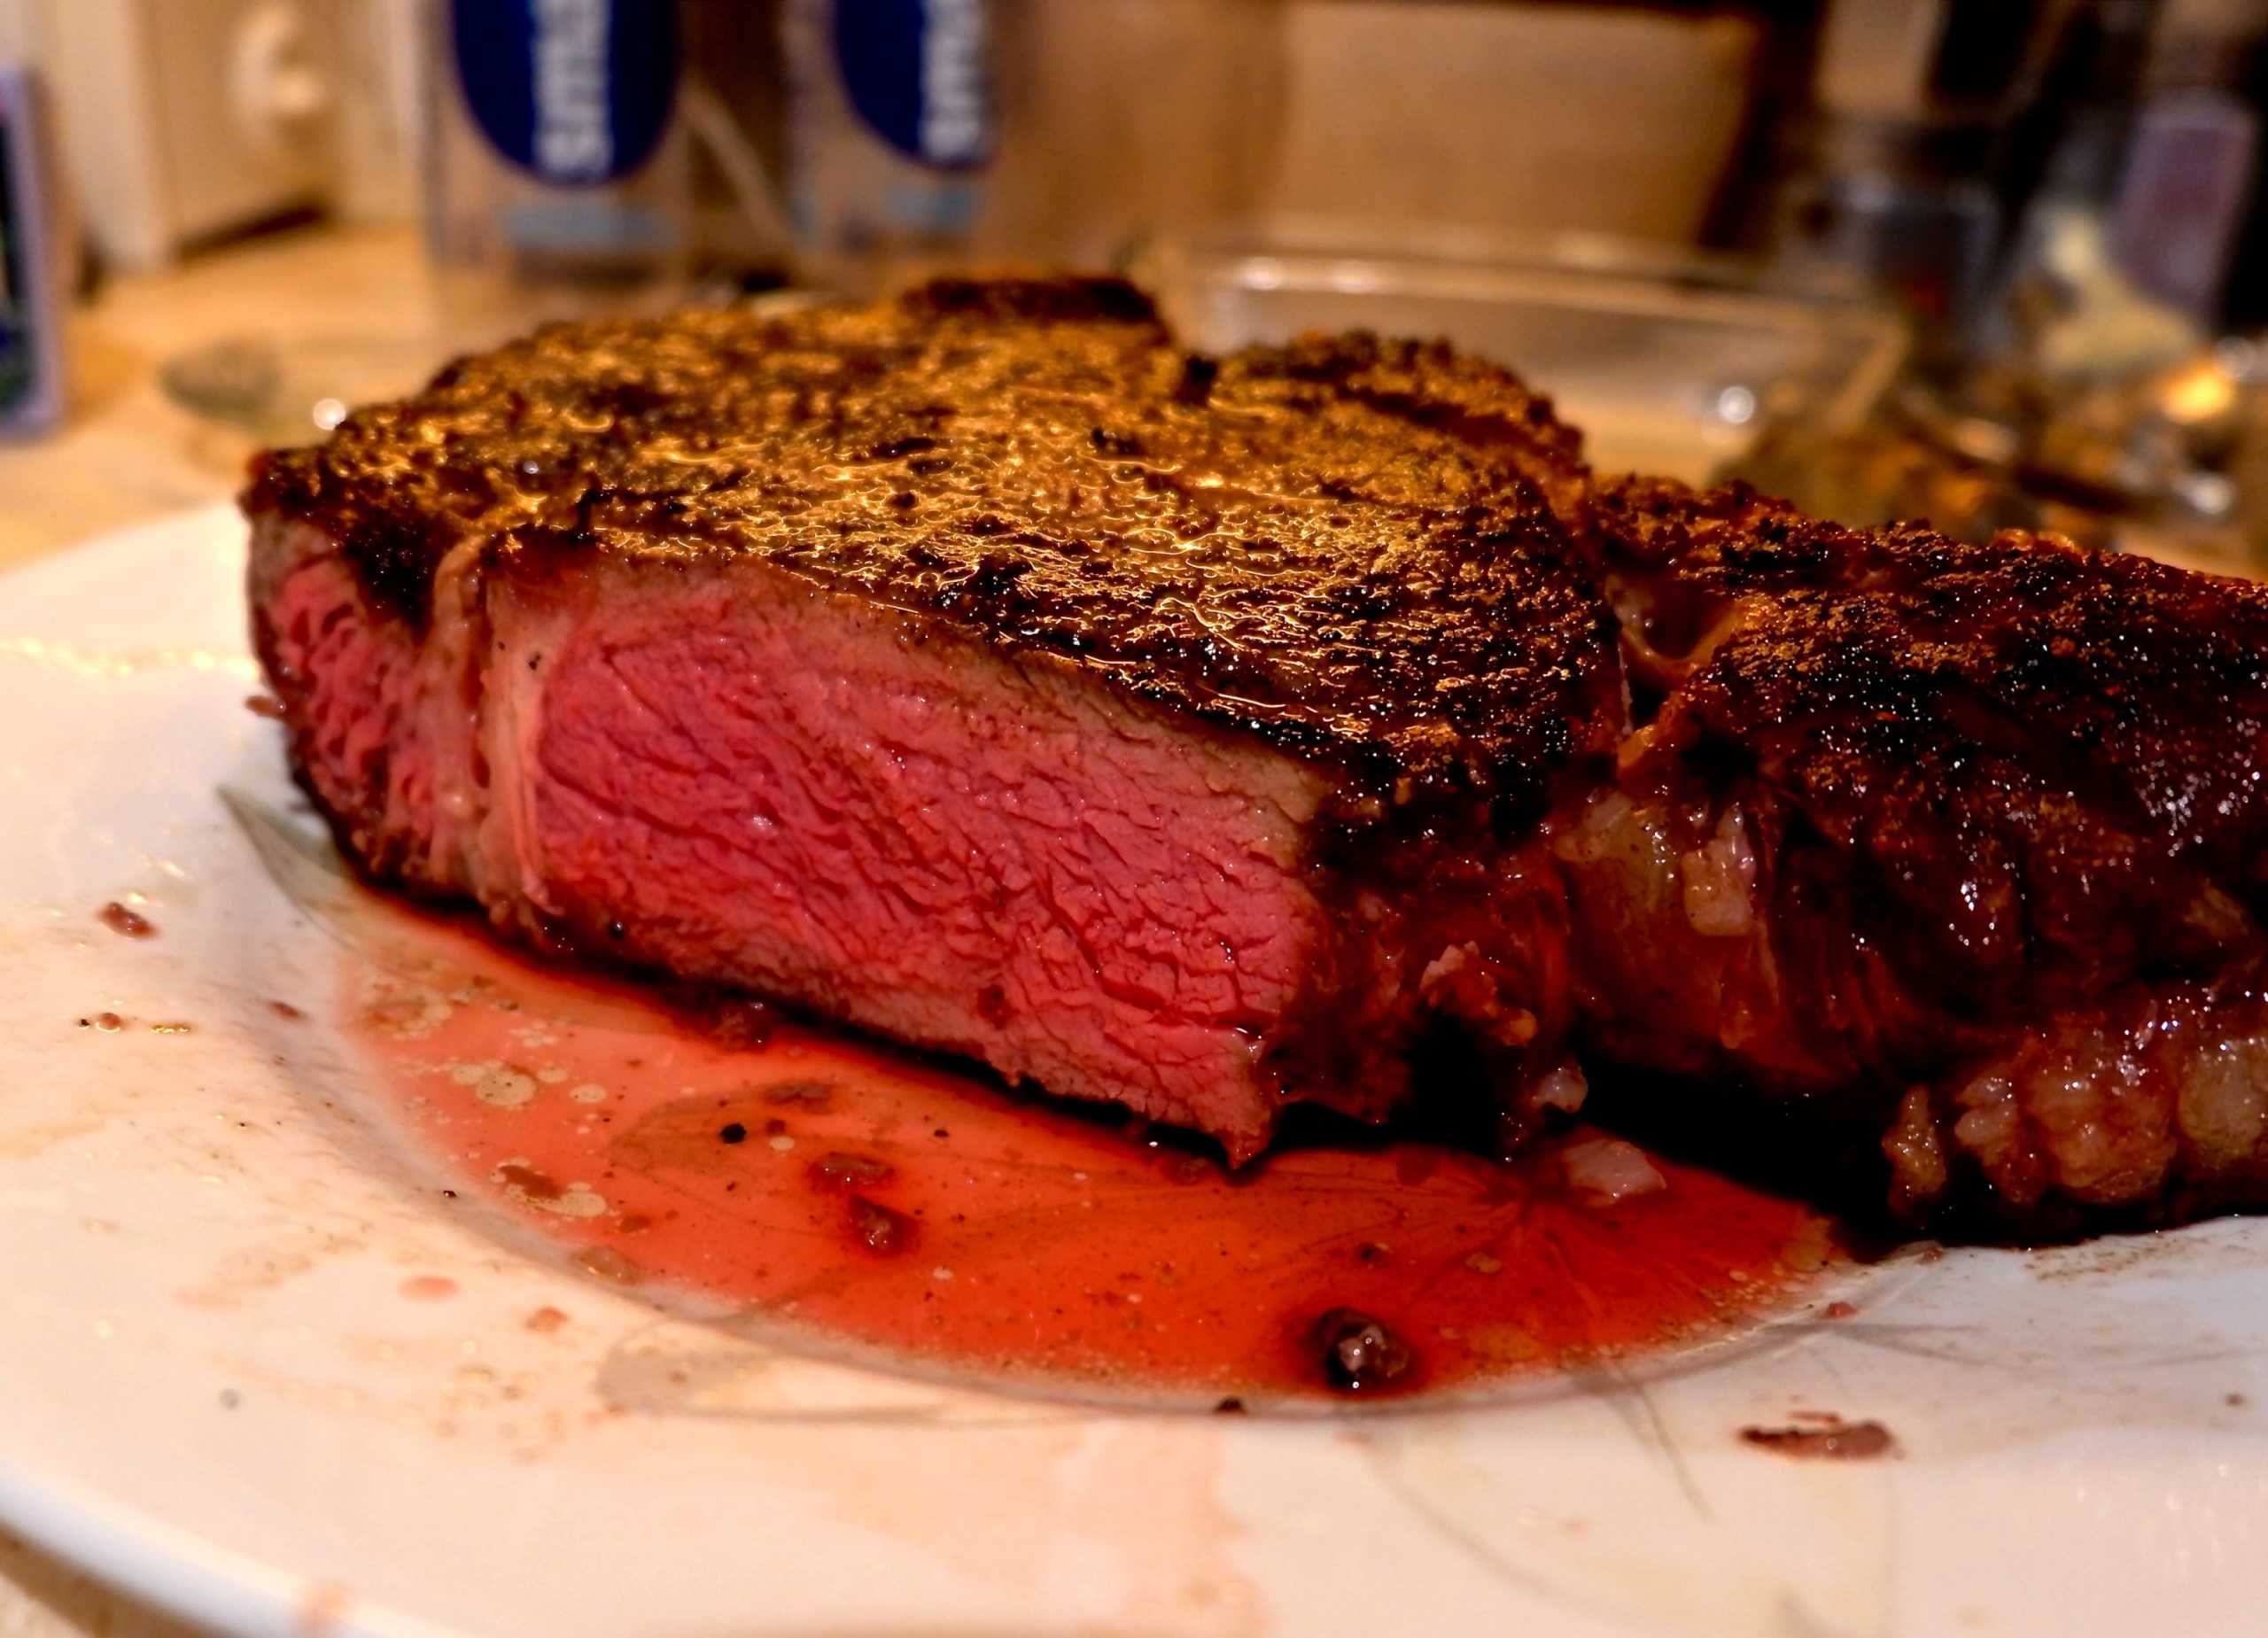
When the steak has reached a desired temperature, remove them from the oven and set aside. Put your skillet on high heat. Sear the steaks (using a small amount of oil in the pan) for 2 minutes per side, flipping three or four times. The steak will be done when each side has a nice brown crust, and a bit of crunch.
4b. Sear on the grill
Place your steak directly over the hottest part of the grill to sear it. Flip every 30 seconds until the desired crust develops, and the right internal temperature has been reached.
5. Rest, then eat!
Rest the steak for at least five minutes before eating to redistribute the meat’s juices more evenly.
Conclusion
Using the reverse sear method to cook steaks is an extremely reliable way to cook them perfectly, no matter the cook top and your familiarity with the equipment. Once you start cooking steaks using reverse sear, you won’t want to go back to simple grilling!