I’m all about decorating for the seasons, and there’s no doubt that fall is upon us. With that comes Halloween! It’s been a long time since I’ve trick-or-treated, but that doesn’t mean I can’t deck out my home with cute, clever DIYs, right? Right. So, let’s get down to it. I have a few awesome DIYs that only use supplies from Dollar Tree. It doesn’t get much more budget-friendly than that! Go ahead and check out these ideas and get more info on each project in the video below.
Faux Knitted Pumpkin
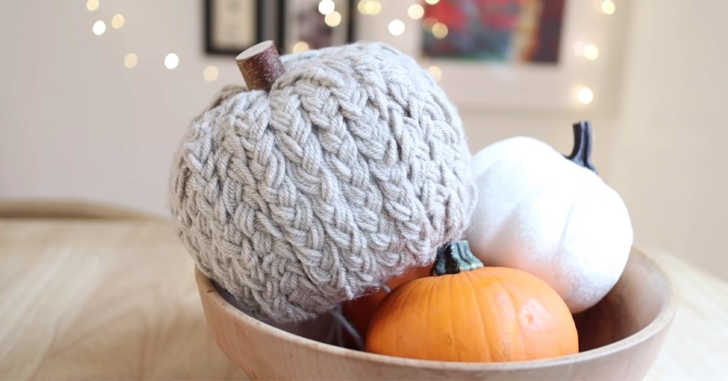
First of all, I absolutely LOVE how this turned out! I’ve seen similar products for $20 each on Etsy, but this one is a fraction of the cost. All you need is a foam pumpkin from the dollar store, some yarn, cheap acrylic paint, and a hot glue gun. Depending on what you already have on hand, the total cost of this DIY is about $3.
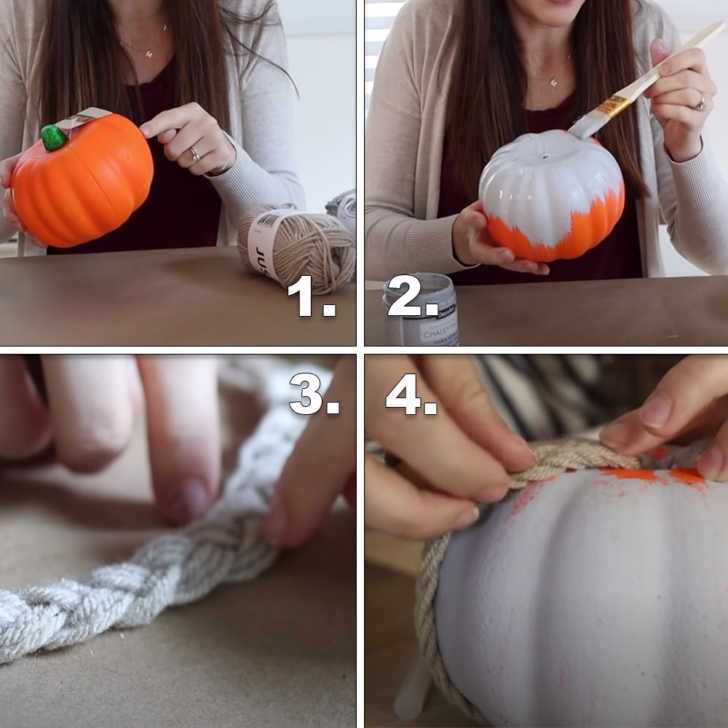
Start by removing the stem from the pumpkin. Paint the pumpkin a similar color to the yarn you’re going to use. While it’s drying, go ahead and cut several strands of yarn. To get the faux knitted look, simply braid the yarn, using 9 strands for each braid. Next, cut a hole in the bottom of the pumpkin and hot glue one end of your braid inside the hole, then wrap it around the pumpkin, placing a few dots of hot glue along the way. Repeat the process until the pumpkin is covered! All that’s left to do is either reattach the old stem or replace it with a wooden one, or even a wine cork.
Skeleton Lantern
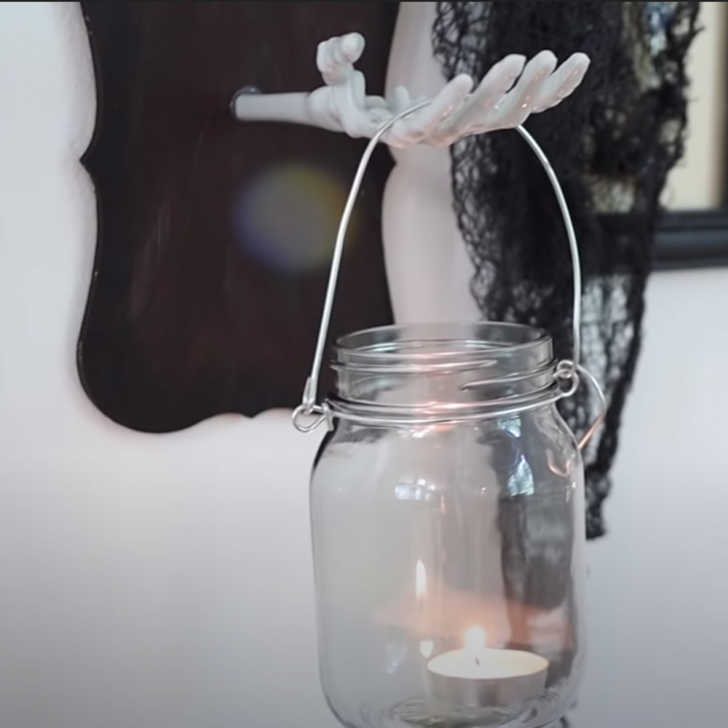
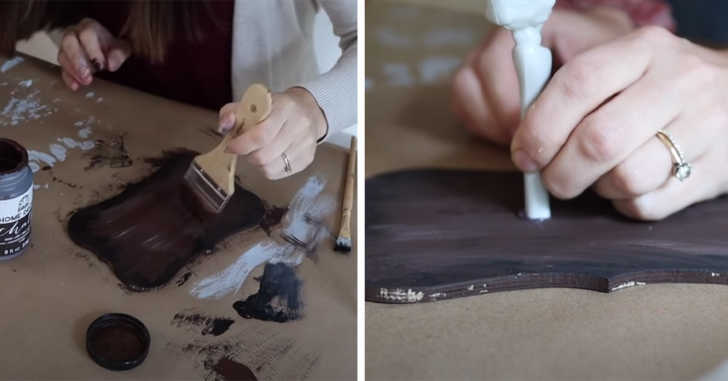
This is one of the easiest DIYs, but I love the end result! Grab a wooden plaque, a plastic skeleton arm, a hanging lantern, and a tea light. All of these items should be available at your local dollar store.
Start by painting the plaque. You can go with black, white, a pattern, whatever you want. Then, cut the plastic arm down to size. It should be pretty easy to trim with a serrated knife. Next, place a dot of heavy-duty glue like E6000 in the center, then surround that dot of glue with a ring of hot glue. Attach the arm and let dry. You don’t have to use the hot glue if you don’t want to mess with so many kinds of glue. The reasoning behind it is that the E6000 glue is very strong, but takes forever to dry, whereas the hot glue dries quickly but isn’t as strong. If you use both, the hot glue will dry and hold the arm in place while the industrial-strength glue has time to dry. All that’s left is to place a tea light inside your lantern and hang it!
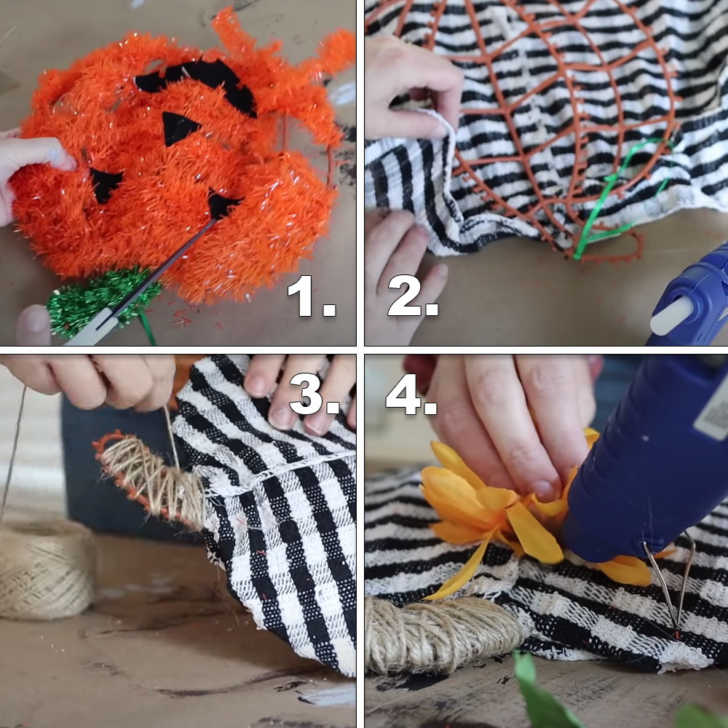
Garland Pumpkin Makeover

I absolutely adore this DIY! We’ve all seen the garland pumpkins sold at pretty much every retailer this time of year, but I love the cute and clever makeover this one got. Start by cutting away all of the garland until you have just the frame left.
Next, grab a cute dish towel and cut it down to size. Begin tucking the fabric around the wire frame and hot gluing it in place. Once that’s done, wrap the stem in twine. From there, you can really decorate however you want! Fall foliage, a cute chalkboard, etc.
DIY Garland
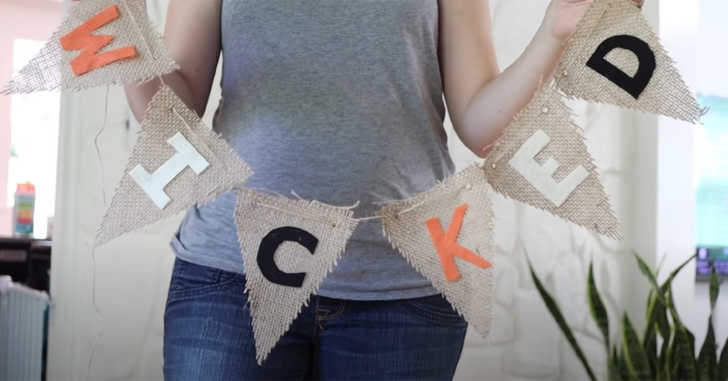
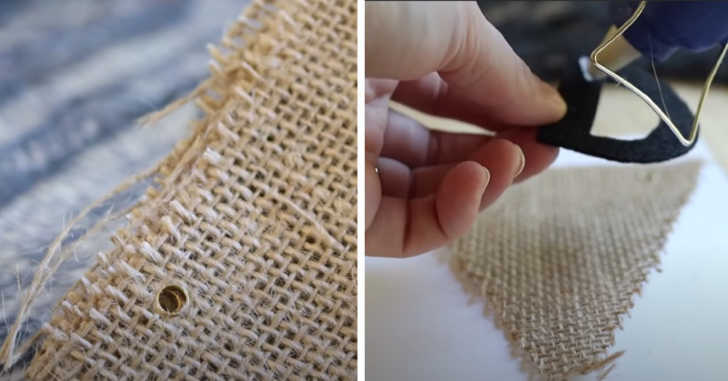
Last but not least, we have a cute, customizable garland. This is such a simple DIY, but good to keep in your back pocket. So often I’ll be shopping for cute decor and see something I love, but with a different word than I would like. This DIY shows us how easy it is to make our own!
Grab a burlap triangle garland and some festive felt sheets. You guessed it – cut out the letters you want and glue them on. Here’s a little tip about cutting out letters: Start with the same size squares for each one. Make simple, straight cuts whenever possible, keeping the same basic size for each letter.