10 Home Repair Hacks You Need To Know!

Owning a home is a wonderful thing – and a huge responsibility! At any given moment there are probably at least a dozen little things that need to get fixed around the house. From the toilet that won’t stop running to a hole in the wall, and everything in between. Sometimes making ends meet while paying off the mortgage is hard enough, let alone paying a professional to come in a work on these projects. The good news is, a lot of minor home repairs are easy to do yourself! So grab a friend and get to repairing your home this weekend with this easy list of tips and tricks from the pros!
10. Repair A Hole In The Wall
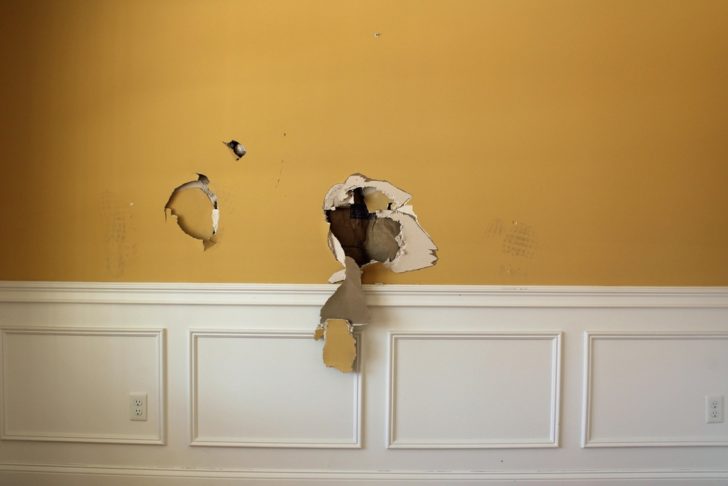
We’ve all probably gotten a hole in a wall, one way or another. Whether you decided to “toss” a textbook onto the bed only to miss and have it crash into the wall, or your husband got a great idea to move a massive bookshelf to the other room without any help and it inevitably ended up crashing into the wall, or… any other way people get holes in walls, the fact is that the hole is there, and it’s ugly. In this easy to follow tutorial from The DIY Playbook, we learn how simple it is to repair a hole in the wall. You’ll just need a few basic supplies: mesh tape, razor blade, spackle, paint and primer, and a sanding block. The process is pretty simple – a couple layers of mesh tape, followed by spackle and sanding the area down. Then, paint away, and you’re good to go!
9.Fix Chipped Concrete Steps
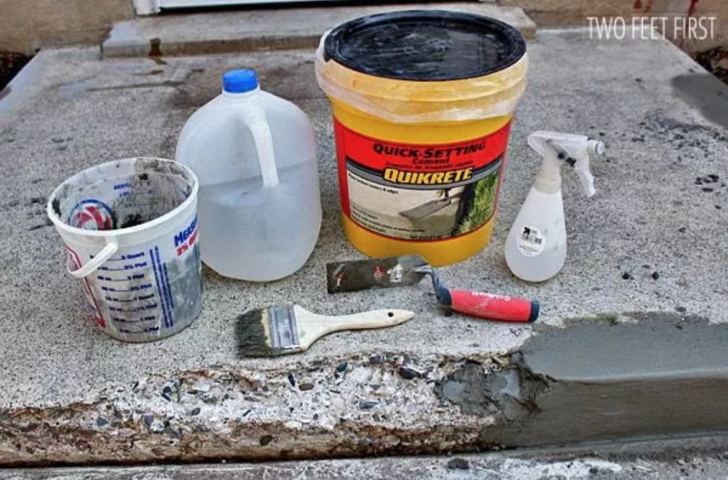
If you have concrete steps in your front or backyard, you’ll know the ongoing battle of keeping them up! Once that first crack shows, it only gets worse year after year as the water freezes and expands during the winter months, then melts and contracts during the spring and summer. It can be hard to get control of! Plus, usually, things like back porch steps are pretty low on the priority list when it comes to home repairs, but don’t put this one off any longer! Repairing concrete stairs is actually a lot easier and cheaper than you might think. In this step-by-step tutorial from Two Feet First, we see how to repair concrete with some cement, water, a putty knife, and a wire brush.
8. Restore Hardwood Floors In 5 Minutes
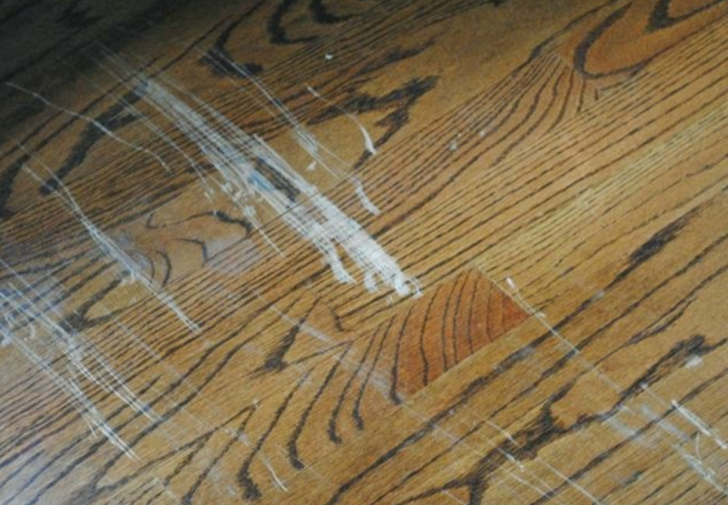
One of my first apartments had beautiful hardwood floors that I loved. What I didn’t love? When my roommate brought home a 65-pound dog full of energy and rebellion. After a year of playing run-around-the-apartment-and-scratch-up-the-floors, as well as normal wear and tear (it wasn’t all the dog’s fault, after all), I was sure we would never get the deposit back on the apartment. I tried several different methods of cleaning up the floors and eventually gave up. I wish I would have known about this little trick way back then! According to The Chronicles of Home, all you need is a can of Restor-a-Finish and a roll of paper towels. Simply pour some of the finish on the scratches, then rub it into the scratches with a paper towel. Then use a dry paper towel to pass over the area several times. It won’t make deep scratches disappear, but it will significantly reduce the eyesore of scratched floors! Plus, it really does work wonders on small scratches. See for yourself!
7. Fix A Stuck/Uneven Door

We all have that one door that gets stuck all the time. And if you don’t have an uneven door now, chances are you will at some point, so this is good info for everyone to know. The first place to look for trouble is the screws on the hinges. If the screws are tight, do a visual inspection when the door is closed. If you can see the gap go from wide to narrow, it’s probably due to a hinge that has worn down over time. See how to fix this quite easily with this tutorial from homespothq.com!
6. Caulk Like A Pro
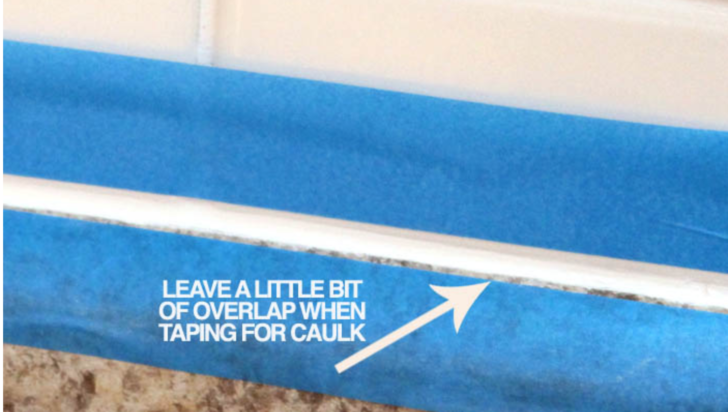
Have you ever taken on a caulking project? Whether it was for a backsplash in the kitchen, redoing the tile in the bathroom, or installing new windows, caulk is definitely one thing the home repair DIYer always has on hand. However, sometimes the caulking ends up looking sloppy, especially if you’re just starting out and haven’t used this product before. A quick and super easy tip from How To Nest For Less tells us to use painter’s tape when caulking. How genius is that?! I can’t believe I’ve never thought of that before, but next time I’ll know!
5. Repair Garage Door Dents
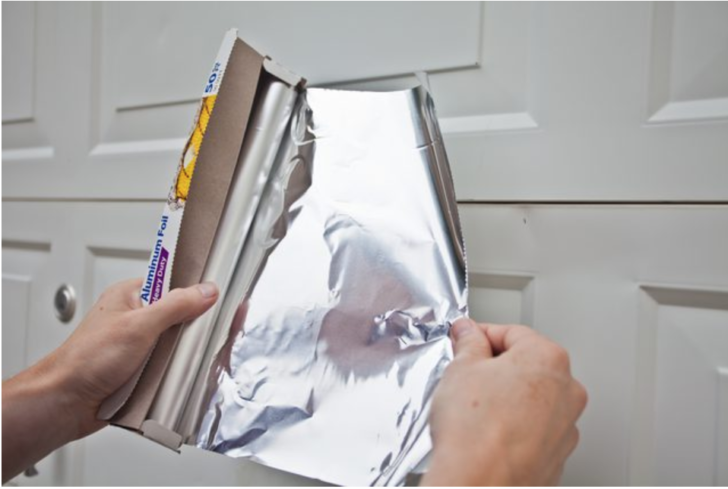
Aluminum and steel garage doors have their pros and cons. On one hand, they are relatively maintenance-free, but on the other hand, they can dent easily. Lucky for us, this easy tutorial from hunker.com shows us one easy trick the pros use on dented cars that works just as well on garage doors! First things first – clean the dented area with soap and water and allow to dry for at least an hour. Then, cut a piece of aluminum foil that is big enough to cover the dent. Set the foil over the dent and hold with your hand. Move a lighter back and forth over the dent for a minute, and then take a compressed air canister and flip it upside down and spray the area for 30 seconds. The temperature difference between the lighter and frozen compressed air will force the dent to “pop” out!
4. Fix A Chipped Sink
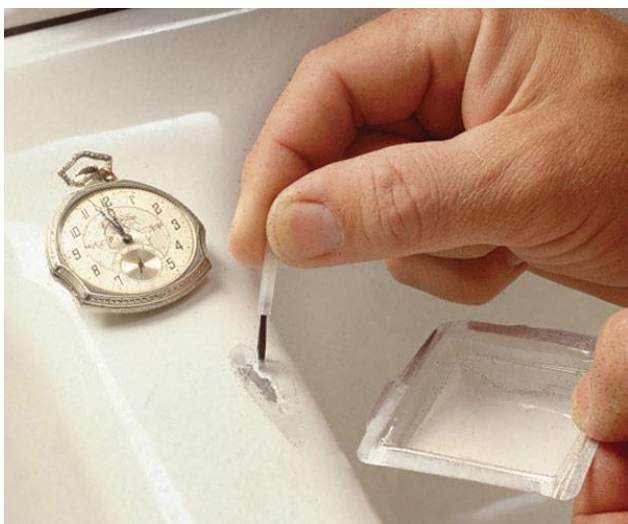
Chipped enamel on sinks or tubs can be unsightly and so frustrating to deal with. You don’t have to replace the whole thing just because of a few chips – with this helpful tutorial from Family Handyman, see how you can fix it yourself for less than $20! You’ll need an Epoxy repair kit, which can be found in the adhesive section of most hardware stores. There are several color options available and you can mix colors to get the perfect match, if necessary. You’ll also need a small brush and some wet/dry sandpaper, 400 or 600 grit. Start out by scrubbing the area with a sponge and soapy water, and rub the sandpaper over the damaged area to remove dirt. Then, just mix the epoxy according to directions and use a brush to fill in the gap. You’ll need to work in layers, and be respectful of the dry time according to the package.
3. Repair A Sagging Fence
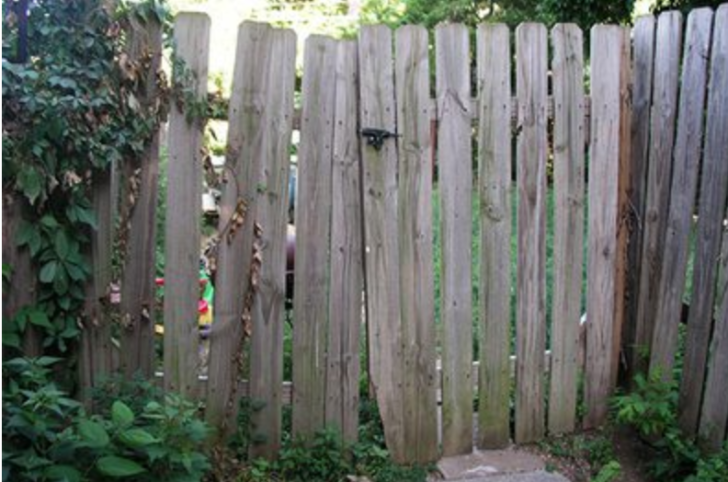
Does this look familiar? I grew up on a farm where some part of the wooden fence was in desrepair. It really feels like a huge undertaking to fix a fence – either that or pay way too much to have someone else come and do it for you. But, as you’ll learn in this awesome tutorial from ehow.com, it’s usually a lot easier than it looks! Instead of going through and replacing each plank of wood, you can usually save the structure of the fence simply by resetting some bolts and hinges, and a few strategically placed reinforcement planks.
2. Fix Torn Drywall Paper

If you’ve ever tried to remove the trim in your house and didn’t score the trim enough (or at all), you’ll find that the paint pulls the paper right off of your drywall, and you’re left with an unfortunate looking wall. Your first instinct might be to just paint over the ripped paper, but wait! It’ll look terrible (trust me). Plus, there’s an easy way to fix the torn drywall paper. First, cut off the loose edges, even if that means cutting off a significant amount of the paper. Then, sand it all down. Prime the area and use a joint compound. Sand again. Repeat the joint compound and sanding steps as much as necessary to build the wall back up, and end with a coat of primer to seal it all in. See the full tutorial at mresdoitherself.com!
1. Popcorn Ceiling Makeover
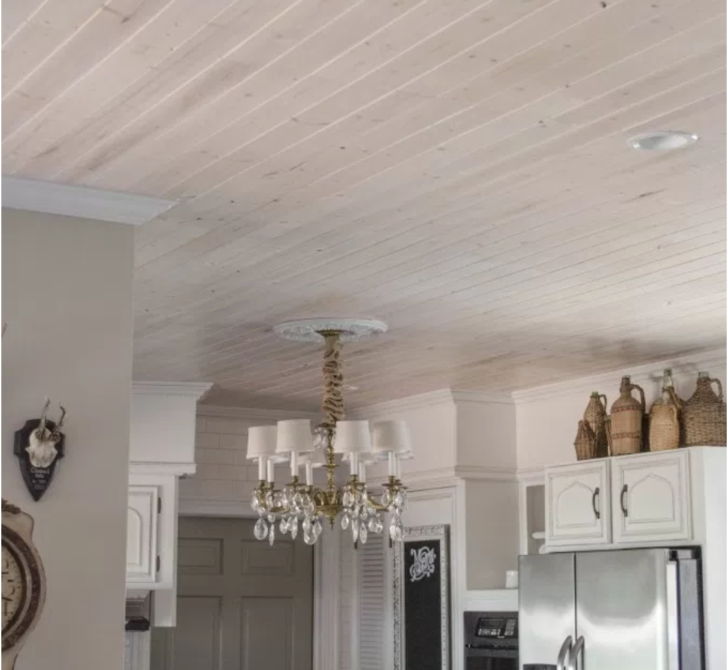
Pretty much everyone knows the pain of the popcorn ceiling. It’s fine for an apartment or a temporary living situation, but it’s such a hassle to keep clean and after several years of wear and tear it start crumbling and leaving lots of dust around. Not to mention… it’s not very attractive! In this amazing DIY from edithandevelynvintage.com, see how this lady transforms her popcorn ceiling into a gorgeous planked ceiling for under $300! Plus, there’s no need to scrape off the old popcorn texture – win-win!
Click Next Page to see our favorite home cleaning tips!