5 Ways To Upcycle Valentine’s Day Candy Boxes

Valentine’s Day has come and gone. Whether you were gifted chocolates or bought them for yourself, chances are, you have a few empty candy boxes floating around. Instead of tossing them, check out a few ways to upcycle these containers. You might be surprised what all you can do with a heart-shaped box!
Jewelry Organizer
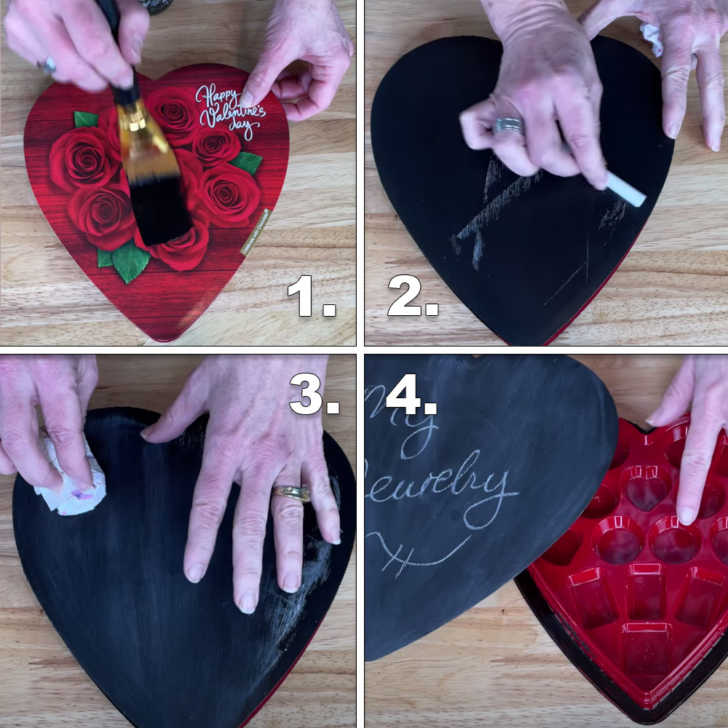
This is such a cute and easy idea! The only materials you need are a heart-shaped box (or any box), chalkboard paint like FolkArt, Waverly, or Craft Smart, and some chalk. Start by cleaning off the surface of your box and letting it dry. Then, paint at least two coats of chalkboard paint on the front of the lid.
Once the final coat is dry, make sure to cure the chalkboard paint. To do this, just lightly rub chalk over the entire surface and then erase it. This will ensure whatever you write on the paint will erase properly. After that, it’s simply a matter of writing on the front and using the inside slots to organize! The example above shows the box as a jewelry organizer, but you could just as easily use it for office supplies or any other small items.
Picture Frame
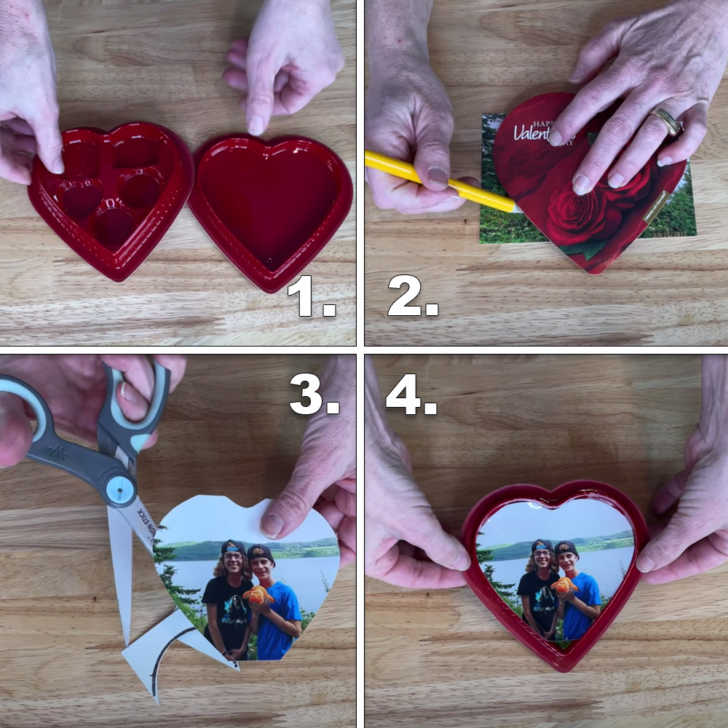
How cute is this? I love how easy this DIY is. Start by selecting the photo you want to use. Place the lid of the box over the photo and trace around the edges. Cut the photo out and press it inside of the lid. It should stick there on its own, but you can also put a dab of glue if you prefer.
There are a few ways to display your new photo frame. You can attach a command strip and hang it on the wall, attach magnetic strips to the back and place it on your fridge, or make a stand out of cardboard and set it on a table.
Gift Card Holder
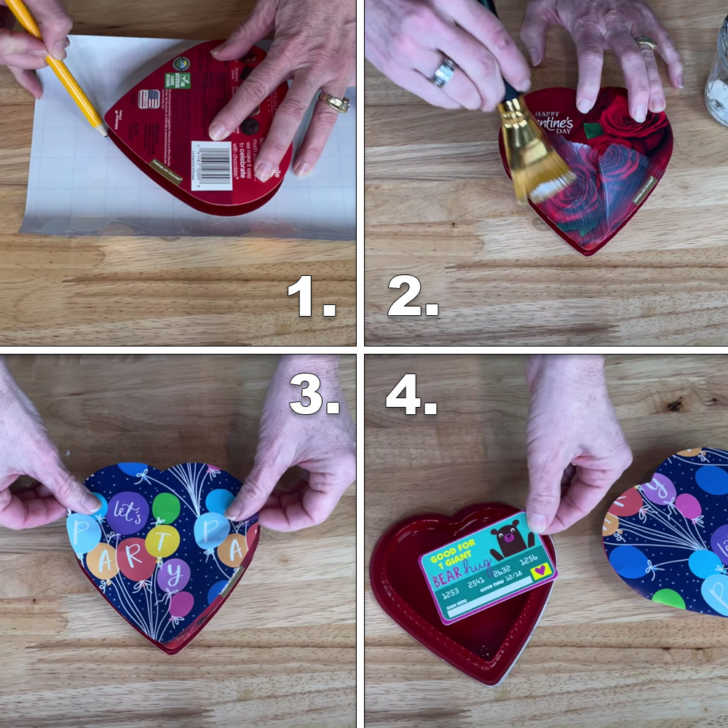
This is such a fun idea! I don’t know about you, but there are always a few people on my gift list who are impossible to shop for. I like giving actual presents, but sometimes gift cards are the safest bet. However, they aren’t nearly as fun to open as packages. That’s where this DIY comes in!
Simply trace the top and bottom of your heart-shaped box on wrapping paper (or contact paper, scrapbook paper, etc.) and cut out the shapes. Attach the pieces to the top and bottom of the box using a thin layer of Mod Podge. Then, decorate with a bow, ribbon, glitter, etc. The box is the perfect size to hold a gift card!
Nail Kit
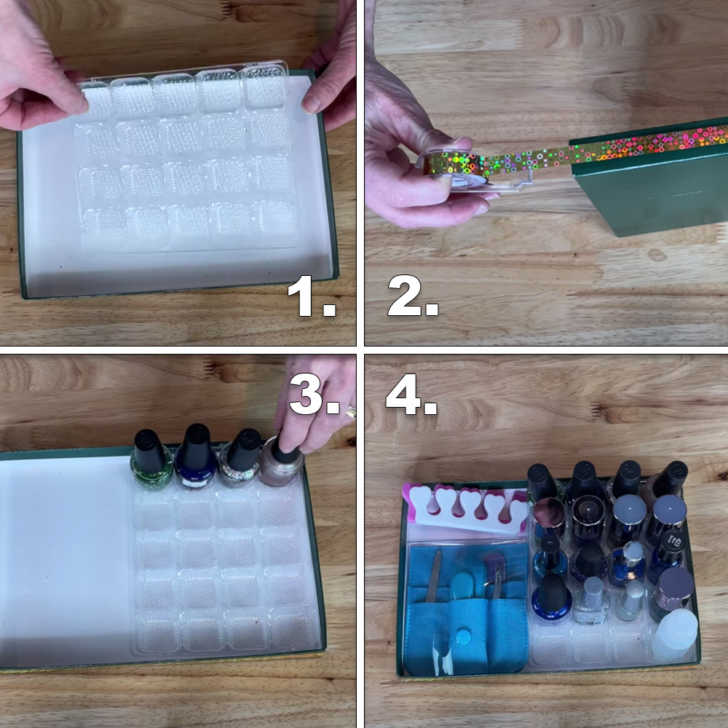
Sometimes chocolates don’t come in heart-shaped boxes – gasp! But don’t worry, we’ve got an awesome DIY for those rectangle boxes as well. Start by sprucing up the lid of the box. You can paint it, use washi tape, or cover it with scrapbook paper. Then, place the candy tray back inside and proceed to organize! I love the use of this box as a nail kit, but you can, of course, use it for anything you’d like.
Candy Dish
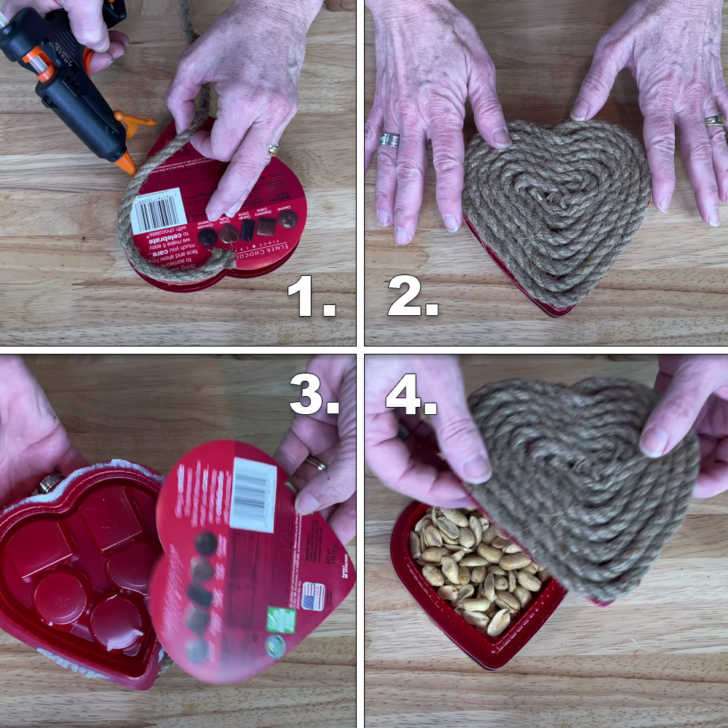
Here’s another super quick and easy DIY. For this one, grab some rope, twine, or yarn. Place a dab of hot glue on the lid and secure the end of the rope (or twine, etc.) to the lid. Wrap the rope around the outside and spiral inward, dabbing hot glue along the way as necessary.
Next, turn the bottom of the box over and peel off the cardboard back. You can flip it over and hot glue it back on if you’d like the bottom of the box to look a little cleaner, but it won’t matter much in the end. Alternatively, you can paint the bottom of the box. You can use this as a candy dish or a storage dish!