Renovations Aren’t Just For The Pros, This Couple Transformed Their Tiny Kitchen Together

My partner Lindsey and I have learned through every step of this process that remodeling is no joke, especially when you’re working on a kitchen. When we went into this renovation we wanted a custom feel without the crazy price tag, so we definitely met at a mid-point and mixed custom features with cheaper premade items. People think cooking is a labor of love, but just wait until you start rebuilding a kitchen! Looking at our rebuild you’ll see how everything doesn’t have to be expensive to get a unique vibe.
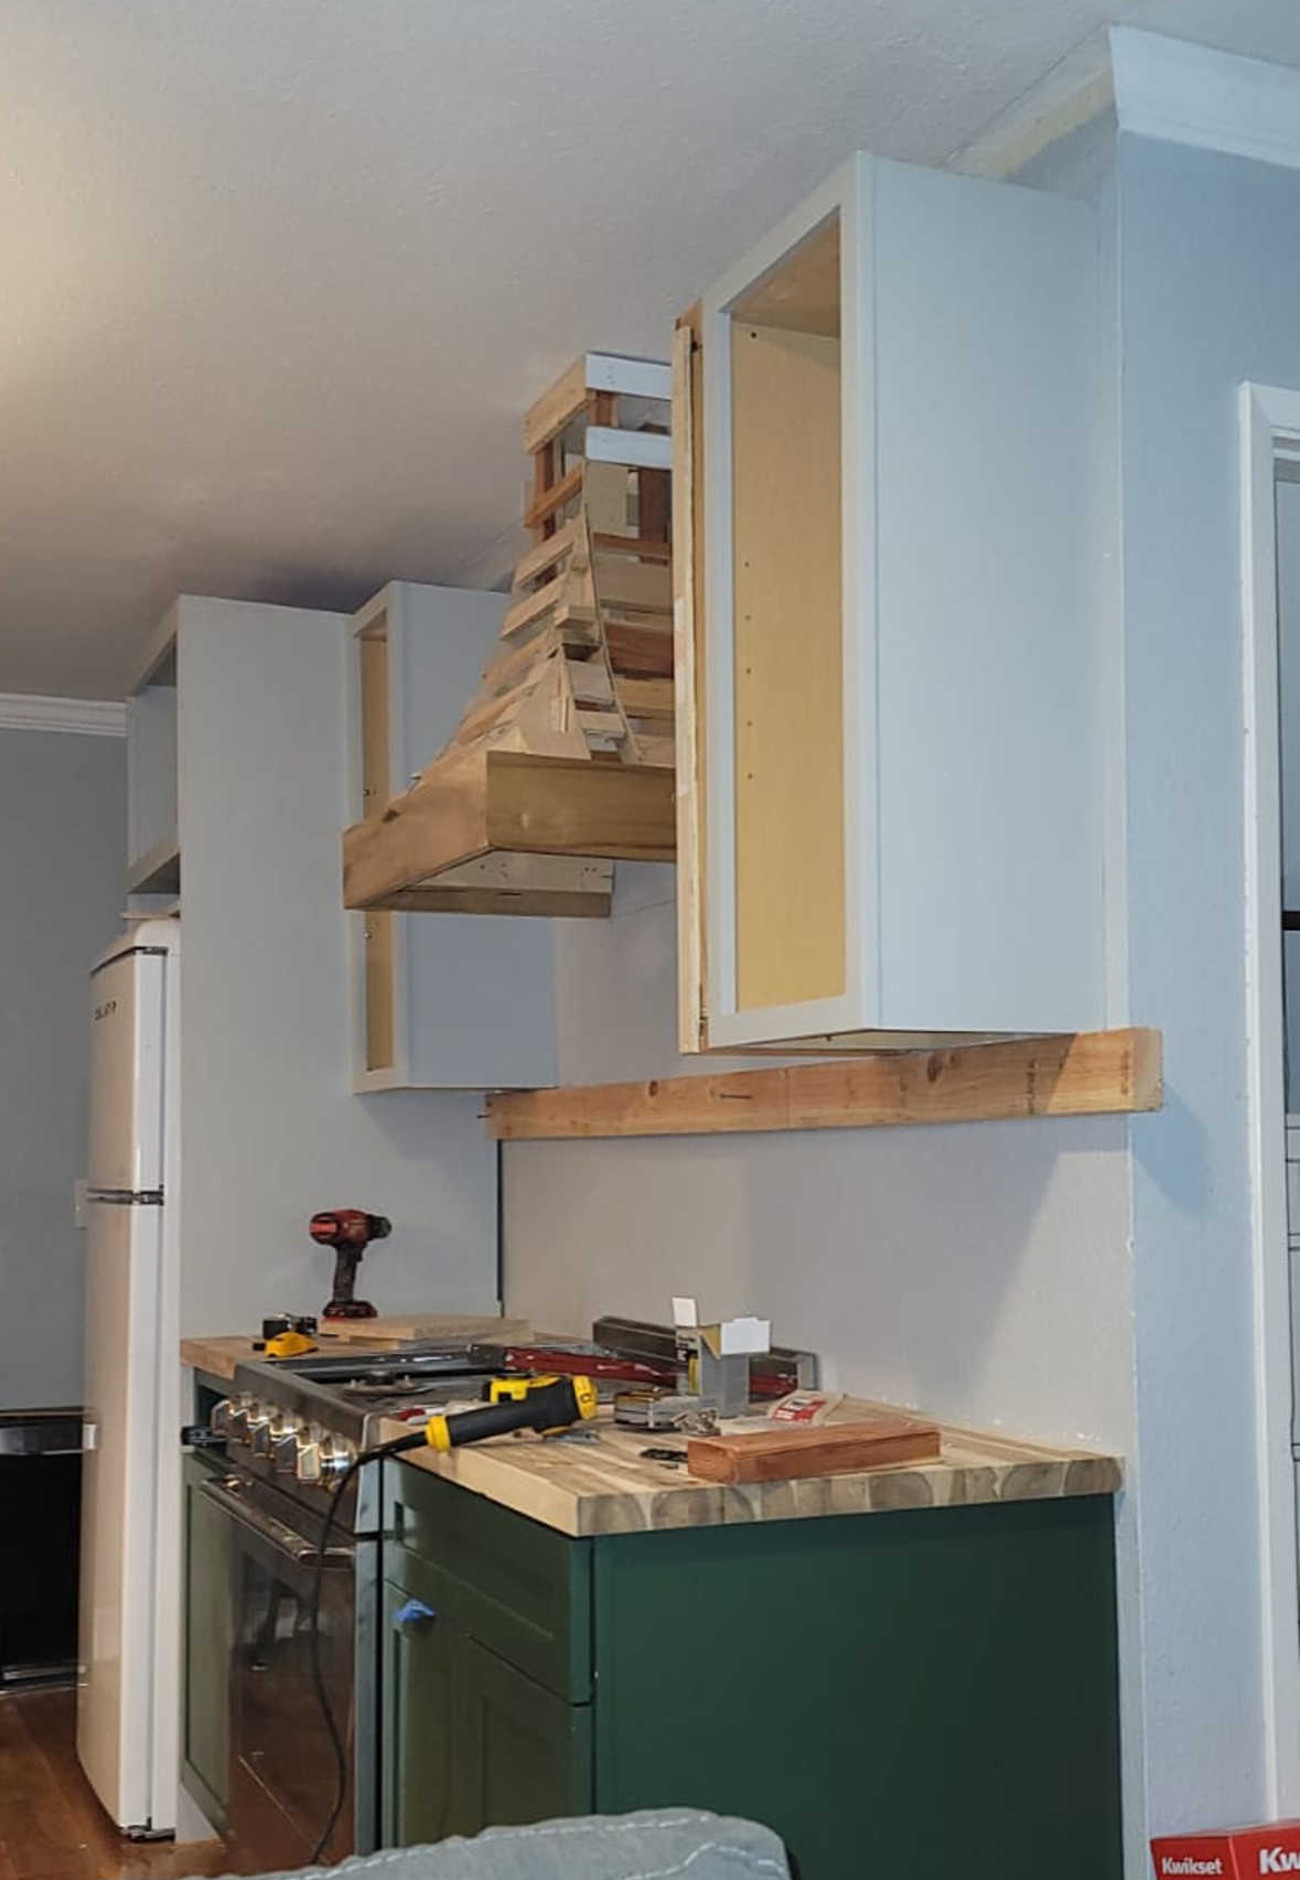
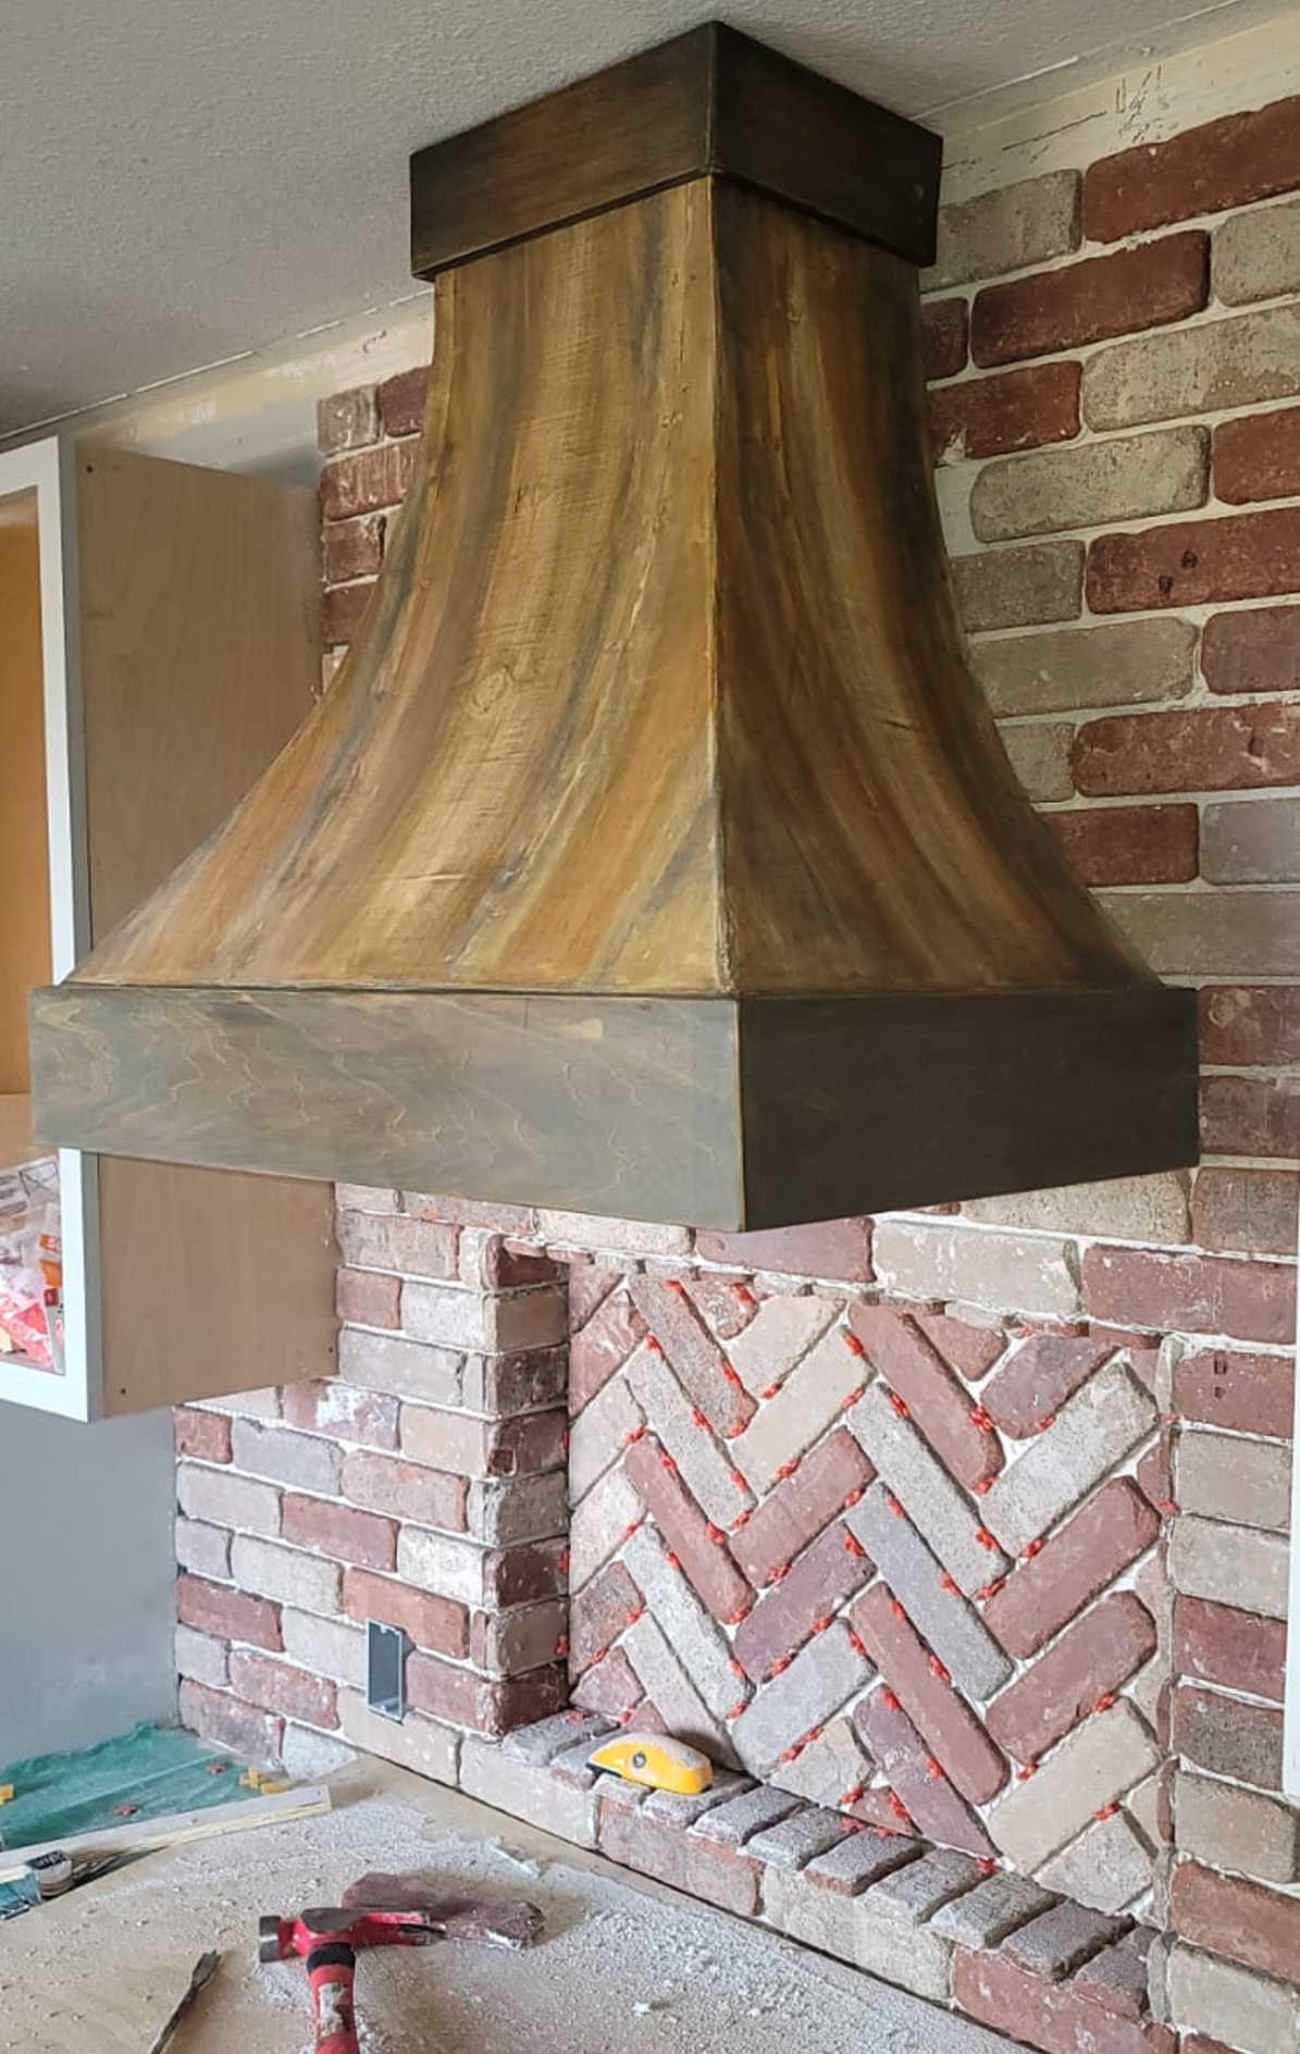
Okay, so some of the items here are custom built. Amid our kitchen overhaul, Lindsey decided to create and build a custom range hood. This process was a definite labor of love, but it seriously turned out great. The framework for the hood was a riot! Lindsey and I looked at a bunch of images online and decided we liked the French curve style hood and then we researched a little bit about how to make it.
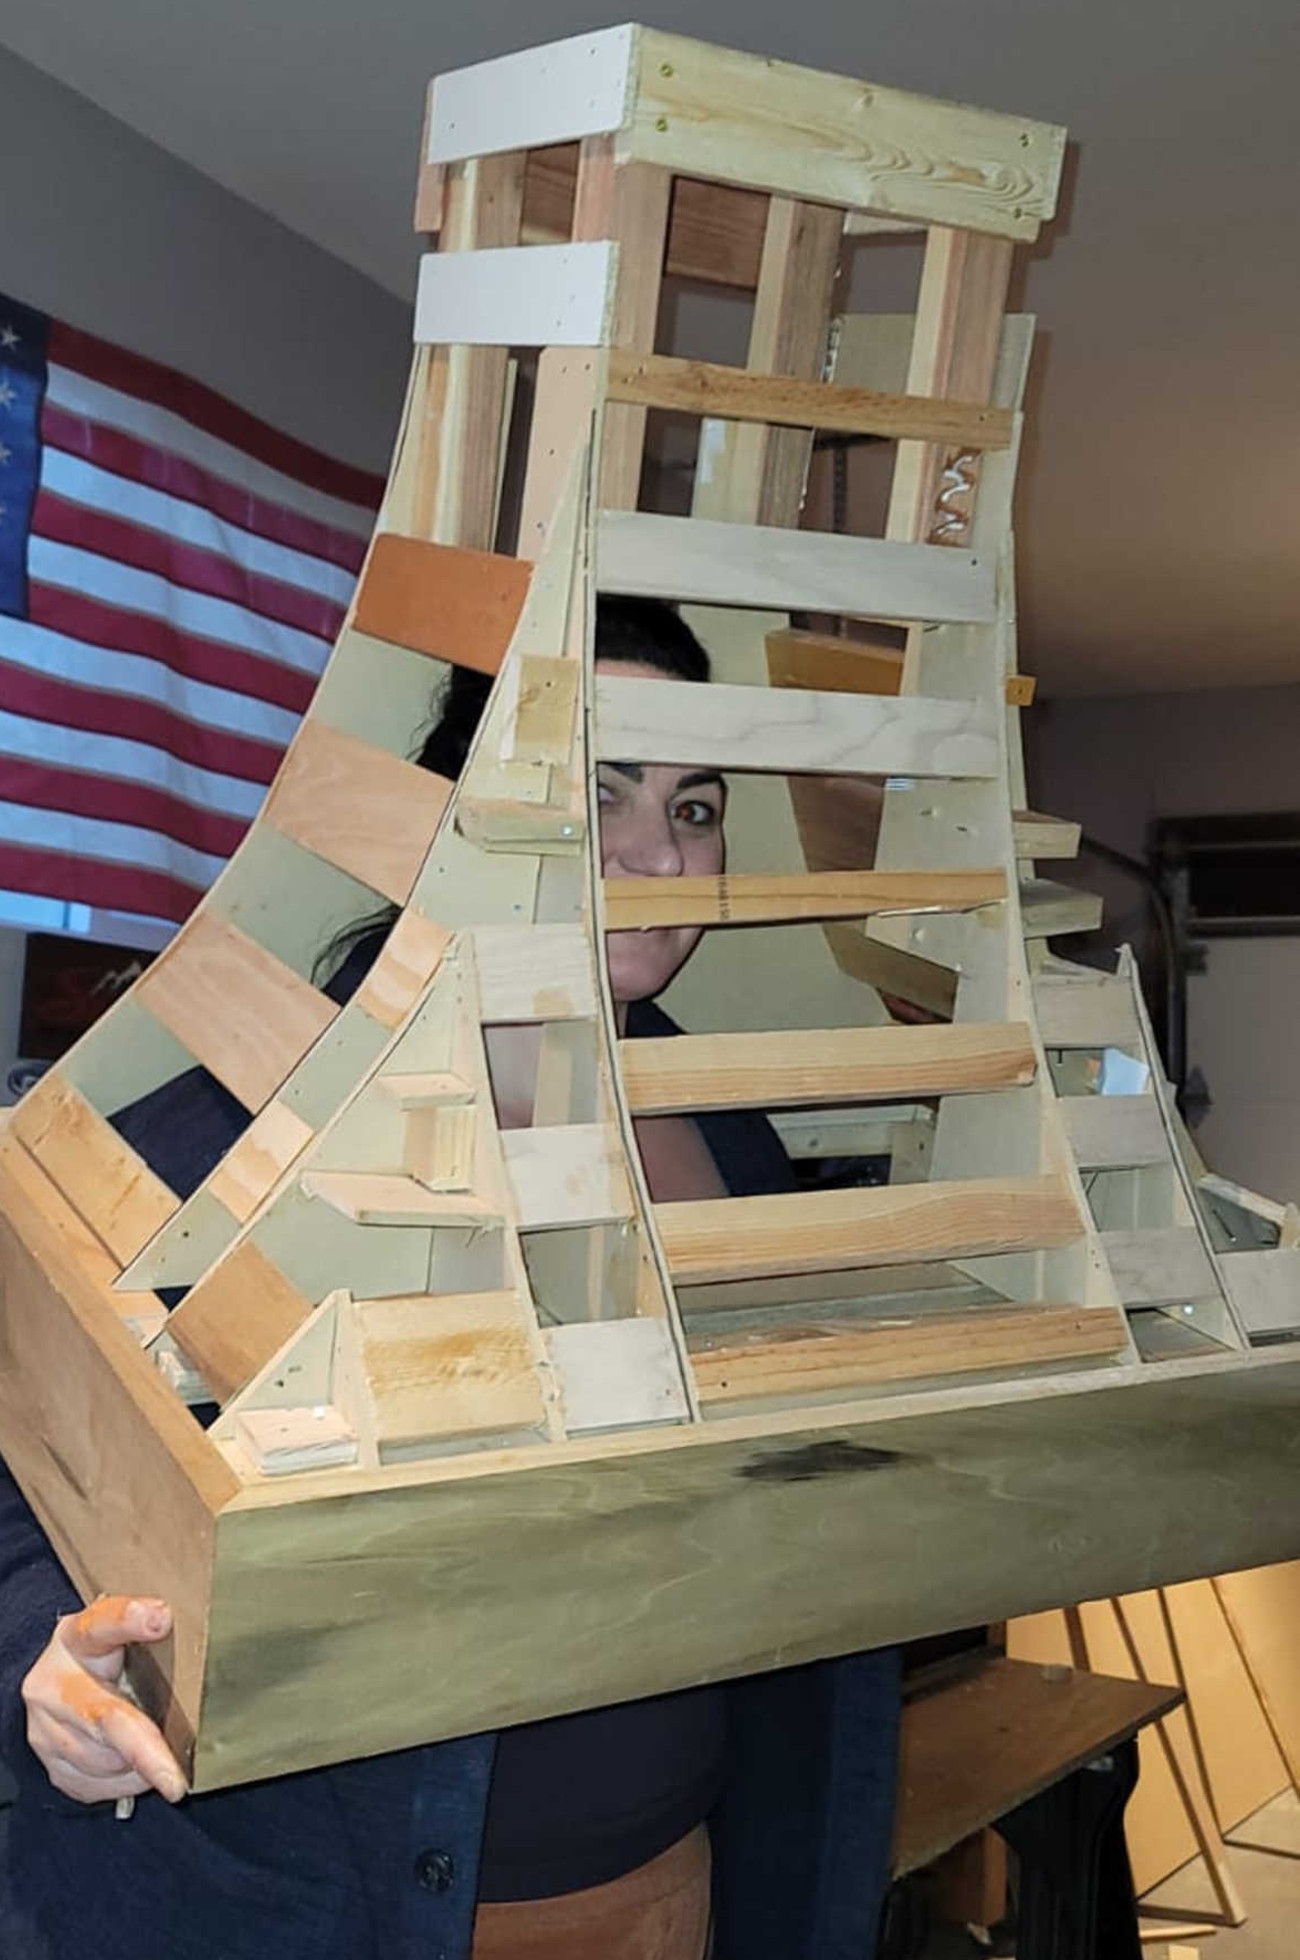
The tedious computer process began! Lindsey used illustrator to figure out the dimensions and then created a template for the curve with the program Glowforge. Then we used the jigsaw to cut a bunch of curves and just sorta started putting it together. The bones of the range are pine and the outer material is a fancier sturdier oak, again, a little overkill! You’d think we were trying to build a ship or something! As we were making the range, we joked that we might just keep the bones uncovered and hang it like an abstract art piece. I’m glad we didn’t do that.
While we went custom for some elements, we took some great budget-friendly shortcuts. For instance, buying cabinets second-hand saved us a lot of hassle with custom building. Lucky for us there’s a local warehouse called Urban Ore in Berkeley, California that had a second-hand supply of cabinets. We simply only had to sand, prime, and paint the cabinets.
For the uppers, we went searching and found some good discounted “dent and scratch” upper cabinets from Lowes. For the refrigerator, we had to build out the cabinet, but it was luckily from affordable scrap wood, but we still had to trim it all out, prime and hand paint each item.
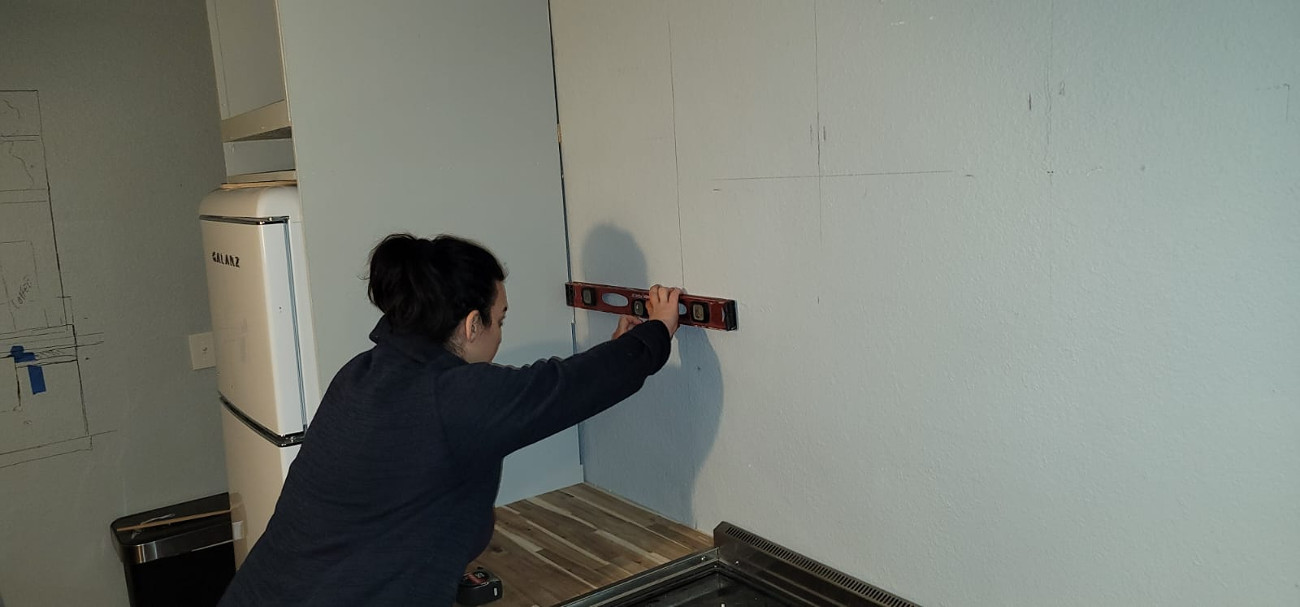
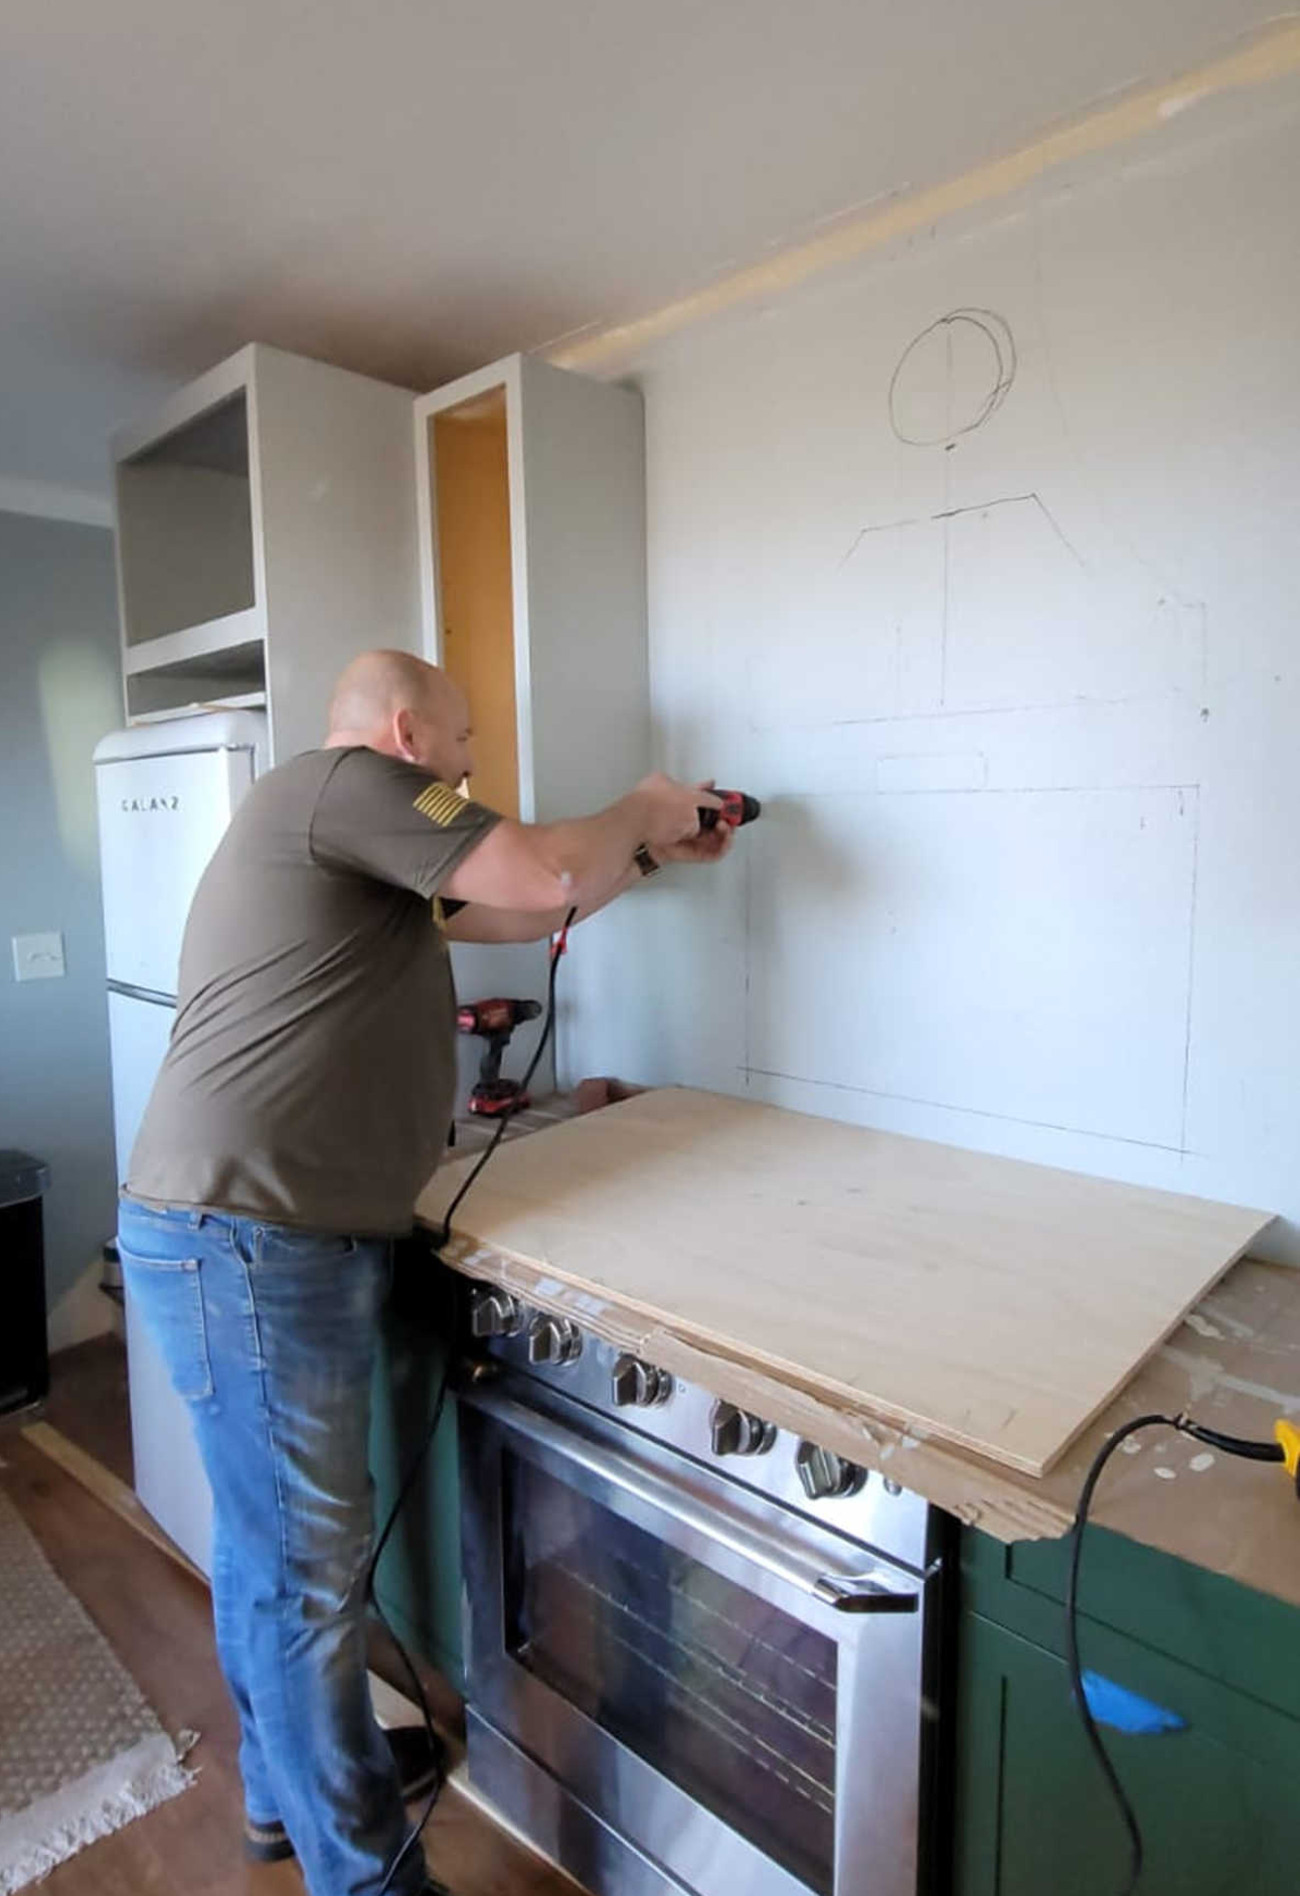
The space was tiny, but we knew we could make it work! We created more wall space for the sink cabinet by removing a preexisting 6-foot sliding glass door and replacing it with a new glass front door and 36×36 kitchen window. We were able to make it work with the existing framing of the sliding door.
Lindsey really knows the knitty gritty of this. “I had a layout planned and RTA cabinets in my cart ready to purchase when we found the cabinets at Urban Ore.” She says, “originally the cabinets flanking the range were both going to be 24-inch wide, however, two of the cabinets we found were 27-inch and 21-inch in size. The math worked, but I lost the symmetry, which I ended up really liking! We also found 12-inch and 15-inch wall cabinets, which completed the asymmetrical look… I added a 3-inch spice pull-out to even out the space on either side of the hood. I decided to put the smaller cabinets on the left side next to the fridge cabinet because I think that balances out the visual weight.”
We created a “coffee nook” complete with a pot filler because apparently, we are far too lazy to take it to the sink, which is an entire foot away. 😂 But seriously, it’s actually really convenient and one of our favorite things! The top part of the coffee nook area started with an old TV cabinet that I have been holding on to for probably 10 years always thinking I was going to do something with it someday. That day has finally come! It now houses a huge Brita dispenser, a microwave, a toaster, and a coffee maker… and the best part is we can close the doors and hide it all away.
The backsplash and surrounding area were completed with thin kiln-fired brick. Still needs grout! But as with all renovations, it’s always an action-in-progress. Though it was definitely a sort of crazy hard process you’ll see how the balance of custom and prefab pays off in big design ways!