IKEA is known for many things. Sweedish meatballs, confusing assembly instructions, and of course, the ultimate test of any relationship. Only the strongest can survive an IKEA excursion!
All that aside, IKEA also has affordable and versatile furniture and home furnishings. While the options are limited and tend to come in one or two color choices, there’s still a lot you can do with these pieces with just a little creativity and elbow grease. Let’s take a look at 8 amazing IKEA table makeovers!
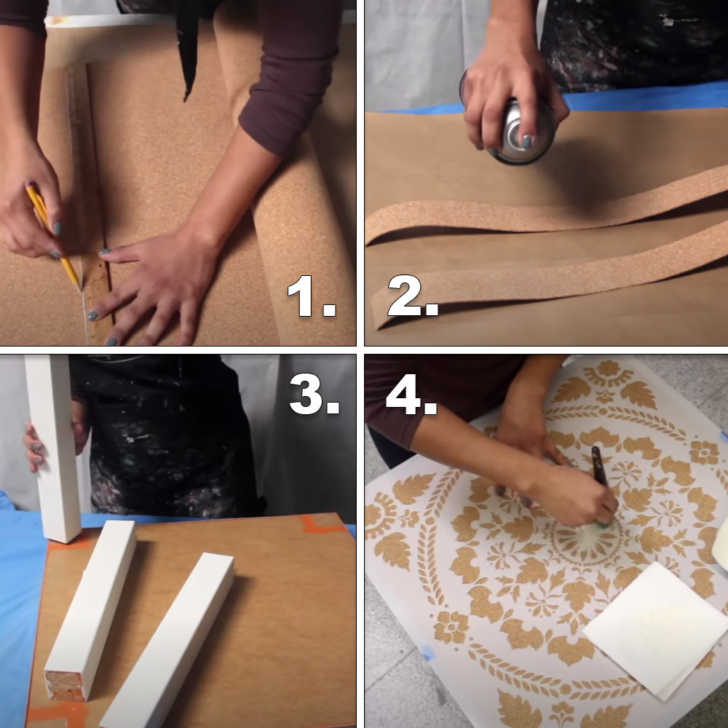
Cork & Stencil
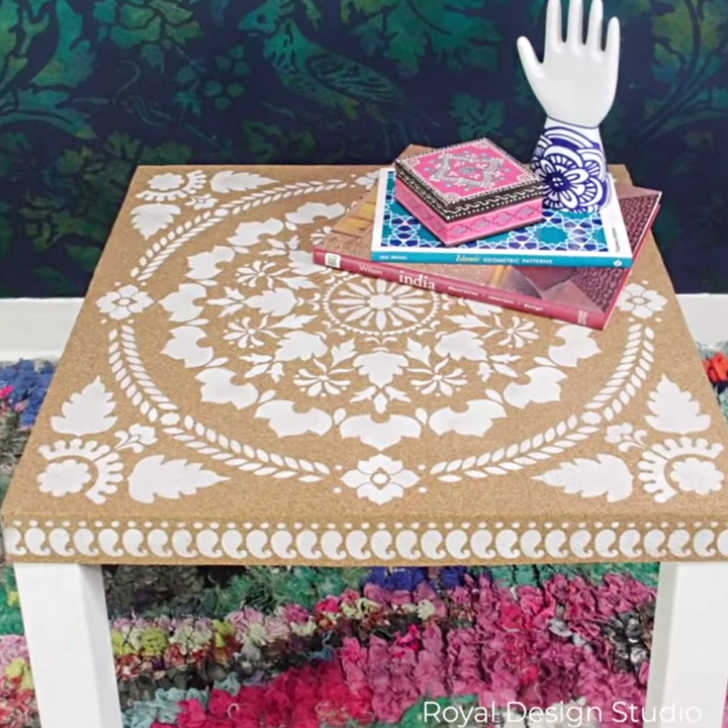
How cute is this?! I love the texture of the cork when paired with the white stencil. I also love how incredibly easy this project is. Start with your tabletop – don’t assemble anything yet. Measure and cut a roll of cork down to size. You’ll want strips for the edges of the table as well as a big piece to cover the top. Attach the cork to your tabletop with some spray adhesive.
While the adhesive is drying, you can paint the legs of your table if you so desire. All that’s left to do is find some stencils you like and get to painting! When everything is dry, assemble your cute new table and put it on display.
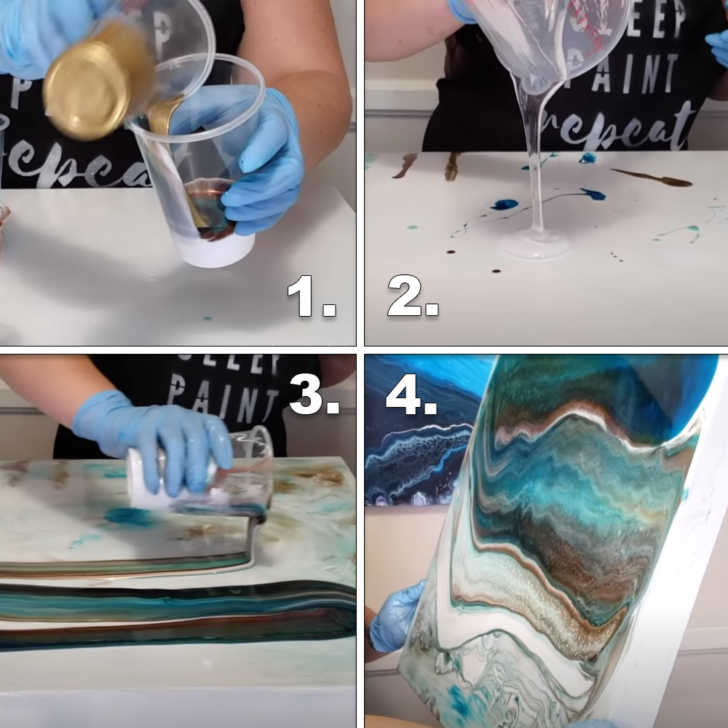
Paint Pour Marble
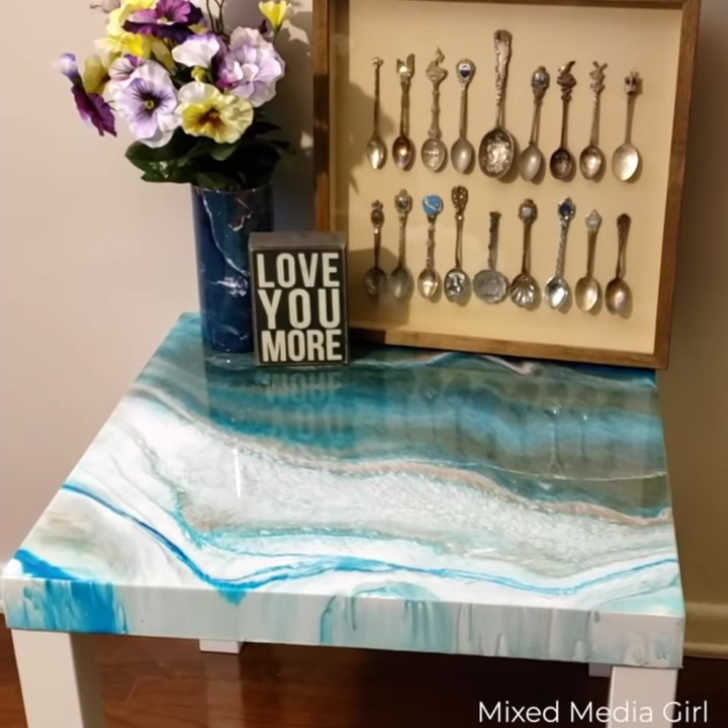
I’ll admit, this is my favorite one on the list. Just look at this gorgeous marbling effect! Would you believe it’s done by simply pouring acrylic paint over top? Well, there are a few more steps than that, but it’s a heck of a lot cheaper than real marble and it looks fantastic.
For the pour technique, you’ll want to get a large plastic cup and begin layering your paint directly inside. Don’t worry about it mixing too much. As long as you don’t stir or shake the cup, the acrylics will be fine. Start by pouring a layer of epoxy resin on the tabletop. Without letting it dry, go ahead and pour the paint over top, making lines like in the photo down below. Then, begin tilting the flat tabletop until the paint covers the whole thing.
You’ll finish off this project with another layer of epoxy resin. Make sure there are no bubbles in this layer! You can take a straw and blow right over the surface to get rid of bubbles or use a heat gun to smooth everything out. I think you’ll agree, the end result is totally worth it!
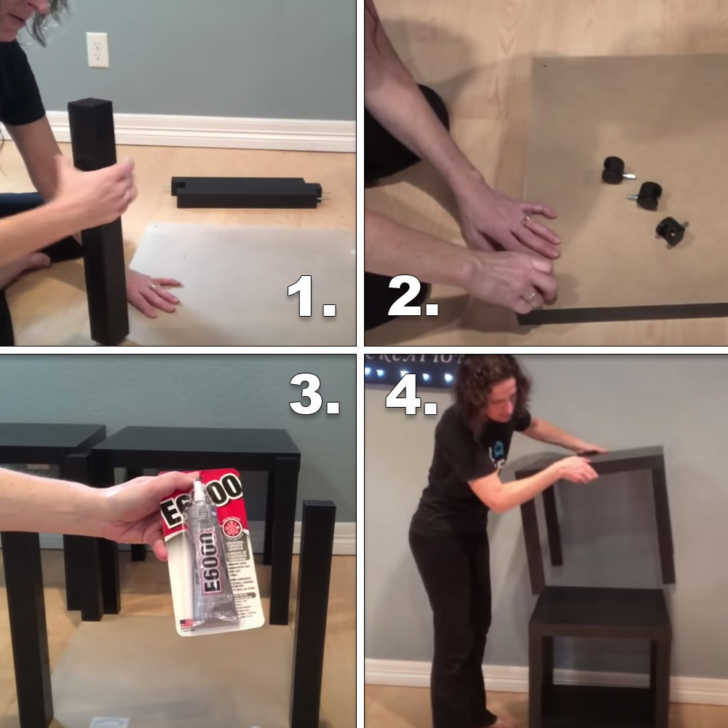
Kitchen Island
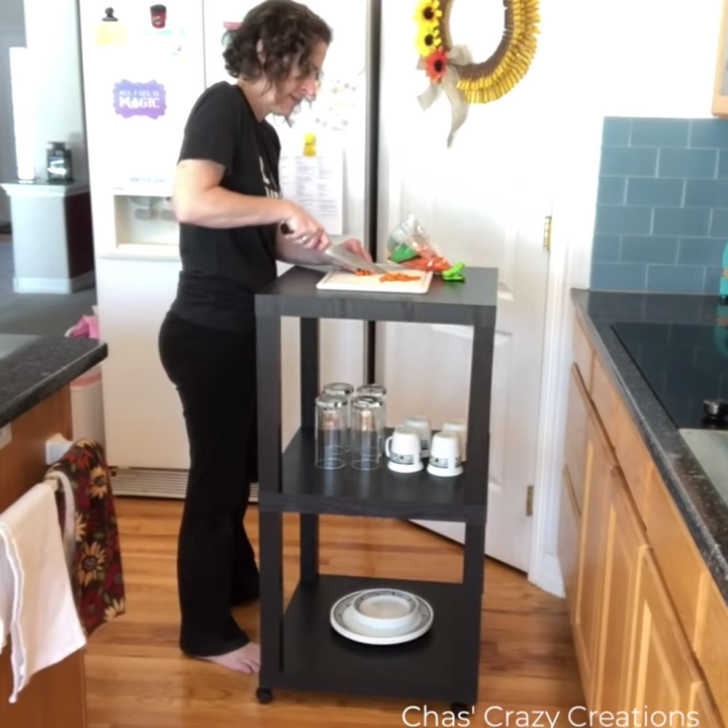
How’s this for a practical idea? I’m always in need of a little extra storage. Add additional counter space and a set of wheels, and this kitchen island is a dream come true! For this project, you’ll need three tables. Begin by assembling two tables like normal, and one table with wheels instead of the legs it comes with.
From there, stack the tables and attach them with E6000 or another industrial strength glue. When it’s dry, you’ll have a nifty little kitchen island that can easily be stored away when not in use.
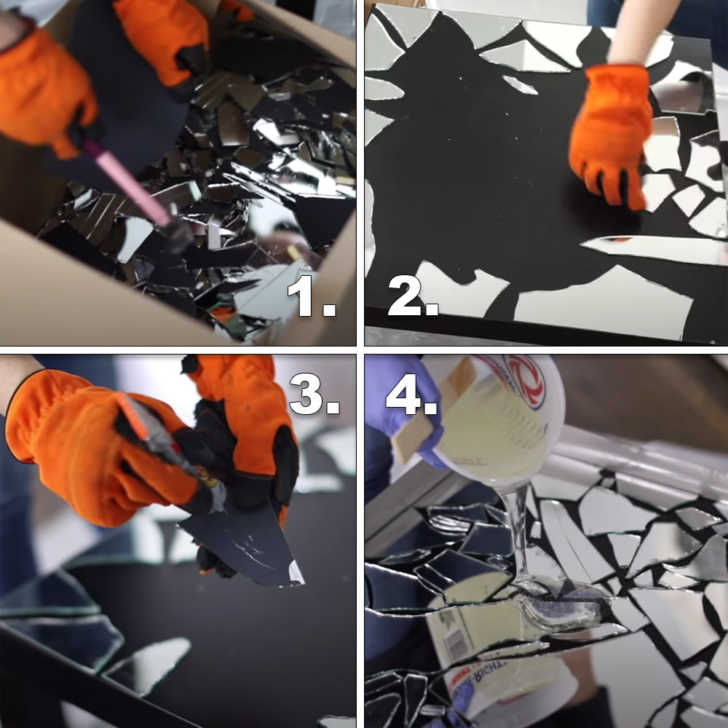
Mirror Mosaic
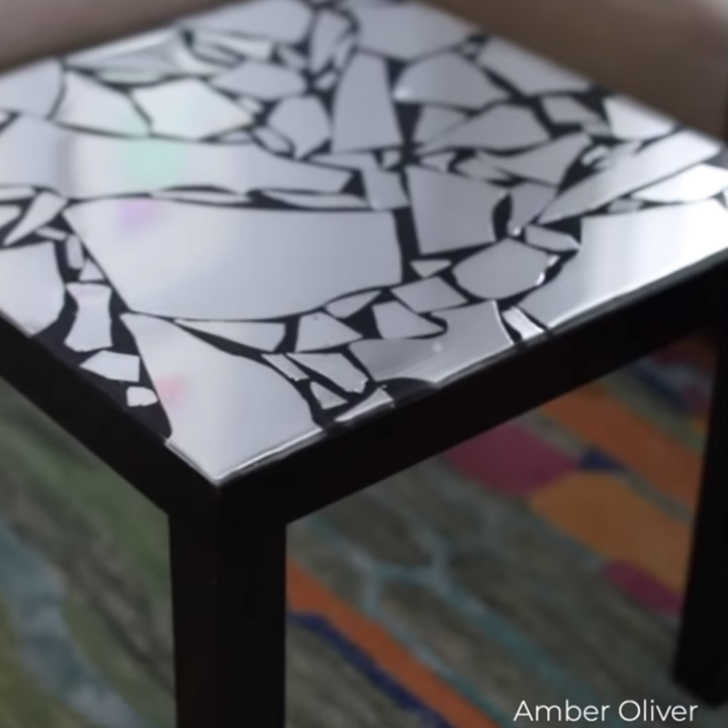
Here’s another gorgeous table, don’t you think? I love this idea! If the mirrored look isn’t your thing, you can always follow these same steps but with broken plates or glass stones or really, anything you think would look good! For the purposes of this example, let’s stick with the mirror.
You’ll start by preparing your space. Spread out a sheet that can be thrown away, and place an empty box on top. Set your mirror in the box and get to smashing that glass! Of course, you’ll want to wear protective eye gear and have some hefty work gloves for this step. Safety first! When you’re all done, take the box full of mirror scraps to your workspace and then roll up the sheet that caught the glass shards and throw it away.
Now that we’re done with that part, the rest is easy. Arrange your pieces in a rough outline of where you want them to go, then glue them on with E6000 glue. Once you’ve sufficiently covered the top, line the edges of the table with duct tape, making sure there’s a significant lip around the top. Then, pour some epoxy resin to seal everything up. Spread it out to all edges and corners of the table. The duct tape will keep it from spilling over. After it dries, you have a gorgeous table!