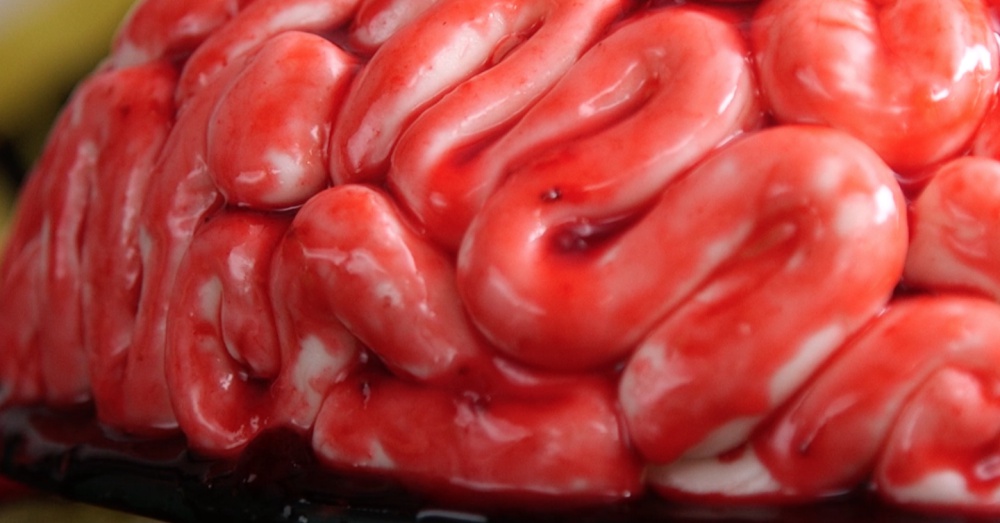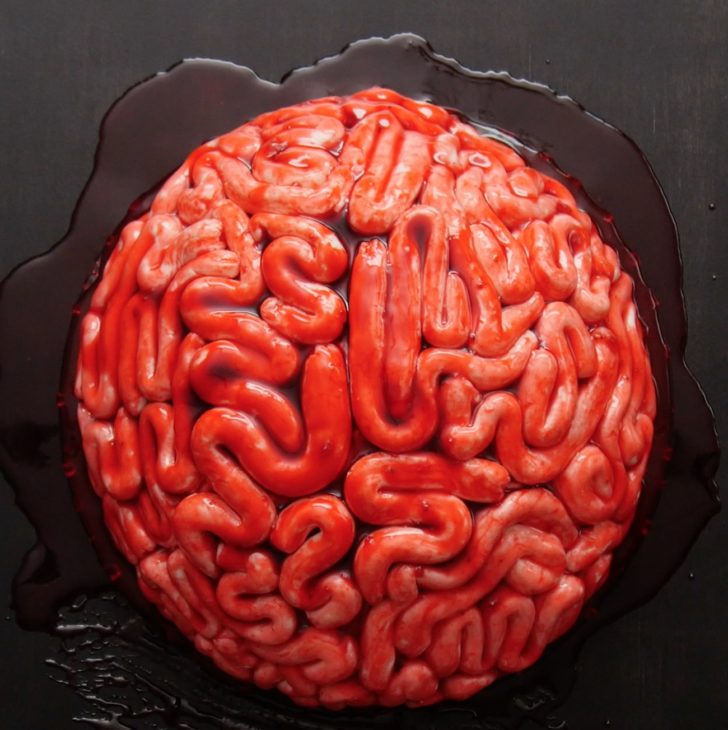
If you need something special for a spectacularly spooky occasion – or if you happen to be feeding a horde of hungry zombies – this beautiful and bloody brain cake is just the ticket. While it looks pretty convincing, it really tastes of strawberry and chocolate, so your guests will enjoy eating it as much as they like looking at it!
It may look daunting to put together, but we promise it’s not that hard at all. Just watch the video below for step by step instructions.
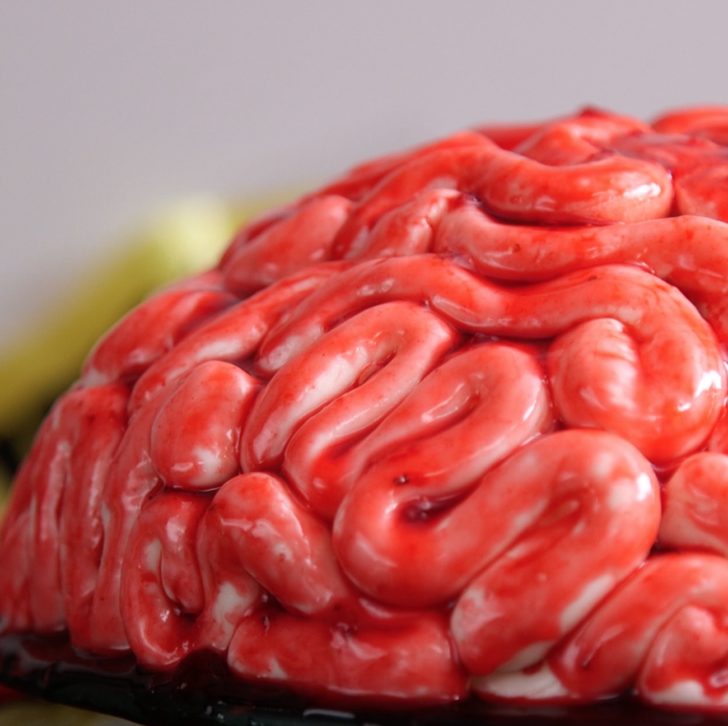
The base of the cake is a red velvet cake made from a box mix, and the brain effect is created with marshmallow fondant. You can find fondant at specialty cooking stores and sometimes in your regular grocery store, but you can also make your own. (It’s actually pretty easy.) Instructions on how to do so are at the bottom of the printable recipe. A sweet strawberry glaze gives the brain its perfect red hue and lends a lovely flavor to this creepy cake. Happy Halloween!
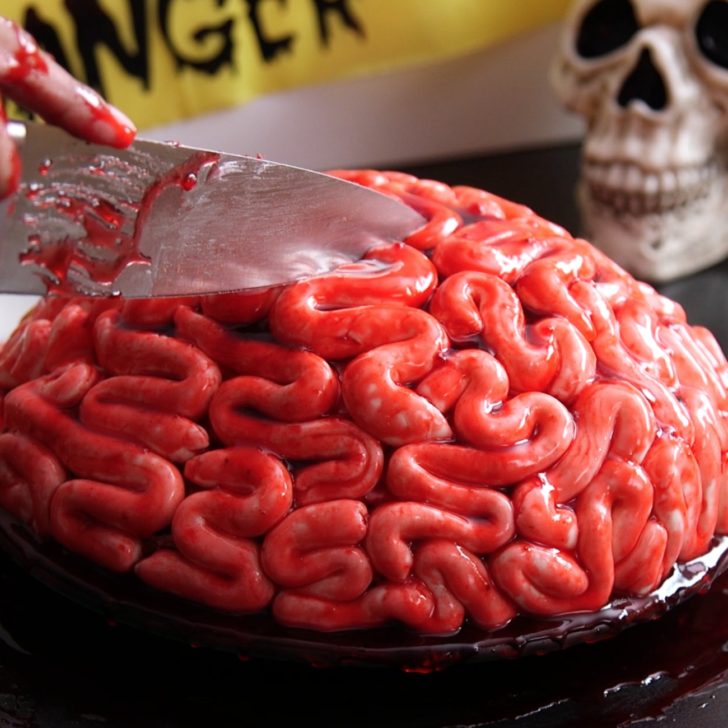
Brain Cake
Yield(s): Serves 8-10
1 hour
Ingredients
- 1 box red velvet cake mix, plus ingredients required on the box
- 1 container buttercream frosting
- 1 package marshmallow fondant (or see homemade recipe below)
- Ivory gel food coloring, as needed
- For the homemade marshmallow fondant:
- 16 ounces white mini marshmallows
- 2-5 tablespoons water
- 8 cups powdered sugar, sifted
- 1/2 cup solid vegetable shortening
- For the red “blood”:
- 1-2 teaspoons red gel food coloring
- 1/8 teaspoon black gel food coloring
- 1/4 cup honey
- 1/2-1 teaspoon water
- 1/4 cup strawberry jam
Preparation
- Preheat the oven to the temperature indicated on cake mix box and grease a circular or dome-shaped cake pan with nonstick spray.
- Prepare your cake batter according to the instructions on the box. Pour batter into prepared cake pan, and bake according to box instructions.
- Once done, remove cake pan from oven and allow cake to cool in pan 10 minutes before removing to a wire rack to cool completely. If your cake doesn't look like an oval dome, use a knife to trim cake into the right shape.
- Cover cake evenly with a thin layer of buttercream frosting and chill 30 minutes to 1 hour to set the frosting.
- Meanwhile, mix the fondant with the ivory food coloring to get an off white color. (Instructions to make your own fondant are below.) Remove a small portion of the fondant and roll into long "worms." Squiggle the fondant all over the cake, making sure to maintain a dividing line down the center of the "brain." Continue until the entire cake is covered, then set cake bake in fridge to chill until the "blood" is ready.
- To make the blood:
- In a small bowl, mix together red gel food coloring, black gel food coloring, honey, water, and strawberry jam. Adjust the amounts until the desired consistency is achieved.
- Using a pastry brush, brush "blood" over the cake. To create more shine, use more honey or red food coloring. Slice and serve. Enjoy!
- To make homemade fondant:
- If using homemade fondant, prepare the night before. Microwave marshmallows and 2 tablespoons of water in 30 seconds intervals until melted, stirring in between. (About 2 1/2 minutes total.)
- Fold 3/4 of the powdered sugar into the marshmallow mixture and place the shortening in a separate bowl for greasing your hands. Grease hands and work surface generously.
- Turn dough onto prepared surface and knead, adding additional sugar and regreasing hands to prevent sticking. Add additional water to the mixture, 1/2 tablespoon at a time if the fondant is tearing easily. Continue kneading until fondant forms a smooth, firm ball that will stretch without tearing.
- Allow fondant to sit, double-wrapped, overnight. Coat fondant with a thin layer of shortening, wrap in plastic wrap and place in a ziploc bag. When ready to use, knead until smooth.
